We may earn money or products from the companies mentioned in this post.
To clean a Whirley Pop, hand wash it with warm, soapy water and dry thoroughly. Avoid using a dishwasher.
Cleaning your Whirley Pop regularly ensures it functions efficiently and lasts longer. Hand washing is crucial to maintain the quality and performance of this popcorn maker. Warm, soapy water effectively removes grease and residue without damaging the pot’s surface. Using a soft sponge or cloth prevents scratches and keeps the Whirley Pop in good condition.
Always dry it thoroughly after washing to avoid rust and prolong its lifespan. This simple routine helps you enjoy perfect, homemade popcorn every time. Proper maintenance not only preserves the Whirley Pop but also enhances your popcorn-making experience. Regular care keeps it looking new and performing well for years.
An Introduction to the Whirley Pop Popcorn Popper
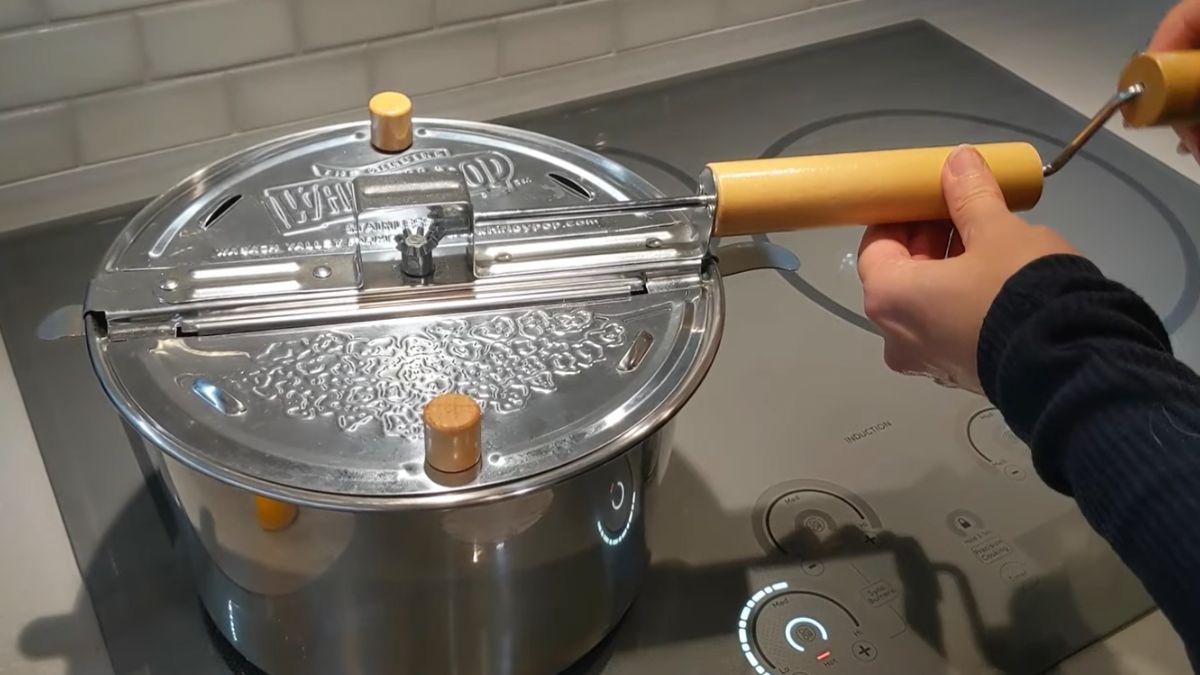
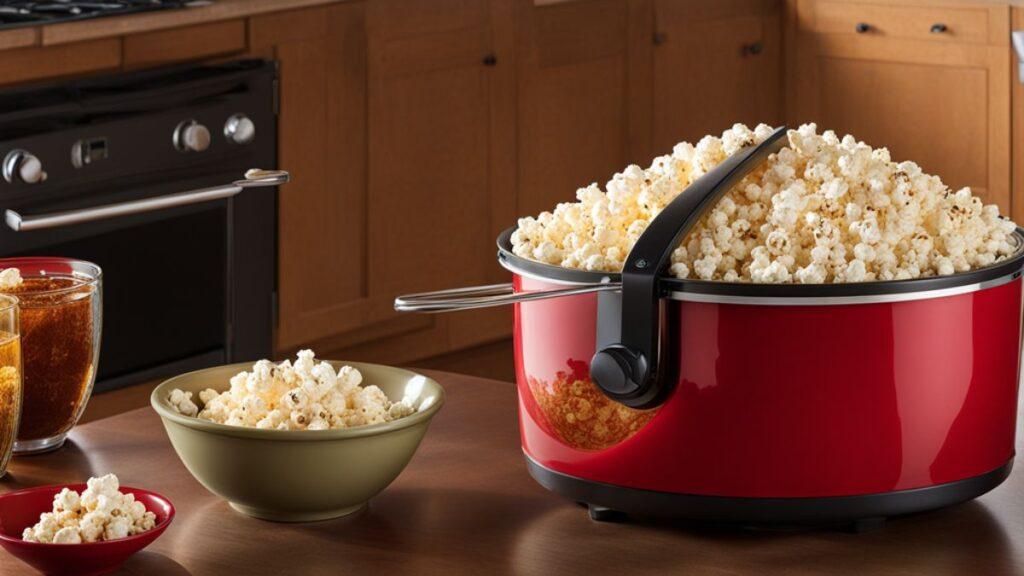
Whirley Pop is a stovetop popcorn popper that makes popcorn the old-fashioned way. If you’re looking for an easy, mess-free way to make popcorn at home, a Whirley Pop is a great option. This aluminum popper uses hot oil and kernels to pop fresh, homemade popcorn right on your stovetop.
To get started, add about 1-3 tablespoons of high-oleic safflower or coconut oil to the popper along with 1/3 cup of popcorn kernels. Place the popper over medium-high heat, put the lid on, and start cranking the handle. The handle will spin the kernels and oil, keeping everything in motion so the popcorn pops evenly.
In just 3 to 5 minutes, you’ll hear the popcorn start to pop. Once the popping slows down, remove from heat and keep cranking for another 30 seconds. Then remove the lid, season the popcorn with salt to taste, and enjoy your freshly popped popcorn! The Whirley Pop yields light and fluffy popcorn that’s perfectly salted.
To clean your Whirley Pop after use, remove any unpopped kernels and wipe out excess oil with paper towels. Then wash the popper with hot, soapy water. For stuck-on residue, fill the popper with water and dish soap and let it soak before scrubbing it clean. Rinse and dry completely to prevent rusting. Apply a thin coat of oil to the inside of the popper after cleaning to prevent sticking and keep it seasoned. With proper care and cleaning, a Whirley Pop can last for many movie nights and family game nights to come.
The Whirley Pop popcorn popper is a fun, retro way to make homemade popcorn for family and friends. Follow our tips for how to clean and season your Whirley Pop, and you’ll be enjoying light and fluffy popcorn in no time. Happy popping!
Read More: Whirley Pop Cleaning Instructions: Spotless in Minutes!
Essential Tools
Cleaning your Whirley Pop popcorn maker can be a breeze with the right tools. Having the essential tools on hand ensures that your Whirley Pop stays in top condition, ready for your next movie night. Let’s dive into the must-have supplies and safety gear needed for a thorough cleaning.
Cleaning Supplies
To clean your Whirley Pop effectively, you’ll need a few specific supplies. These items will help you remove grease and grime without damaging the popcorn maker.
- Dish Soap: A mild dish soap works best for breaking down oils and food residue.
- Soft Sponge or Cloth: Use a non-abrasive sponge or cloth to avoid scratching the surface.
- Warm Water: Warm water helps dissolve grease and makes cleaning easier.
- Baking Soda: For tougher stains, baking soda acts as a gentle abrasive.
- White Vinegar: Use vinegar to remove lingering odors and disinfect.
Here’s a quick step-by-step guide to using these supplies:
- Disassemble the Whirley Pop by removing the lid and handle.
- Rinse each part with warm water to remove loose debris.
- Apply dish soap to a sponge and gently scrub the interior and exterior.
- For stubborn stains, sprinkle baking soda on the sponge before scrubbing.
- Rinse thoroughly with warm water to remove soap residue.
- Wipe down with a cloth soaked in white vinegar for added cleanliness.
- Dry all parts completely before reassembling.
Safety Gear
Safety is crucial when cleaning your Whirley Pop, especially when dealing with hot water and cleaning solutions. Equip yourself with the following safety gear to ensure a safe cleaning process.
- Rubber Gloves: Protect your hands from hot water and cleaning chemicals.
- Apron: An apron keeps your clothes dry and free from soap splashes.
- Goggles: Wear goggles to protect your eyes from splashes, especially if using vinegar.
Consider these additional safety tips:
- Always let the Whirley Pop cool down before cleaning to avoid burns.
- Handle each part gently to prevent bending or breaking.
- Work in a well-ventilated area to avoid inhaling fumes from cleaning agents.
Having the right safety gear ensures you can clean your Whirley Pop efficiently and safely. This way, your popcorn maker remains in excellent condition, ready to make delicious popcorn for years to come.
Preparing The Popper
Cleaning your Whirley Pop is essential for keeping your popcorn tasting fresh and delicious. Proper maintenance of your popcorn maker ensures it lasts longer and performs better. Before diving into the cleaning process, it’s crucial to prepare the popper. This involves disassembling parts and removing any leftover residue. Let’s walk through these steps to make your Whirley Pop sparkle like new.
Disassembling Parts
To start cleaning your Whirley Pop, you must first disassemble its parts. This step is vital to ensure every nook and cranny gets cleaned. Follow these simple steps to disassemble your popper:
- Remove the lid: Carefully take off the lid and set it aside. Most lids are attached with hinges or clips.
- Detach the stirring mechanism: Unscrew or unclamp the stirring rod from the inside of the pot. This part often collects a lot of grease and residue.
- Take out the handles: If your Whirley Pop has removable handles, detach them as well. This makes it easier to clean the pot thoroughly.
Once disassembled, you’ll have the following parts ready for cleaning:
| Part | Details |
|---|---|
| Lid | Usually made of metal or plastic, with hinges or clips. |
| Stirring Mechanism | Includes the rod and paddles, often greasy. |
| Handles | May be made of wood or plastic, sometimes removable. |
With all parts disassembled, you’re now ready to move on to the next step: removing residue.
Removing Residue
Removing residue from your Whirley Pop ensures it remains hygienic and functions well. Follow these steps to get rid of any leftover popcorn bits, oil, and grease:
- Soak the parts: Fill your sink with warm, soapy water. Submerge the disassembled parts and let them soak for about 15 minutes. This helps loosen any stuck-on residue.
- Scrub gently: Use a soft sponge or cloth to scrub each part. Pay extra attention to the stirring mechanism and the pot’s interior, as these areas often have the most buildup.
- Rinse thoroughly: Rinse all parts under running water to remove soap and loosened residue. Make sure no soap is left, as it can affect the taste of your popcorn.
- Dry completely: Use a clean towel to dry each part thoroughly. Ensure no moisture is left, especially on metal parts, to prevent rust.
For stubborn residue that doesn’t come off easily, consider using a mixture of baking soda and water. Apply the paste to the residue, let it sit for a few minutes, and then scrub gently. Baking soda is a natural cleaner that helps break down tough grease and grime.
After removing all residue and drying the parts, your Whirley Pop is ready for reassembly and future popcorn adventures. Proper cleaning keeps your popper in excellent condition and ensures every batch of popcorn is as tasty as the first.
Cleaning The Pot
Cleaning your Whirley Pop ensures it remains in top condition for making delicious popcorn. The pot can accumulate grease and residue after several uses. Let’s explore effective methods to clean the pot and keep it sparkling.
Using Soap And Water
Soap and water are the most basic and effective tools for cleaning your Whirley Pop. Follow these simple steps:
- Disassemble: Remove the lid and separate all parts for thorough cleaning.
- Warm Water: Fill the sink with warm water. Warm water helps to dissolve the grease and residue.
- Dish Soap: Add a few drops of mild dish soap to the water. Soap breaks down oils and makes cleaning easier.
- Soak: Place the pot and lid in the soapy water. Let them soak for about 10-15 minutes to loosen any stuck-on food.
- Scrub: Use a non-abrasive sponge or cloth to scrub the inside and outside of the pot. Pay attention to the corners and crevices.
- Rinse: Rinse all parts thoroughly with clean water. Ensure no soap residue remains.
- Dry: Wipe the pot and lid with a clean, dry towel. Let them air-dry completely before reassembling.
These steps ensure your Whirley Pop stays clean and ready for the next batch of popcorn. Regular cleaning prevents build-up and extends the life of your pot.
Dealing With Stains
Stains can be stubborn but don’t worry. Here are some tips to tackle them:
- Baking Soda Paste: Create a paste with baking soda and water. Apply it to the stained areas and let it sit for 10 minutes.
- Scrub: Use a soft brush or sponge to scrub the paste gently. Baking soda acts as a mild abrasive, lifting the stains without scratching the surface.
- Vinegar Rinse: Rinse the pot with a mixture of water and vinegar. Vinegar helps to neutralize any remaining baking soda and removes odors.
- Boil Method: For tough stains, fill the pot with water and add a few tablespoons of vinegar. Bring the water to a boil and let it simmer for 10 minutes. The heat and vinegar work together to loosen the stains.
- Final Scrub: After boiling, let the pot cool slightly. Scrub again with a non-abrasive sponge to remove any remaining stains.
- Rinse and Dry: Rinse thoroughly with clean water and dry completely.
These methods help keep your Whirley Pop free from stubborn stains. Regular maintenance makes cleaning easier and keeps your pot looking new.
Cleaning The Lid
The Whirley Pop is a beloved tool for making delicious popcorn at home. To keep it in top shape, regular cleaning is essential. One of the most critical parts to clean is the lid. The lid of the Whirley Pop can accumulate grease and popcorn residue over time, affecting the taste and quality of your popcorn. This guide will help you clean the lid effectively using simple methods.
Wipe Down Method
For a quick clean, the Wipe Down Method is the best option. This method is simple and effective for daily maintenance.
- First, make sure the Whirley Pop is cool to the touch.
- Use a damp cloth or sponge to wipe down the lid.
- Focus on removing any grease or popcorn residue.
- For stubborn spots, use a bit of mild dish soap on the cloth.
- Rinse the cloth and wipe the lid again to remove any soap residue.
- Dry the lid with a clean towel to prevent water spots.
This method helps maintain the lid’s cleanliness with minimal effort. It’s perfect for daily upkeep and ensures your popcorn always tastes fresh.
Deep Cleaning Techniques
For a thorough clean, use Deep Cleaning Techniques. These methods are ideal for periodic maintenance.
- Remove the lid and disassemble any removable parts.
- Fill a sink with warm water and add a few drops of mild dish soap.
- Soak the lid and parts in the soapy water for 10-15 minutes.
- Use a soft brush or sponge to scrub away any stuck-on residue.
- Rinse each piece thoroughly under running water to remove soap.
- Dry each part completely with a clean towel.
- Reassemble the lid and make sure it is dry before storing it.
These deep cleaning steps ensure your Whirley Pop lid stays in top condition. Regular deep cleaning prevents buildup and keeps your popcorn tasting great.
Maintaining The Crank
Cleaning your Whirley Pop is essential for making great popcorn. Maintaining the crank is a key part of this. The crank helps stir the popcorn kernels, ensuring even cooking. Keeping the crank in good condition ensures your Whirley Pop works well for a long time.
Lubrication Tips
The crank needs proper lubrication to work smoothly. Without it, the crank may become stiff or noisy. Here are some tips for lubricating the crank:
- Use Food-Grade Oil: Choose an oil safe for cooking tools. Olive oil or vegetable oil works well.
- Apply Sparingly: A little oil goes a long way. Too much oil can attract dirt and grime.
- Focus on Moving Parts: Apply oil to the gears and joints of the crank.
- Wipe Excess Oil: After applying oil, wipe off any excess with a clean cloth.
Follow these steps to lubricate the crank:
- Remove the lid and crank from the Whirley Pop.
- Apply a small amount of food-grade oil to the gears and joints.
- Turn the crank to spread the oil evenly.
- Wipe off any excess oil with a clean cloth.
- Reassemble the Whirley Pop and test the crank for smooth operation.
Avoiding Rust
Rust can damage the crank and make it hard to use. Keeping rust away ensures your Whirley Pop stays in top condition. Here are some ways to avoid rust:
- Dry Thoroughly: After washing, dry the crank completely. Use a clean towel to remove any water.
- Store in a Dry Place: Keep your Whirley Pop in a dry area. Avoid damp or humid places.
- Use a Rust Inhibitor: Apply a light coat of oil to the crank. This helps prevent rust from forming.
- Regular Checks: Regularly inspect the crank for signs of rust. Address any issues immediately.
Follow these steps to keep rust away:
- After washing, dry the crank with a clean towel.
- Store the Whirley Pop in a dry cabinet or pantry.
- Apply a light coat of oil to the crank every few weeks.
- Check the crank for rust regularly and reapply oil as needed.
By following these tips, you can maintain your Whirley Pop’s crank and enjoy perfect popcorn every time.
Drying The Components
Cleaning your Whirley Pop is crucial to keep it in top condition. After washing, drying the components properly is essential to prevent rust and ensure longevity. Here, we’ll discuss two effective methods: air drying and using a towel.
Air Drying
Air drying is a simple and effective way to dry your Whirley Pop components. After washing, place each part on a clean, dry surface. Ensure the parts are spread out, not stacked. This allows air to circulate freely, ensuring thorough drying.
To enhance air drying:
- Use a drying rack: A drying rack provides excellent air circulation.
- Position near a fan: Place the components near a fan to speed up drying.
- Sunlight exposure: If possible, place the parts in direct sunlight. Sunlight helps to dry them quickly and naturally.
Here is a table to summarize the air drying tips:
| Tip | Benefit |
|---|---|
| Drying Rack | Enhanced air circulation |
| Position Near Fan | Faster drying time |
| Sunlight Exposure | Natural and quick drying |
Air drying is effective but takes time. Ensure all parts are completely dry before reassembling to avoid rust.
Read More: Stone Cookware Pros and Cons: Unveiling Key Insights
Using A Towel
Using a towel is a faster method to dry your Whirley Pop components. After washing, use a clean, dry towel to wipe each part. Pay special attention to corners and crevices where water may linger.
Steps for towel drying:
- Pat dry: Gently pat each component to remove excess water.
- Wipe thoroughly: Use the towel to wipe away any remaining moisture.
- Inspect: Check each part to ensure it’s completely dry.
Using a towel is quick and effective but requires careful attention. Make sure no moisture is left behind to prevent rust.
Here are some tips for towel drying:
- Use a lint-free towel: Lint-free towels leave no fibers behind.
- Be thorough: Ensure every part is completely dry, including small areas.
- Check for moisture: Inspect parts after drying to ensure no water remains.
By following these methods, you can keep your Whirley Pop in excellent condition, ready for the next delicious batch of popcorn.
Reassembling The Popper
Cleaning your Whirley Pop is an essential task to ensure it continues to produce delicious popcorn. After a thorough cleaning, reassembling the popper correctly is crucial. This guide will walk you through the steps to put your Whirley Pop back together, focusing on proper alignment and securing all parts.
Proper Alignment
Proper alignment is key to making sure your Whirley Pop works efficiently. Start by aligning the lid with the main body of the popper. The lid should sit flush against the pot to prevent any popcorn from escaping during the popping process.
Next, focus on the stirring mechanism. Ensure the stirring rod is straight and fits into the notches inside the pot. If the rod is bent, your popcorn will not stir properly, leading to uneven popping.
- Place the lid on the pot.
- Align the stirring rod with the notches inside the pot.
- Check that the handle is properly attached to the lid.
Verify the alignment by turning the handle. It should rotate smoothly without any resistance. If you encounter any issues, double-check the positioning of the rod and lid.
A table can help summarize the alignment steps:
| Step | Action |
|---|---|
| 1 | Place the lid on the pot |
| 2 | Align the stirring rod |
| 3 | Check the handle attachment |
| 4 | Verify smooth rotation |
Read More: How to Clean a Whirley Pop: Easy & Sparkling Results!
Securing All Parts
Once everything is aligned, securing all parts is the final step. First, tighten the wing nuts on the handle. These nuts hold the handle in place and ensure it doesn’t come loose during use.
Next, secure the lid clips. These clips hold the lid tightly to the pot. If the clips are loose, steam can escape, affecting the popping process. Make sure the clips snap firmly into place.
- Tighten the wing nuts on the handle.
- Secure the lid clips to the pot.
- Double-check all connections.
Double-check all connections before starting to pop. This includes the screws on the handle and the clips on the lid. Everything should be tight and secure to ensure a smooth operation.
A checklist can be useful to ensure everything is in place:
- Wing nuts on the handle
- Lid clips
- Screws on the handle
- Stirring rod alignment
By following these steps, your Whirley Pop will be ready to use again, ensuring you enjoy perfectly popped popcorn every time.
Regular Maintenance Tips
Cleaning your Whirley Pop popcorn maker is crucial for its longevity and performance. Regular maintenance ensures that it remains in top condition and continues to produce delicious, fluffy popcorn. Below, we’ll share some essential tips to keep your Whirley Pop in pristine shape.
Frequency Of Cleaning
It’s important to clean your Whirley Pop regularly to prevent buildup and ensure optimal performance. After every use, you should perform a basic cleaning. This involves wiping the inside with a paper towel to remove any leftover oil and popcorn residue.
For a more thorough cleaning, consider the following schedule:
- Weekly: If you use your Whirley Pop several times a week, deep clean it once a week.
- Monthly: For occasional use, a monthly deep clean should suffice.
To deep clean your Whirley Pop, follow these steps:
- Disassemble the unit, removing the lid and stirring mechanism.
- Wash all parts with warm, soapy water.
- Use a non-abrasive sponge to clean the pot and lid.
- Rinse thoroughly and dry completely before reassembling.
Never submerge the wooden handle in water, as this can cause it to crack or warp. Instead, wipe it with a damp cloth.
Consistent cleaning ensures your Whirley Pop remains free from burnt-on residue and continues to function efficiently.
Storage Recommendations
Proper storage of your Whirley Pop is essential to maintain its condition. Store it in a cool, dry place to prevent rust and other damage. Avoid storing it in damp areas, such as under the sink or in a humid garage.
Here are some tips for optimal storage:
- Avoid stacking heavy items on top of your Whirley Pop, as this can damage the lid and handle.
- Keep it covered: Use a cloth or plastic cover to protect it from dust and debris.
- Disassemble for storage: If space is an issue, disassemble the Whirley Pop and store the parts separately.
Consider creating a designated spot in your kitchen for your Whirley Pop. This can be a cabinet or shelf where it won’t be jostled or damaged. Use a small hook for hanging the lid and stirring mechanism, keeping everything organized and easily accessible.
Regular maintenance and proper storage will keep your Whirley Pop in excellent condition, ensuring it continues to make delicious popcorn for years to come.
Frequently Asked Questions
How Do You Clean A Whirley Pop?
To clean a Whirley Pop, first let it cool. Then, use warm soapy water and a non-abrasive sponge. Rinse thoroughly and dry.
Can You Put Whirley Pop In The Dishwasher?
No, it is not recommended to put a Whirley Pop in the dishwasher. Hand wash only with warm soapy water.
How Often Should You Clean A Whirley Pop?
Clean your Whirley Pop after every use. This prevents buildup and ensures your popcorn always tastes fresh and delicious.
What Tools Do You Need To Clean A Whirley Pop?
You need warm soapy water, a non-abrasive sponge, and a towel to clean your Whirley Pop properly.
Read More: How to Clean Whirley Pop Popcorn Popper: Easy Guide & Tips
Conclusion
So there you have it – now you know exactly how to give your Whirley Pop a top-to-bottom scrub down. Not only will cleaning it thoroughly make your popcorn taste better, but it also ensures your popper lasts for years of fluffy, movie-night goodness. Just be sure to follow our handy guide step-by-step, and don’t forget that a well-seasoned pot is the key to popcorn perfection. Give it a try tonight and get ready to enjoy the crispiest, crunchiest popcorn around. Happy popping!