We may earn money or products from the companies mentioned in this post.
To clean a Whirley Pop, wipe it with a paper towel and wash it with warm, soapy water. Ensure it’s completely dry before storing.
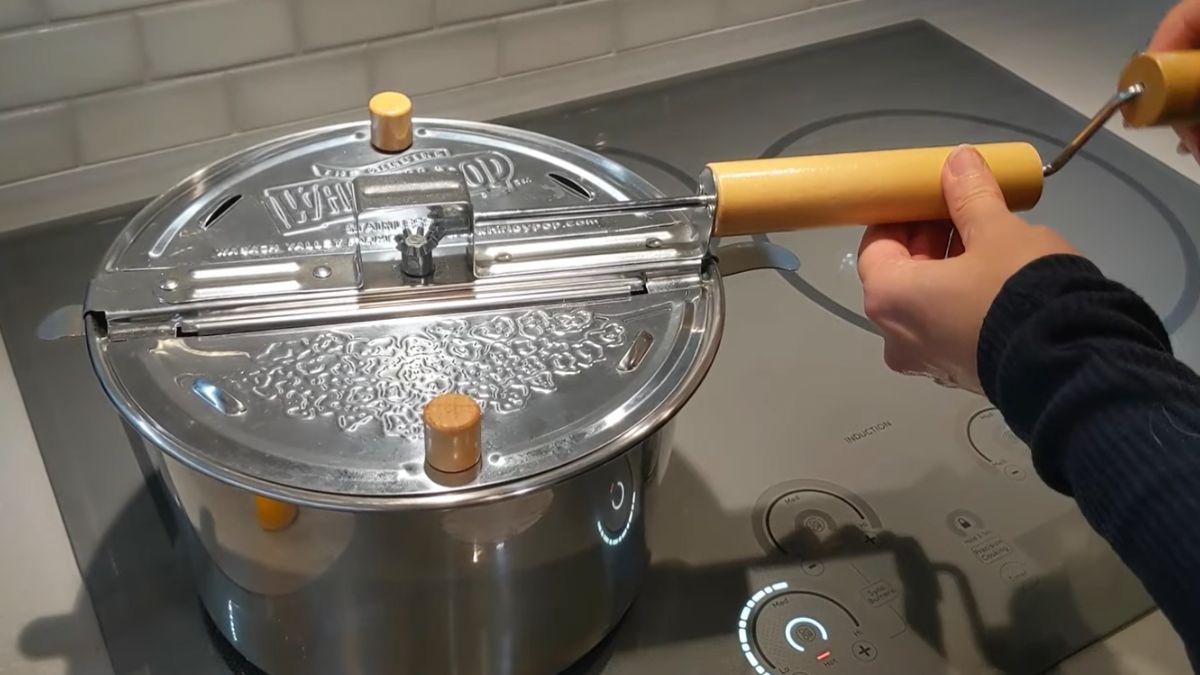
A Whirley Pop popcorn maker brings the nostalgic feel of classic, theater-style popcorn right into your kitchen. This handy stovetop popper has become a staple for movie nights and snack lovers alike. Maintaining your Whirley Pop ensures you’ll enjoy perfectly popped snacks for years.
Regular cleaning prevents the buildup of old oils and burnt kernels that can affect the taste and performance of your popcorn maker. Despite the simple mechanism, the best care involves a gentle touch and an avoidance of harsh chemicals. A clean Whirley Pop not only extends its lifespan but also ensures every batch of popcorn is as delicious as the last. Keep your popcorn maker in top shape with proper maintenance after each use, and it will continue to deliver that delightful pop time and time again.
Reed: Granite Cookware Benefits: 5 Reasons to Make the Switch
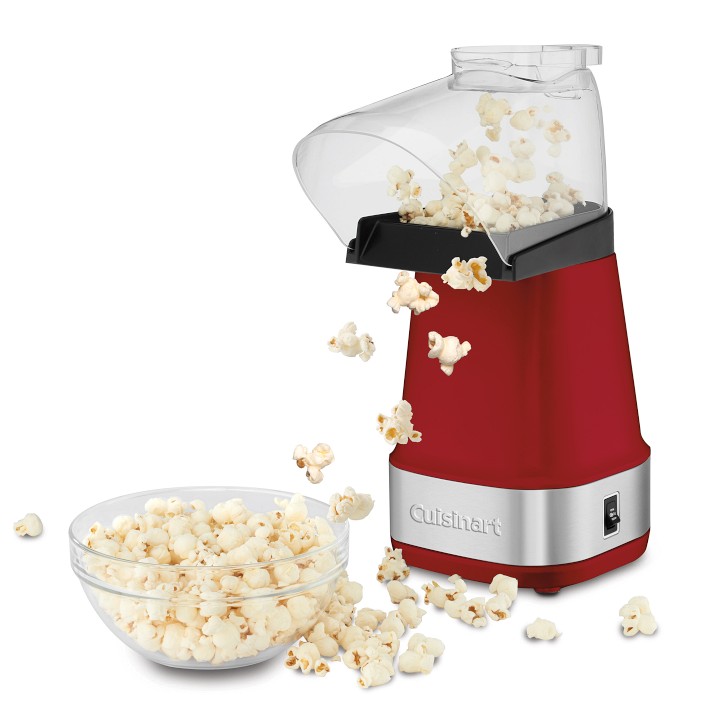
Credit: www.williams-sonoma.com
Introduction
Discover the simple steps to maintain your Whirley Pop Popcorn maker’s longevity and performance. Learn the essentials of effectively cleaning this classic stovetop appliance, ensuring it remains a staple for your movie nights and snack sessions.
Whirley Pop Popcorn makers brew up delicious popcorn quickly and with a delightful dash of nostalgia. However, their unique design also calls for special care when cleaning to ensure longevity and performance. Let’s pop right into the steps needed to keep your Whirley Pop in tip-top shape.
The First Step To A Shiny Whirley Pop
Before diving into soap and water, it’s essential to understand what your Whirley Pop is made of. Most often, they are constructed of aluminum or stainless steel, which affects how you treat and clean its surfaces. Remember, the maintenance of your popcorn maker begins from the moment you finish popping your last kernel.
A Deep Clean: Method And Materials
- Frequency of Cleaning: Your Whirley Pop should be thoroughly cleaned after every few uses to prevent the build-up of old oils and popcorn residue.
- What You’ll Need: Gather mild dish soap, a soft sponge or cloth, and warm water. For tougher stains, you might consider a mix of water and white vinegar.
Quick Tips For Daily Care
Ensuring everyday longevity for your Whirley Pop doesn’t need to be a complex affair. A simple wipe-down after each use can go a long way.
- Post-Use Protocol: After each use, once the Whirley Pop has cooled down, use a paper towel or a soft cloth to remove any remaining oil or kernels from the pot.
- Avoiding Water Stains: If you own a stainless steel Whirley Pop, dry it immediately after washing to prevent water spots and maintain its luster.
Putting It All Together
Having looked at both the substantial and slighter aspects of cleaning, it’s evident that your Whirley Pop requires a gentle touch paired with regular attention. Tend to your popper with care, and it will be a trusty companion for many movie nights to come.
Just remember, when it’s not popping corn, your little bit of effort in cleaning makes a world of difference.
Gather Supplies
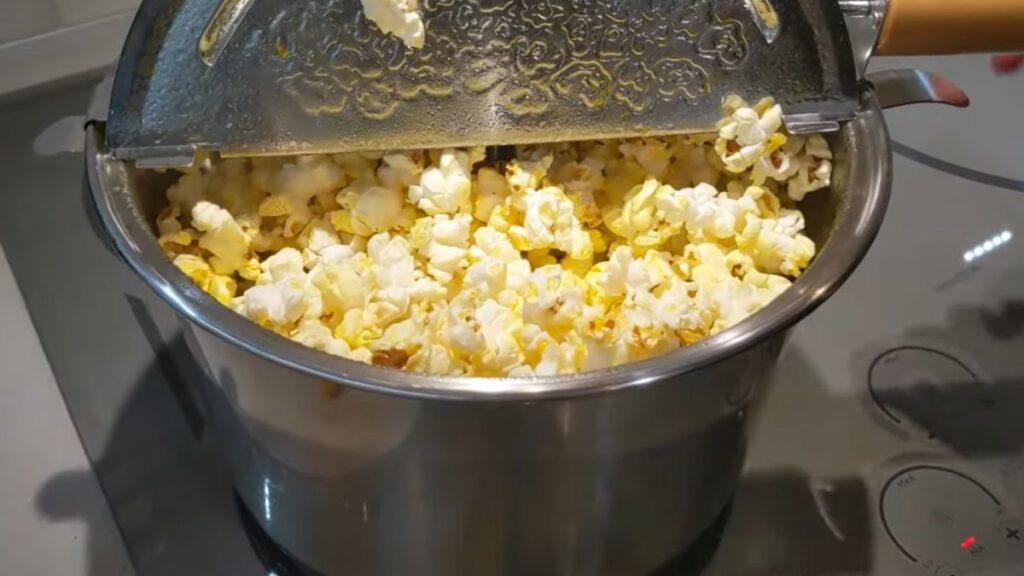
Clean popcorn sessions are incomplete without the two important companions – a Whirley Pop, and a bucket of popcorn. To always have a functioning and ready-to-go Whirley Pop, you are encouraged to clean it regularly. This not only enhances its lifespan but also contributes positively to the popcorn’s taste.
In this blog post, embark on a nutshell guide to cleaning your Whirley pop, steered by simple tools sourced from your own home.
List Of Necessary Supplies For Cleaning
Before diving deep into the cleaning process, it’s fruitful to gather supplies. Why you ask? Having a prepared list eliminates the need for frantic searches in the middle of cleaning your Whirley Pop. Let’s look at a few important accessories:
- Warm Water: Provides the base for a cleaning solution, perfect for loosening oil build-ups.
- Mild Dish Soap: Adept at cutting through stubborn oil residues and burnt particles.
- Soft Cloth or Sponge: Ideal tool to gently clean without leaving any scratches.
- Dry Towel: Removes moisture post-cleaning, ensuring a thorough dry.
- Baking Soda (optional): Useful for stubborn spots that resist the soap and water solution.
How To Arrange Your Cleaning Supplies
Benefits multiply when you arrange your tools orderly prior to the cleaning process. An easy layout of supplies reduces the overall cleaning time and lowers mishap possibilities during the clean-up.
- Start by filling a large bowl or basin with warm water.
- Mix mild dish soap into the warm water till it forms a soapy solution.
- Lay out a soft cloth or sponge within easy reach.
- Keep the dry towel nearby for quick access post-cleaning.
- If you’re dealing with exceptionally stubborn stains, reserve a box of baking soda within reach.
With these supplies at hand, you’re ready to embark on the Whirley Pop cleaning journey. Following a systematic approach gives you sparkling results while extending the life of your beloved popcorn-making partner.
Disassembly
Disassembly plays a critical role in maintaining your Whirley Pop. Accurate dismantling can facilitate a profound cleansing of this marvelous popcorn popper, enhancing the device’s longevity and performance.
Nothing beats the taste of freshly popped popcorn made in a Whirley Pop stovetop popcorn popper. Yet, the key to maintaining that amazing flavor lies in how well you care for your Whirley Pop. Proper cleaning, which starts with the correct disassembly of the device, ensures the longevity of your appliance and guarantees delicious popcorn every time.
Understanding The Whirley Pop Components
Before starting the disassembly process, it’s important to become familiar with the components of your Whirley Pop. This will make it easier to disassemble and reassemble later.
- Lid with Crank:
Explaining this is simple. This is the top part of the Whirley Pop which includes the crank mechanism that stirs the popcorn.
- Pot:
This is the bottom part, or base, of the popper where you place the popcorn and oil.
- Handles:
These are located on both sides of the pot and aid in shaking the popcorn while it pops.
Steps For Disassembling Your Whirley Pop
Disassembling your Whirley Pop is relatively straightforward. If you follow these outlined steps, it should be a breeze.
- Separating the Lid from the Pot:
Simply flip the Whirley Pop upside down. You will notice three screws securing the lid and crank to the pot. Using a Phillips-head screwdriver, carefully remove these screws.
- Detaching the Crank:
The crank is secured to the lid with a small screw. Once again, with your Phillips-head screwdriver, remove this screw to separate the crank from the lid.
- Taking off the Handles:
Each handle is held in place by two screws. You can remove these with your screwdriver to completely detach the handles from the pot.
With each use, a Whirley Pop stovetop popcorn popper creates wonderful memories, from family movie nights to impromptu get-togethers. You can ensure those memories keep on popping by properly cleaning your Whirley Pop, starting with correct disassembly. Remember, treating your Whirley Pop with care will guarantee it serves up that amazing, fresh popcorn flavor for years to come.
Pre-cleaning
Experience the joy of a spotless Whirley Pop with pre-cleaning techniques tailored just for you. Unearth secrets to keeping your popcorn maker pristine, enhancing its longevity and performance. Dive into our guide for swift and effective Whirley Pop maintenance.
Gather Your Cleaning Supplies Beforehand
Getting ready to clean your Whirley Pop should be as enjoyable as making the popcorn itself. Before you dive into the pre-cleaning process, make sure you have all the necessary supplies at hand. Having everything you need within reach will make the cleaning process seamless and efficient.
- Non-abrasive sponge: This sponge won’t scratch your Whirley Pop’s surface.
- Mild dish soap: A gentle soap ensures that the non-stick surface is not damaged.
- Dishtowel or paper towels: For drying your Whirley Pop after cleaning avoid any water spots.
- Vinegar (optional): Vinegar serves as a natural cleaner for stubborn residues.
Examine Your Whirley Pop For Leftover Kernels And Oil
Before you start scrubbing, take a moment to inspect the Whirley Pop carefully. You’re looking for any leftover popcorn kernels or oil residue that could impact the cleaning process. This step ensures that you address all the nooks and crannies where gunk tends to hide.
Remove all visible debris:
- Loose popcorn kernels: Dispose of any remaining popcorn pieces that didn’t get popped.
- Oil residues: Wipe away any oil that’s left to avoid it turning rancid over time.
Now, you’re all set with the pre-cleaning steps. This attention to detail not only maintains your Whirley Pop in pristine condition but also ensures your popcorn keeps tasting great, batch after batch. Remember, every scrumptious popcorn experience starts with a clean popper!
Hand Wash Components
Ensuring your Whirley Pop stays in peak condition hinges on regular cleaning with the right-hand wash components. Opt for mild detergents and soft sponges to gently scrub the inside, keeping the popcorn maker ready for your next movie night.
Cleaning your Whirley Pop doesn’t have to be a daunting task. With the proper care, this stovetop popcorn maker can provide countless nights of movie-time treats. Let’s dive into the steps to hand wash your Whirley Pop’s components, ensuring it continues to function beautifully, popping after popping.
Disassembling Your Whirley Pop
Before washing, you’ll need to disassemble your Whirley Pop to ensure each piece is thoroughly cleaned:
- Remove the lid: Twist and lift off the lid to access the internal components.
- Detach the stirring mechanism: Unscrew the mechanism from the pan; this may vary depending on your model.
- Prepare components for washing: Ensure all pieces are free of popcorn kernels and residue.
Choosing The Right Cleaning Agents
When selecting cleaning agents for your Whirley Pop, consider the materials it’s made from:
- Mild detergent: Opt for a gentle dish soap to avoid damaging the surface.
- Non-abrasive sponge: To prevent scratches, use a soft sponge or cloth for cleaning.
Washing The Pot
The pot is the heart of your Whirley Pop, where all the magic happens. Cleaning it properly is crucial for its longevity:
- Gently scrub the interior with your non-abrasive sponge, using warm, soapy water to remove oil and residue.
- Rinse thoroughly with clean water to ensure no soap is left behind.
Cleaning The Lid And Stirring Mechanism
The lid and stirring mechanism are vital components that need regular maintenance:
- Stirring mechanism: Carefully clean each part, checking for hard-to-reach spots where oil can accumulate.
- Lid: Pay special attention to the vents and any moving parts to prevent the build-up of old popcorn flavor.
Rinsing And Drying
Rinsing and drying are as important as the washing step to avoid water spots and maintain the integrity of your Whirley Pop:
- Rinse all components well under running water.
- Use a soft, dry towel to eliminate moisture or let them air dry on a rack before reassembling.
Reassembling Your Whirley Pop
Once all the parts are clean and dry, it’s time to put your Whirley Pop back together so it’s ready for your next popping session:
- Reattach the stirring mechanism: Make sure it’s secure and moves freely.
- Replace the lid: Ensure it fits snugly and locks in place.
By following these simple steps, your Whirley Pop will be ready for its next use. Regular cleaning not only extends the life of your popcorn maker but also keeps your popcorn tasting great batch after batch.
Clean The Kettle
Discover the secrets to maintaining a pristine Whirley Pop by mastering the art of kettle cleaning. Embrace a spotless snack experience with each use, ensuring your popcorn maker’s longevity and performance.
Giving your Whirley Pop a deep clean is less daunting than it seems. It can easily be achieved by focusing on the most important part of the popcorn maker – the kettle. Regularly maintaining this component will not only extend the lifespan of your trusty popper, but also make every popcorn snacking experience all the more delightful.
Pay Attention To The Material Of The Kettle
Firstly, you need to determine the kettle’s material:
- Stainless Steel: These are recognized for their durability, but special care must be taken to avoid scratching the surface. Use soft cleaning tools such as sponges or microfiber cloths.
- Aluminum: Lightweight and fast heating, these kettles can stand up to most cleaning methods. However, avoid using hard-bristle brushes which can create surface scratches.
The Cleaning Process: Step By Step Guide
Cleaning your kettle is not a Herculean task. Let’s break the process down into manageable steps:
- Step 1: After use, let the kettle cool to a safe temperature.
- Step 2: Remove any remaining popcorn kernels that might get stuck inside.
- Step 3: Fill the kettle halfway with warm, soapy water. Allow it to sit for a few minutes.
- Step 4: Gently scrub the inner surface of the kettle, paying close attention to areas where oil and bits of popcorn may have accumulated.
- Step 5: Rinse thoroughly with water and let dry completely before the next use.
Extra Tips For Better Maintenance
Getting more out of your Whirley Pop requires continual upkeep:
- Always dry your kettle before storing: Storing a damp kettle can lead to rust, negatively impacting its longevity and performance.
- Regular cleaning: Don’t exceed four uses without cleaning. This helps to maintain top-notch taste quality and keep your popcorn popper in prime condition.
- Get a cover: If your Whirley Pop didn’t come with a cover, consider buying one. A cover can help protect your popcorn maker from dust and potential damage.
Rinse And Dry
Discover the simple yet effective method of keeping your Whirley Pop squeaky clean! Dive into the cleaning process with our two critical steps: Rinse and Dry. Our guide will have your popcorn maker shining in no time.
Caring for your Whirley Pop popcorn maker requires regular cleaning to ensure it remains in top shape for your movie nights, parties or snack-time crunches. Below, we delve into the key steps you need to perform in rinsing and drying your Whirley Pop to prolong its quality use life.
Let’s get down to it.
Step 1: Prep Work
Before you charge into the cleaning process, prep your gear first. Here’s what you need to do:
- Empty: Remove any leftover popcorn kernels or residue in the Whirley Pop.
- Disassemble: Take apart the Whirley Pop handle and lid to make it easier for a thorough clean.
Step 2: Rinse Off
Forget about intricate rinsing maneuvers, it’s simpler than you think. This step requires running hot water and gentle squirts of dish soap. Follow these steps:
- Fill up: Pour warm water into the Whirley Pop until it’s about three-quarters full.
- Add soap: Squirt in some dish soap and give the interiors a good swish to generate soapy water.
- Soak: Leave it to soak for about 5 to 10 minutes before rinsing out the soapy water under the tap.
Step 3: Scrub
Time to flex some elbow grease. A soft sponge or dishcloth is all you need to get rid of stubborn remnants. Where a sponge won’t cut it:
- Deal with stubborn spots: Give recurring stains a workout using a non-abrasive scrub pad.
- Eliminate oil residue: Use a mixture of baking soda and water to get rid of any oily deposits left behind.
Step 4: Final Rinse And Check
Rinse the Whirley Pop-under warm running water, ensuring all soap and cleaners are washed away. It’s crucial to:
- Check corners: Pay extra attention to the corners, edges, and underneath the pan.
- Inspect: Run a hand inside the Whirley Pop to check if there’s any oily residue or popcorn bits left. If so, repeat the rinse and scrub process.
Step 5: Dry
A fundamental yet often overlooked step is proper drying of your Whirley Pop. Let’s nail it:
- Shake off excess water: Get rid of as much water as possible from your Whirley Pop immediately after the final rinse.
- Leave-out: Allow it to air dry, ensuring it’s completely dry before reassembling or using it again.
Reassembly
Master the art of cleaning a Whirley Pop with our comprehensive guide. Maintain the efficiency and longevity of your popcorn maker through regular cleaning. Easily reassemble for another batch of popcorn, ensuring you always have a machine that’s as good as new.
Preparing To Reassemble Your Whirley Pop
For those popcorn enthusiasts who’ve just finished thoroughly cleaning their Whirley Pop, reassembly is the final step before you can return to making batches of delicious popcorn. Assembling it correctly ensures your popper functions smoothly during your next popping session.
Let’s make sure we put all the pieces back together the right way.
Latching The Lid Properly
- Aligning the lid and pot handles:
Make sure the lid handle lines up directly with the pot handle. This is crucial for a secure fit and to ensure that the stirring mechanism operates without hindrance.
- Securing the lid:
Once aligned, gently press down on the lid until you hear a soft click, indicating it is locked in place. This step prevents the lid from coming loose as you crank the stirring mechanism.
Attaching The Stirring Mechanism
Attaching the stirring mechanism can seem tricky, but with a bit of patience, it clicks right into place. The stirring rod needs to slide into its designated slot within the pot. This is essential for even heat distribution and preventing burnt popcorn.
- Inserting the stirring rod:
Locate the slot at the bottom of the pot and carefully insert the stirring rod. This will make sure your popcorn kernels move freely and get an even pop.
- Securing the stirring rod:
Check that the rod is secure by rotating the crank handle. A smooth rotation without any obstructions means you’ve done it correctly.
Final Checks Before Use
Now that your Whirley Pop has been reassembled, it’s wise to perform a few final checks to ensure everything is in working order. This can save you from potential issues during your next popcorn-making adventure.
- Testing the crank handle:
Rotate the crank handle several times. It should turn with ease, indicating the stirring mechanism is properly engaged.
- Inspection for any loose parts:
Give your Whirley Pop a gentle shake to listen for any rattles or loose components. If nothing sounds amiss, you’re all set!
With your Whirley Pop reassembled and all components checked, you’re now ready to pop some fresh, flavorful popcorn. Gather your favorite seasonings, invite friends over for a movie night, and enjoy the fruits of your labor with your meticulously maintained snack-time companion.
Final Touches
Master the art of maintaining your Whirley Pop with targeted cleaning tips. Discover quick methods for a pristine popcorn maker, ensuring delicious snacks every time.
Cleaning a Whirley Pop doesn’t have to be a chore – with the right steps, you can ensure your popcorn maker is ready for its next use in no time. Now that you’ve tackled the basics of cleaning, it’s time for the final touches that will make your Whirley Pop sparkle and function flawlessly for your next popcorn adventure.
Reassembling The Parts
After everything is dry, put the Whirley Pop back together. This process is straightforward:
- Handle attachment: Secure the handle back onto the pot with care. Ensure it’s tightly fastened so it won’t become loose during use.
- Knob check: Verify that the knobs on the lid and crank are well-attached. They should turn without resistance.
It’s crucial that the Whirley Pop is reassembled correctly to avoid any mishaps the next time you make popcorn.
Storing Your Whirley Pop
Where you store your Whirley Pop can impact its longevity. Look for a cool, dry spot in your kitchen:
- Cupboard convenience: Tuck it away in a cabinet that’s free from humidity to prevent any rusting of metal parts.
- Avoid stovetop storage: Keeping it far from the stove will shield it from accidental heat and grease splatters.
Reminder, treat your Whirley Pop with a little TLC and it’ll be ready to serve up tasty treats on movie nights for years to come.
Maintenance Tips
Keep your Whirley Pop in top condition with these simple cleaning steps. First, use a soft cloth and warm, soapy water to wipe the interior after each use. Ensure the popper is completely dry before storing it to prevent rust and build-up.
Popcorn lovers know the frustration of a Whirley Pop losing its steam! By following some basic maintenance tips, you can easily maintain your popcorn maker’s efficiency, ensuring it delivers a perfect batch of popcorn every time. In this blog, we’ll explore the best ways to keep your Whirley Pop in top condition.
Understanding Your Whirley Pop’s Anatomy
Firstly, comprehending the structure of your Whirley Pop is crucial for maintaining it properly. A few key components make up this handy machine:
- The Pan: This is where the popcorn pops. Regularly clean it to prevent the build-up of oil or popcorn debris.
- The Lid: It traps heat and keeps popcorn from flying out. Ensure it closes properly to maintain optimal popping temperature.
- The Crank Assembly: It stirs the popcorn and should smoothly turn for even popping.
The Golden Rule: Regular Cleaning
Cleanliness significantly contributes to your Whirley Pop’s performance. Here’s a quick rundown on how to keep your machine squeaky clean:
- Post-Use Cleaning: Once you’ve enjoyed your popcorn, don’t let leftover kernels and oil sit in the pan. A quick rinse and dry will avoid any problematic build-up.
- Deep Cleaning: Performing a thorough cleaning every few weeks can extend the life of your popcorn maker. Washing the pan with warm water and mild dish soap, followed by a dry wipe is typically all you need.
- Special Attention to Crank Assembly: Careful cleaning under the arms where oil can gather is pivotal. Use a soft damp cloth for this process.
Popping Perfect Popcorn – Heat Management
Preventing heat-related damage is another prime facet of maintaining your Whirley Pop. Follow these tips for stress-free popping:
- Warm-Up Time: Allow your Whirley Pop to preheat before adding popcorn kernels. This promotes effective popping.
- Stirring: Consistent stirring prevents kernels from overcooking or burning.
- Cooling: Never store your Whirley Pop while it’s hot. Allowing it to cool down safeguards the pan and its components.
Practical Tips For Long-lasting Usage
Lastly, adopting a few daily practices can enhance the lifespan of your Whirley Pop:
- Quality Oil: Opt for good quality popping oil. Lower-grade oils might leave residue and cause damage.
- Fresh Popcorn Kernels: Always use fresh kernels for optimal performance and to avoid potential build-up in your popping machine.
- Proper Storage: Store your Whirley Pop in a dry place, free of moisture. It maintains the integrity of the machine components.
Maintaining your Whirley Pop isn’t a tough task. With a comprehension of its structure, cleanliness habits, temperature management, and practical everyday practices, you’ll keep your popcorn maker popping for a good, long while.
Troubleshooting
Maintaining a Whirley Pop can be simple with appropriate troubleshooting methods. Effective cleaning steps can help preserve its functionality and prolong its use. Our guide provides practical tips for maintaining your popcorn maker in prime condition.
Maintaining your Whirley Pop in pristine condition can seem daunting. Relax! We’ve got you covered with some proven troubleshooting tips. Here, we focus on understanding the common problems and resolving them promptly.
Identifying The Issues
First, it is crucial to be aware of potential challenges that might occur with your Whirley Pop. These could include:
- Uneven Popcorn Popping: This could be due to the inconsistent heat distribution. You might try adjusting your stove’s heat levels to make sure your popcorn pops evenly.
- Difficulty Turning the Handle: If this happens, it could signify a lack of lubrication or debris buildup. Often, thoroughly cleaning your Whirley Pop as instructed can solve this issue.
- Burnt Popcorn: It’s possible your stove’s heat was set too high, or the popcorn was left to pop for too long. Remember, cooking at a moderate heat and removing the popcorn immediately once popping slows are ideal.
Addressing The Troubles
Having acknowledged the common issues, let’s uncover practical solutions.
Firstly, persistent uneven popcorn popping can be rectified with practice. Your Whirley Pop requires a gentle touch. Moderate heat and consistent stirring will yield perfectly popped corn.
Has turning the handle become a strain? Consider washing your Whirley Pop after each use and particularly focusing on cleaning the stirring mechanism to maintain a smooth operation.
We’ve all scorched a batch or two of popcorn. Don’t be disheartened! Maintaining a balance between the cooking time and stove temperature is key. Experiment to discover what settings yield your perfect popcorn batch. Remember, immediately remove your freshly popped corn from the heat.
These common Whirley Pop issues can often be resolved with proper maintenance and attention to cooking techniques. Who’s ready for movie night?
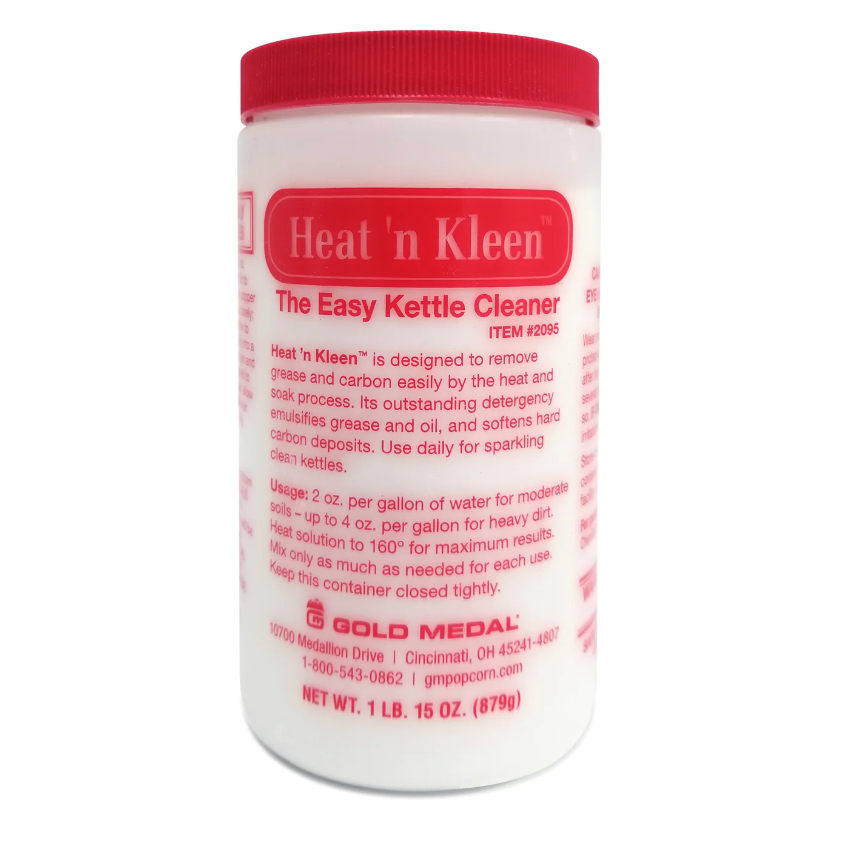
Credit: grpopcorn.com
Frequently Asked Questions On How To Clean A Whirley Pop
How Do You Clean A Greasy Popcorn Popper?
What Happens If You Put Whirley Pop In Dishwasher?
Can You Use Vinegar To Clean Popcorn Machine?
How Do I Season My Whirley Pop?
Conclusion
Mastering the art of cleaning a Whirley Pop ensures the longevity of the appliance. Regular upkeep maintains optimal popping performance. Using these simple steps, cleaning becomes a breeze and not a chore. Enjoy fresh popcorn, free of residual taste and aroma.
Happy popping with your now tidy Whirley Pop!