We may earn money or products from the companies mentioned in this post.
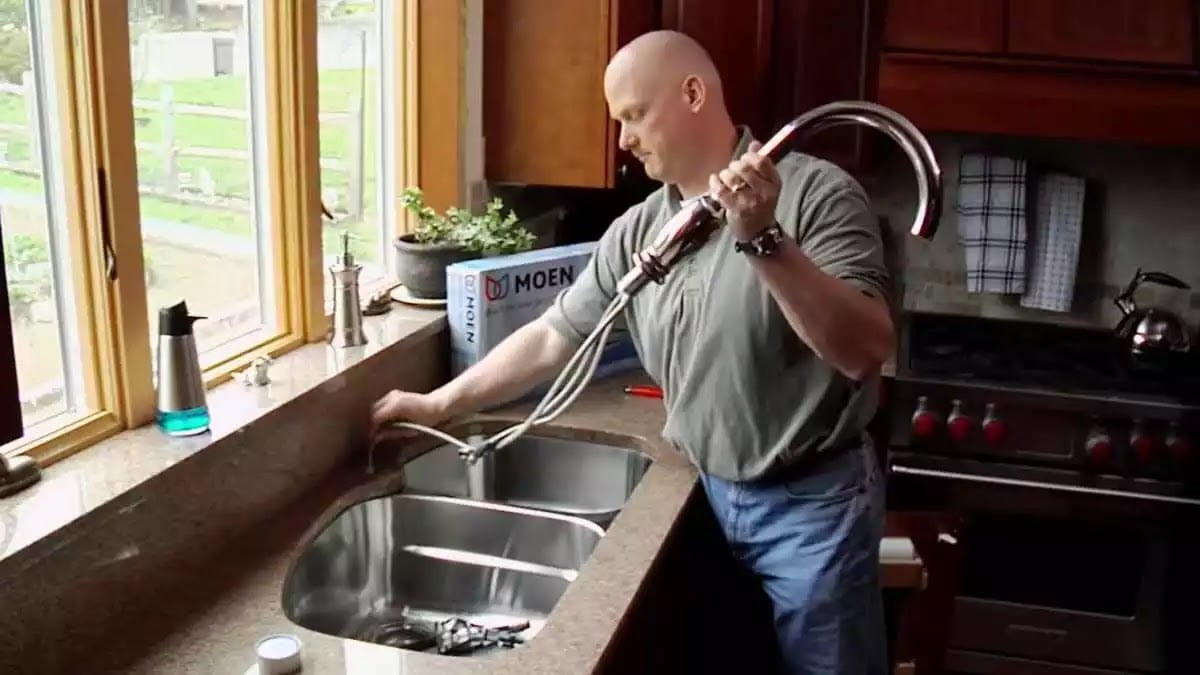
Installing a new Moen kitchen faucet to improve the look and feel of your kitchen is a wise choice. It may seem difficult to install a new kitchen fixture, but if you have some simple equipment and pay close attention to the directions, you can quickly enjoy your new Moen faucet. You will be guided through the whole installation procedure with this step-by-step tutorial, from taking out your old faucet to fastening the water supply lines on your brand-new Moen fixture. With a little perseverance and the appropriate methods, you can successfully finish this do-it-yourself plumbing job and enjoy your elegant, high-quality Moen kitchen faucet. So take your towel, plumber’s putty, adjustable wrench, and other required equipment, and let’s get going.
Introduction to Moen Kitchen Faucets
Selecting Your Moen Kitchen Faucet
When choosing a Moen kitchen faucet, you have many high-quality options to consider for your home. Moen is the
1 faucet brand in North America, offering innovative designs, proven durability, and reliable performance.
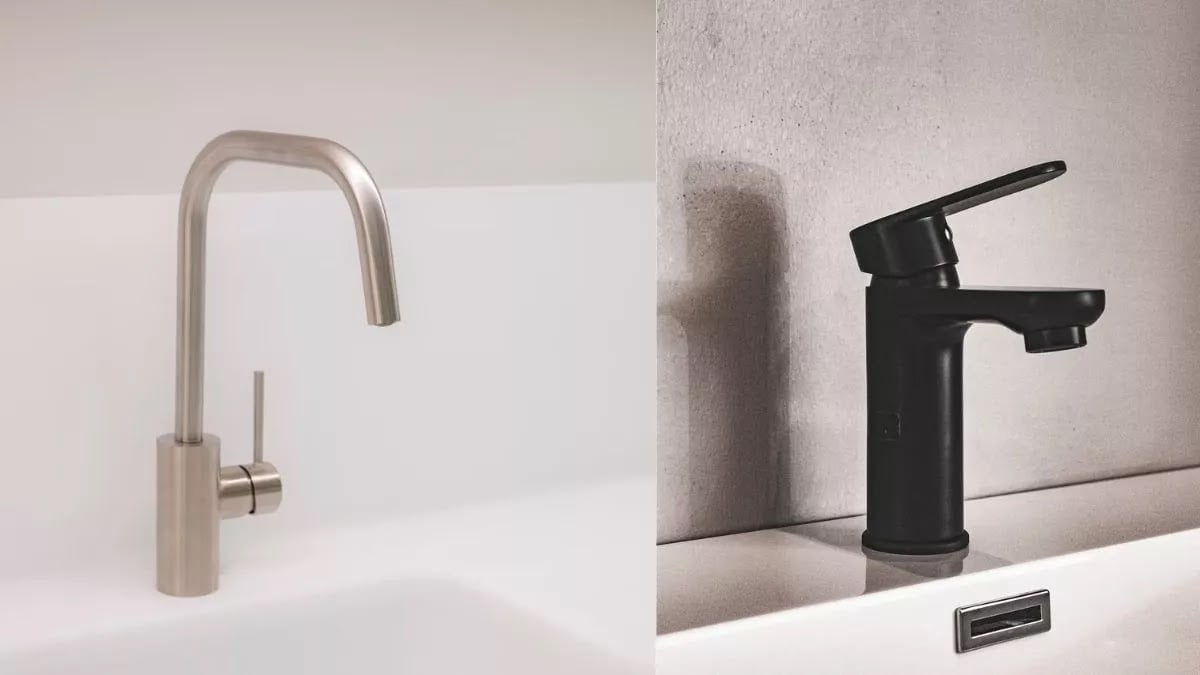
The kitchen faucet lines from Moen vary from spectacular, professional-grade designs to basic, transitional choices. To fit your design, you may choose from well-liked collections like Moen’s Arbor, Brantford, or Align. These collections come in a range of finishes, including chrome, stainless steel, matte black, and oil-rubbed bronze.
In addition to other practical features like Power Clean spray technology for quicker cleanup of stuck-on messes, the Reflex system for simple maneuverability, and the Duralast cartridge for smooth handle control and drip-free performance, you might want to think about a pull-down or pull-out spout for optimal functionality. At the push of a button, you can transition between normal flow and spray mode with an integrated sprayer.
Moen’s value-priced collections provide dependable quality at a reasonable price when money is an issue. Like all Moen faucets, even the more affordable versions provide cutting-edge technology, dependability, and design.
Finding the ideal kitchen faucet for your requirements and price range is made simple by Moen, which offers an extensive selection of design and finish choices, flow rates, and additional functions. Contact your neighborhood plumber for more information on Moen’s kitchen faucet selections, or go to moen.com. For many years to come, your new Moen faucet may contribute to a more fashionable and useful kitchen area.
Before You Begin – Gathering Tools and Materials
Before beginning the installation of your new Moen kitchen faucet, it is important to gather all necessary tools and materials. This will ensure you have everything on hand to complete the installation efficiently.
.webp "Moen Kitchen Faucet Installation Guide Step-by-Step Instructions")
Required Tools:
- Adjustable wrench or pliers
- Basin wrench
- Screwdrivers (Phillips head and flathead)
- Pocket knife or utility knife
- Towels or rags
Materials:
- Plumber’s putty (if installing a deck plate)
- Supply lines (if not included with the faucet)
- Escutcheon or deck plate (if not included with the faucet)
Optional Tools:
- Flashlight
- Teflon tape
- Silicone sealant
Once you have gathered all tools and materials, turn off the water supply to your sink by locating the shutoff valves under or near the sink and closing them. This will prevent water damage during the installation process. Place towels in the sink to catch any remaining water drips.
Before removing your existing faucet, note how it is mounted and connected. Take pictures if needed for reference. Remove mounting nuts and retaining clips securing it, disconnect water supply lines, then lift out and remove the old faucet. Clean the area around your sink opening to remove any debris before proceeding to install your new Moen kitchen faucet. Following the instructions included in your product packaging along with these tips will help ensure a smooth DIY installation experience for your Moen kitchen faucet.
Shutting Off Water Supply Lines

To ensure a safe installation and proper functioning of your new Moen kitchen faucet, you must first turn off the water supply lines underneath your sink. Locate the hot and cold water shutoff valves, typically found on the pipe connections behind or beneath your sink.
Turning Off the Water Supply
- Place a bucket under each shutoff valve to catch any remaining water in the pipes.
- Turn the hot water shutoff valve in a clockwise direction until fully closed. Do the same with the cold water shutoff valve.
Check both valves thoroughly by trying to turn on the faucets in your sinks. Neither the hot nor cold faucets should be able to produce any water. Do not start the installation if the water is still flowing until the problem has been fixed and the water supply has been completely turned off.
- Turn on the lowest faucet in your home to drain the pipes. Let the water run until it stops. This depressurizes the plumbing system, so water does not spray out when you disconnect the faucet supply lines.
- Locate the hot and cold water supply lines under your sink that connect directly to your existing faucet. Place a towel around the connections to prepare for any remaining drips of water.
- Loosen the nuts connecting the supply lines to your shutoff valves using a wrench or pliers, and disconnect the lines. Catch any released water with the towel.
You may now securely remove your current faucet after turning off your water supply. In order to prevent harm or water damage, take your time and proceed with care. After installing your new Moen faucet, cautiously turn the water back on and make sure there are no leaks before using it.
Removing the Old Faucet
To install your new Moen kitchen faucet, you must first remove the existing faucet. Before you begin, turn off the water supply lines under the sink.
- Place a bucket underneath the faucet to catch any remaining water in the supply lines.
- Loosen the nuts that connect the hot and cold water supply lines to the faucet using a wrench or pliers. Unscrew the lines from the faucet and let the remaining water drain into the bucket.
- Locate the mounting nuts that secure the faucet to the countertop or sink. They may be underneath the sink, or inside the cabinet. Loosen the nuts with a wrench and unscrew them.
- Pull the old faucet up and out of the sinkhole. Clean the area around the hole to remove any debris before installing the new faucet.
- Take the opportunity to inspect the water supply lines. If they are worn or damaged, replace them now before installing the new faucet. Make sure any remaining connections to the water shutoff valves are secure and not leaking.
- Place a bead of plumber’s putty around the base of the faucet hole on the countertop. The plumber’s putty will help create a waterproof seal between the new faucet and the countertop.
- Bring the new Moen faucet up to the sinkhole and place it on the plumber’s putty base. Hand-tighten the mounting nuts underneath to hold them in place as you make the water supply line connections.
- Connect the hot and cold water supply lines to the correct inlet ports on the new faucet. Tighten the nuts with a wrench.
- Tighten the mounting nuts thoroughly with a wrench to secure the new faucet.
- Turn the water back on and check all connections for any leaks before using the new faucet. Tighten as needed.
Your new Moen kitchen faucet is now installed and ready to use. Enjoy!
Installing the Moen Faucet Base and Components
To install the faucet base and components, follow these steps:
Attach the Faucet Base
The faucet base, also known as the faucet body, is the part that mounts to your sink. To attach the base:
- Apply the plumber’s putty around the faucet’s base in accordance with the package’s instructions. A watertight seal will be formed between the sink and the faucet base by the putty.
- To the sink, mount the faucet base. To secure it, hand-tighten the mounting nuts.
- Over the faucet supply lines and mounting shank, slide the friction ring gasket and friction ring.
- Over the mounting shank and faucet supply lines, slide the faucet base plate.
- To attach the faucet base plate, hand-tighten the mounting nuts onto the faucet mounting shank.
- To tighten the mounting nuts, use pliers or a basin wrench. Avoid overtightening as this might lead to harm to your countertop or sink.
Attach the Spout and Handles
The spout and handles control the flow and temperature of the water. To attach:
- Place the spout into the spout receiver on the faucet base. Hand-tighten the spout nut to hold it in place.
- Attach water lines to the correct supply tubes – hot to hot, cold to cold.
- Attach the water lines to your home’s hot and cold water supply lines. Tighten with an adjustable wrench.
- Attach the handles to the faucet base. The hot water handle goes on the left, and the cold water handle goes on the right.
- Turn on the water supply and check for any leaks before using your new Moen faucet.
By following these steps carefully, you will have your Moen kitchen faucet properly installed and ready to use in no time. Be sure to turn to the faucet’s specifications or a plumber with any additional questions during the installation process.
Connecting the Water Supply Lines
To connect the water supply lines to your Moen kitchen faucet, you will need the following tools and parts:
- Adjustable wrench or pliers
- Teflon plumber’s tape
- Water supply lines (flexible braided stainless steel hoses)
Shut Off the Water Supply
Before beginning installation, locate the shutoff valves under the sink and turn them clockwise to cut off the water supply to the faucet. This will prevent excess water flow as you connect the new faucet.
Apply Teflon Tape
Wrap 3 to 4 turns of Teflon tape around the threaded ends of the water supply lines. Make sure the tape covers all threads to create a watertight seal. Teflon tape helps lubricate and seal pipe threads to prevent leaks.
Connect Hot and Cold Supply Lines
Attach the hot water supply line to the hot water shutoff valve (typically on the left) and the cold water supply line to the cold water shutoff valve (typically on the right). Tighten the connections with an adjustable wrench or pliers. Do not over-tighten.
Attach Supply Lines to the Faucet
Connect the other ends of the hot and cold supply lines to the correct hot and cold ports on the bottom of the new Moen faucet. The hot water supply line connects to the left port and the cold water supply line connects to the right port. Hand-tighten the supply lines before tightening them completely with a wrench.
Turn the Water Back On
Turn the hot and cold water shutoff valves back on by turning them counterclockwise. Check all connections for leaks and tighten them as needed. Run the water for 30 seconds to flush out any debris before using the new faucet.
Your Moen kitchen faucet installation is now complete. Turn on the faucet to enjoy your stylish and functional new fixture. Be sure to turn the water back on slowly to check for any leaks before leaving the area. Call a plumber for any leaks or malfunctions noted during use.
Finishing Touches – Wipe Down and Check for Leaks
With the faucet installation complete, it’s time to wrap up by wiping down the area and ensuring there are no leaks.
Double-check underneath and around the sink deck area for any drips or drops of water. Tighten or reseal as needed. It’s best to find any issues now before too much time has passed.
Wipe Down the Faucet and Sink
Use a clean, soft cloth to wipe away any dirt, debris, or fingerprints from the surface of the new faucet fixture and sink area. For stubborn stains, you may need to use a specialized kitchen and bath cleaner or degreaser. Be sure to rinse and dry completely when done cleaning.
Check that all connections at the supply lines and faucet are tight. Run some water to ensure proper flow and drainage. Look for any pooling of water which could indicate improper installation or sealing. Tighten and reseal as needed.
Turn the water supply back on fully and let it run for at least 30 seconds to clear any debris. Check under the sink again for leaks or drips. The water lines and connections should remain completely dry.
Test the New Faucet
Turn on the hot and cold water to ensure proper temperature control and water pressure. Check that the sprayer or pull-down hose retracts as intended and moves freely. Ensure any included accessories like soap dispensers are functioning properly.
Run water through the faucet for at least two minutes to flush out any manufacturing oils, dirt, or sediment that may be in the system. Your Moen faucet is now fully installed and ready to use. Turn off the fixture when done testing.
If there are any issues with leaking, water flow or pressure, or other installation concerns, turn off the water supply immediately and contact Moen’s customer service for troubleshooting and next steps. It’s best to address any problems promptly to avoid water damage or loss of function.
Troubleshooting Common Installation Issues
Once you have completed the installation steps, you may encounter some common issues. Here are some troubleshooting tips to help resolve them:
Faucet is leaking or dripping
Double-check that all connections are tight, especially the supply lines and mounting nuts that secure the faucet to the sink. Tighten them with an adjustable wrench if needed. The cartridge or seal inside the faucet may also need to be replaced – contact Moen for replacement parts.
Water flow is reduced or uneven
There could be sediment buildup or debris stuck in the aerator or cartridge. Unscrew the aerator at the tip of the spout to clean it out. You may also need to shut off the water supply, disassemble the cartridge, and rinse it to remove any debris. Ensure all parts are reassembled properly to restore full water flow.
Sprayer hose or accessory malfunctioning
Make sure the sprayer hose is not kinked, twisted, or damaged in any way. Ensure it is properly connected to the faucet base. The diverter mechanism that switches between the spout and sprayer may need to be cleaned or repaired. Contact Moen for assistance with sprayer or diverter issues.
The faucet rotates or moves on the countertop
The mounting nuts that secure the faucet to the sink may need tightening. Ensure the mounting bracket is properly aligned and secured before tightening the nuts. You may need to apply additional plumber’s putty or sealant around the base to create a watertight seal.
By following these troubleshooting tips, you should be able to resolve the most common issues that arise from installing a Moen kitchen faucet. However, for any complex repairs or part replacements, it is best to contact Moen’s customer service for guidance to avoid damaging the faucet or voiding the warranty. With proper care and maintenance, your Moen kitchen faucet will provide you with years of service and functionality.
Conclusion
Now that your new Moen kitchen faucet is installed, your kitchen has a stylish and really useful focal point. You successfully removed your old faucet and installed the new one, making sure it was correctly linked to your water supply pipes, by following the step-by-step instructions. Better water flow and temperature control are now available to you, along with a fashionable faucet design that will give your kitchen a whole new appearance. Give yourself a moment of appreciation for finishing this do-it-yourself project. Then, prepare to enjoy your newly installed Moen kitchen faucet with the assurance that it was done perfectly by your own skilled hands.