We may earn money or products from the companies mentioned in this post.
Have you ever stared at your kitchen sink, annoyed at that leaky, outdated faucet, and wondered how to replace it yourself? Well, wonder no more. Removing and installing a kitchen faucet is totally doable as a DIY project, as long as you have the right tools. The essential tool for the job is a basin wrench, and once you have that in hand, you’ll be swapping out that old faucet for a shiny new one in no time. In this article, we’ll show you exactly how to use a basin wrench to uninstall your current kitchen faucet and install a replacement, all by yourself. Before you know it, you’ll be enjoying a drip-free, high-functioning kitchen faucet that you installed with your own two hands. How satisfying is that!
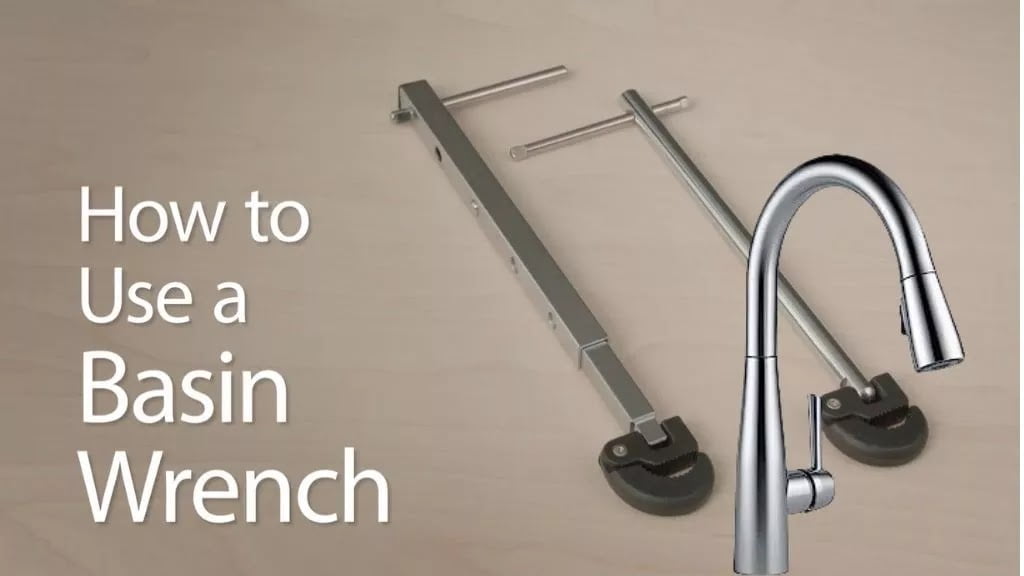
What Is a Basin Wrench?

A basin wrench is a specialty plumbing tool designed specifically for installing and removing faucets. It has adjustable jaws that grip onto the nuts under your sink and secure the faucet in place. Without this wrench, you’d have to contort yourself under the sink and struggle with a regular wrench or pliers to loosen these nuts – not a fun experience!
With a basin wrench, the job is a breeze. First, place the jaws of the wrench over the faucet nuts. Then tighten the wrench to secure it in place. Now you can easily loosen the nuts by turning the handle of the wrench counterclockwise. Once the nuts are loose enough, unscrew them the rest of the way with your fingers and set them aside.
Removing the old faucet is straightforward. Disconnect the water supply lines from the faucet valves or stems. Then unscrew the mounting nuts under the sink to detach the faucet from the sink deck. Clean the area around the sink holes before installing the new faucet.
To install the new faucet, first feed the water supply lines and faucet tubes down through the sink holes. Slide the mounting plate or bracket onto the underside of the sink. Hand-tighten the mounting nuts to hold the new faucet in place.
Now tighten the nuts securely with your basin wrench. Connect the water supply lines to the correct hot and cold faucet valves. Turn the water back on and check for any leaks. Tighten any connections as needed.
With the right tools and some patience, removing and installing a kitchen faucet is absolutely a DIY job. And the basin wrench is the one tool that makes it all possible. Keep it in your plumbing toolbox and you’ll be prepared for your next faucet project.
Why Do You Need a Basin Wrench for Kitchen Faucets?

A basin wrench is specially designed to reach and maneuver in tight spaces under sinks. Without one, removing or installing a kitchen faucet can be difficult and frustrating. Here are a few reasons why a basin wrench is essential for any kitchen faucet plumbing job:
Access Hard-to-Reach Areas
The narrow, angled design of a basin wrench allows you to access nuts and bolts located in cramped areas under your sink that would otherwise be nearly impossible to reach. The adjustable jaw opens wide to fit around different sized nuts and the pivoting head rotates to fit in tight spaces.
Prevent Damage
Using an adjustable wrench or pliers can damage your sink or faucet finishes. The basin wrench’s rubber jaw protects against scratches and dents. It’s also less likely to slip and damage surrounding surfaces.
Make the Job Easier
Removing and installing a kitchen faucet requires maneuvering in awkward, uncomfortable positions for long periods of time. A basin wrench is designed specifically for this purpose, with an extended handle and swiveling head to make the job as easy as possible. The right tool for the job can save you time, frustration, and injury.
Works for Most Faucets
A basin wrench works for removing and installing the vast majority of kitchen faucet types and brands. As long as you have the basic skills, a basin wrench is one of the only tools you’ll need to complete the job. For a relatively small investment, you’ll have a tool that will last for many plumbing projects to come.
In summary, a basin wrench is essential for any DIYer tackling a kitchen faucet plumbing job. With the right approach and tools, you’ll have your new faucet installed or the old one out in no time.
How to Choose the Right Basin Wrench
Choosing the right basin wrench for your kitchen faucet project will make the job much easier. There are a few factors to consider when selecting a basin wrench:
Size
Basin wrenches come in different lengths and jaw capacities to suit different sinks and faucets. For a standard kitchen faucet, a wrench with jaws that open up to about 2 inches wide and a total length of 12 to 24 inches should work well. If you have an especially deep sink or an awkward spot to reach, a longer wrench will give you better access. Make sure the wrench is long enough to comfortably reach up and behind your faucet, but not so long that it’s unwieldy to use in tight spots.
Adjustability
Look for a wrench with adjustable, pivoting jaws that can grasp onto nuts and bolts of different shapes and sizes. The jaws should be able to open wide enough to fit over the retaining clip or mounting nuts on your faucet, then clamp down tightly as you turn. Adjustable jaws will allow you to get a solid grip at different angles, which is helpful when working in tight spaces under your sink.
Material
High-quality basin wrenches are typically made of durable materials like chrome-plated steel or aluminum. These materials can withstand the twisting force needed to loosen stuck faucet nuts without bending or breaking. Plastic wrenches are more prone to cracking under pressure and may not grip as well. For longevity, a metal wrench is the better choice.
Extras
Some higher-end basin wrenches come with useful extras like a telescoping handle for hard-to-reach spots, padded handles for comfort, and a release switch so the jaws don’t lock onto the faucet nuts. While not essential, these added features can make the wrench easier and more pleasant to use.
By considering these factors and choosing a basin wrench suited to your needs, you’ll be well on your way to removing and installing your kitchen faucet with ease. The right tool for the job can make all the difference.
Safety Tips for Working Under a Kitchen Sink
When working under your kitchen sink, safety should be your top priority. Turn off the water supply to the faucet before starting, and be cautious of sharp edges. Here are some tips to keep in mind:
Wear Protective Gear
Put on safety goggles, work gloves, and old clothes. There may be grime, rust, or rough surfaces that can scratch or irritate your skin. Goggles will shield your eyes from debris.
Use a Flashlight
If your sink cabinet is dark, use a flashlight so you can see properly. This will help prevent you from dropping tools or sharp parts. You’ll also be able to see any leaks or damage more clearly.
Protect Your Back
Working hunched over under a sink puts strain on your back. Kneel on a padded mat or towel and take breaks when needed to stand up and move around. You can also place a small stool or overturned bucket under the sink to sit on.
Watch Out for Sharp Edges
The edges of pipes, brackets, and cut-outs in the cabinetry can be sharp. Be very careful when reaching around the back of the sink. Cover any sharp edges with towels or pipe insulation before starting.
contain the Mess
Place a bucket or pan under the sink to catch any water drips or parts you drop. Put down towels around the work area to wipe your hands and catch spills. Remove these when done to avoid water damage.
Turn the Water Back On Slowly
Once you’ve installed the new faucet, turn the water supply back on gradually. Check for any leaks before turning it on fully. Tighten any connections as needed. Run the water for a few minutes to clear any debris before using the faucet.
Following these tips will make removing and installing your kitchen faucet a safe, painless process. Take your time and be cautious, your back and fingers will thank you! If you run into any issues, don’t hesitate to call a plumber. Your safety is most important.
How to Turn Off the Water Supply to Your Kitchen Faucet
To remove your kitchen faucet, the first step is to turn off the water supply. Locate the shutoff valves under or near your sink. They’re usually red or blue handles that control the hot and cold water lines. Turn both valves clockwise until they stop cutting off the water.
Check that the water is off by turning on your faucet to ensure the flow has stopped. This is an important step—you don’t want any surprises when removing the faucet! Once the water is off, turn on the faucet again to drain the remaining water from the pipes.
Turning Off the Main Water Supply
If your shutoff valves are stuck or damaged, you’ll need to turn off the water at the main water supply to your home. The main shutoff valve is usually located where the water line enters your house, in the basement, garage, or near the water heater. Use a wrench to turn the valve clockwise to shut off the water.
Again, turn on several faucets around the house to drain the lines and ensure the water is completely off. Leaving a small trickle of water running from the faucet you’re working on will also help relieve pressure in the lines as you install the new faucet. Be very careful when turning the water back on to avoid damaging anything.
Now that the water is turned off, you’re ready to start removing your existing faucet. Place a towel or bucket under the faucet to catch any remaining water that may drip. Get your basin wrench and prepare to get turning! Take your time and be patient—removing a stuck faucet can sometimes require a bit of elbow grease. But with the proper tools and technique, you’ll have that old faucet out in no time and be ready to install your new, upgraded model.
Removing the Old Kitchen Faucet With a Basin Wrench
The basin wrench is designed specifically for tightening and loosening nuts in hard-to-reach places—like under a sink. To remove your old kitchen faucet, you’ll need to disconnect it from the water supply lines and unscrew it from the sink.
Locating the Faucet Connections
First, locate where the faucet attaches to the supply lines and sink. You’ll see two hot and cold water lines secured to the faucet base with mounting nuts. The faucet is also attached to the sink itself, typically with mounting nuts and washers on the underside of the sink deck.
Turning Off the Water Supply
Turn off the water supply to your kitchen by locating the shutoff valves under the sink. Turn the handles or nuts clockwise to close the valves. Then turn on the faucet to drain any remaining water from the lines.
Removing Supply Lines
Use the basin wrench to loosen the mounting nuts connecting the hot and cold water supply lines to the faucet. Disconnect and remove the supply lines. Be very careful, as any remaining water may spill out. Have towels handy to clean up drips and spills.
Unscrewing the Mounting Hardware
Finally, use the basin wrench to loosen the mounting nuts and washers securing the faucet to the sink. Have someone hold the faucet from above to keep it steady as you work. Once detached, lift out the old faucet. Clean the sink area in preparation for installing the new faucet.
Using a basin wrench is straightforward, but working in a confined space under a sink can be awkward. Take your time and be patient. Make sure to shut off the water supply and drain the lines first before disassembling anything. With some maneuvering, you’ll have the old faucet out and be ready to install a fresh new model. Keep towels nearby for any drips and your patience in hand for any unforeseen challenges! You’ve got this.
Installing the New Kitchen Faucet
Now that you have the old faucet removed, it’s time to install the new one. This may seem tricky, but by following a few simple steps, you’ll have your new faucet in place in no time.
Attach the water lines
Connect the hot and cold water lines to the appropriate hoses on the bottom of the new faucet. Hand-tighten the connections at first.
Mount the faucet
Place a bead of plumber’s putty around the base of the faucet according to the directions in the faucet packaging. Put the faucet into place in the sinkhole and press down firmly so it adheres. Wipe away any excess putty with a damp cloth.
Secure the faucet
Underneath the sink, slide the mounting nuts and washers onto the faucet tailpieces and hand-tighten them. Then, use your basin wrench or tongue-and-groove pliers to fully tighten the nuts, securing the faucet snugly in place. Be very careful not to overtighten, or you may damage the sink.
Connect the sprayer hose (if applicable)
If your new faucet includes a sprayer, connect the hose to the appropriate outlet on the faucet tailpiece. Hand-tighten the connection, then fully tighten it with pliers. Feed the hose down through the sink opening so the sprayer sits properly in the sink.
Turn the water back on
Turn the hot and cold water valves back on under the sink. Check all connections for any leaks and tighten them as needed. Run water through the new faucet for a few minutes to flush out any debris.
Test your work
Turn the new faucet on and off a few times to ensure proper hot/cold water flow and that all parts are functioning properly. Make any final tightening or adjustments needed. Congratulations, you now have a stylish new kitchen faucet installed! Be sure to turn the water supply back on under the sink. Your new faucet is ready to make your time in the kitchen more convenient and enjoyable.
Connecting the Water Supply Lines
Now that you have the basin wrench, it’s time to disconnect the water supply lines from the faucet. This is a crucial step, so make sure to give yourself plenty of time and patience.
Turn off the water supply to your kitchen sink by locating the shutoff valves under the sink. Usually, these are red or blue handles that turn clockwise to shut off the water. Turn them fully until they are tight to prevent any water from flowing.
Locate the hot and cold water lines running from the shutoff valves up to your faucet. These are typically flexible copper, PVC plastic, or braided stainless steel hoses. The hot water line will be on the left and cold on the right.
Get your adjustable basin wrench, which is designed specifically for tightening and loosening supply line nuts in awkward, cramped areas under sinks. Place the wrench end over one of the hexagonal supply line nuts. Make sure the jaws of the wrench are tight enough to grip the nut securely before turning.
While holding the supply line in place with one hand, turn the wrench counter-clockwise to loosen the nut. Loosen it several turns, then do the same for the other supply line nut. Once both nuts are loose, you may need to use pliers to unscrew them the rest of the way by hand.
Have towels, buckets, and rags ready, as there will be residual water in the lines. As you fully remove the nuts, aim the ends of the supply lines into your buckets to catch the water. Detach the lines from the faucet inlets and you’re ready to remove the faucet from the sink!
Be extremely careful not to strip the nuts or cross-thread the threads. Go slowly and steadily to avoid damage. With the water supply lines detached, you can now proceed to remove the retaining clips and lift your faucet out of the sink deck. Job well done! You’ve passed the most difficult step! Now the faucet removal and replacement will be a cinch.
Testing Your New Kitchen Faucet Installation FAQs
Once your old faucet is removed, it’s time to install the new one. This is usually pretty straightforward, but it’s a good idea to test it before calling the job done.
Connect the Water Supply Lines
Connect the hot and cold water supply lines to the correct hot and cold ports on the faucet base. Hand-tighten the connections, then tighten another quarter turn with pliers. Don’t overtighten, or you may damage the faucet.
Attach the Faucet
Place the faucet base over the sink holes or adapter plate and secure it in place with the mounting nuts. Hand-tighten the nuts, then tighten another quarter turn with pliers. Put the faucet handle or handles on and tighten the setscrew to secure.
Turn the Water Back On
Turn the water supply valves back on slowly. Check for any drips or leaks at the connections and tighten as needed. Run the water for a few minutes to flush out any debris.
Test Your New Faucet
Test that the hot and cold water are functioning properly and that the water pressure seems normal. Check that the sprayer or pull-down hose retracts and docks properly. Ensure any special features like separate spray functions work correctly.
Call a Plumber if Needed
If there are any issues with leaks, water pressure, or functions not working, it’s best to turn off the water and call a plumber to inspect and repair or replace as needed. It’s not worth risking water damage to your home or having a faulty faucet.
Conclusion
So there you have it. With a handy basin wrench and a little elbow grease, you can successfully remove and install your own kitchen faucet. Turn off the water supply, disconnect the hoses, and use the basin wrench to loosen the nuts holding the faucet in place. Once the old faucet is out, installing the new one is just a matter of reversing the steps. Tighten everything back up, turn the water back on, and you’ll be enjoying your upgraded kitchen sink in no time. Not only will you save money by doing this yourself, but you’ll also gain a new DIY skill and a sense of accomplishment. Your kitchen and wallet will thank you!
More kitchen Faucets recommendations
- Top 10 The Best Luxury Kitchen Faucets for Every Budget
- What Is the Highest GPM Kitchen Faucet? Meet the Moen Arbor
- Best Gold Kitchen Faucets of 2023: Top 5 Picks for a Luxurious Look
- Waypoint Cabinets vs KraftMaid: Which is the Better Choice?
- American Woodmark Cabinets: Real Customer Reviews
- Midea Appliances Reviews: What Customers Are Saying
- The Best High-End Kitchen Faucets for Every Budget
- Allen and Roth Kitchen Faucet With LED Light:
- How to install a Moen Kitchen Faucet With Sprayer
- How to Install a Kohler Kitchen Faucet: A DIY Tutorial