We may earn money or products from the companies mentioned in this post.

You’ve bought a shiny new kitchen faucet and now you’re ready to install it. Seems pretty straightforward, right? Connecting a kitchen faucet is actually easier than you might think. In this guide, we’ll walk you through the steps to remove your old faucet and install the new one in no time. We’ll also discuss some of the common mistakes people make when connecting kitchen faucets and how to avoid them. So whether you’re a beginner or a seasoned pro, read on to learn how to connect your kitchen faucet! By the end of this, you’ll be turning on the water and marveling at your handiwork. Let’s get started!
Preparing for Kitchen Faucet Installation
Connecting a new kitchen faucet is a DIY project many homeowners take on themselves. Before you get started, there are a few things you’ll want to prepare to ensure it’s a smooth process.
First, gather all the necessary tools and parts. You’ll need adjustable pliers or a basin wrench to loosen the old faucet fittings, as well as a towel to clean up any water drips. Make sure you have the new faucet, supply lines, and mounting hardware on hand.
Next, turn off the water supply to avoid flooding your kitchen. Locate the shutoff valves under or near the sink and turn them clockwise to close them. Then turn on the faucet to drain any remaining water from the lines.
Positioning the New Faucet
Decide where you want to place the new faucet before installing it. Hold it up to the sinkholes or countertop to get an idea of how it will look in different positions. You may need to drill additional holes in the countertop or use an escutcheon plate to cover extra holes. Mark the chosen position to guide you during installation.
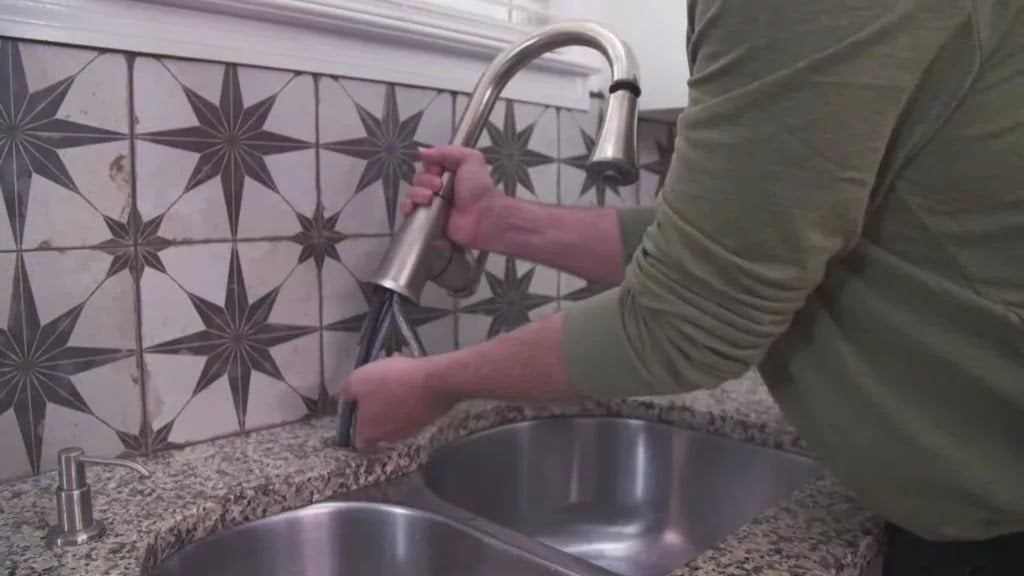
With the prep work done and the new faucet positioned, you’re ready to get your hands dirty. Remove the old faucet supply lines and mounting hardware, then thoroughly clean the sink surface. Connect the water supply lines to the faucet, feed them through the sink holes, and secure the faucet in place.
Turn the water back on and check for any leaks. Tighten any connections as needed. Once everything looks good, you can turn on your new faucet and enjoy! Take your time and follow these tips, and you’ll be washing dishes in no time with your newly installed kitchen faucet.
Turning Off Water Supply Lines
The first step is to locate the main water supply valves under or near your kitchen sink and turn them clockwise to shut off the water. For most homes, you’ll have hot and cold water valves—be sure to turn off both.
Once the water is off, check to make sure the faucet you’re replacing isn’t still dripping. If it is, tighten the valves a bit more. It’s best to give the water about 5-10 minutes to fully drain from the faucet supply lines before starting the installation. This will minimize mess and ensure the lines are empty.
Common Mistakes to Avoid
A lot of DIYers make the mistake of not turning off the water supply before starting. This can lead to water damage, flooding, and a much bigger headache than is necessary. So double-check that those valves are tightly closed!
Another common error is not draining the supply lines for long enough. Even if no water is dripping from the faucet, there’s still water in those lines that will come pouring out as soon as you loosen the connections. Give it enough time to fully drain to avoid getting soaked.
Once you’ve avoided those pitfalls, connecting your new faucet should be fairly straightforward. But if at any point you feel overwhelmed or aren’t comfortable doing it yourself, don’t hesitate to call a plumber. It’s always better to be safe than end up with costly water damage repairs down the road. Your kitchen faucet is an important fixture, so take your time and do it right the first time.
Removing the Old Faucet
Removing the old faucet is often the trickiest part of the whole process. But with some patience and the right tools, you’ll have that old faucet out in no time.
Turn off the water supply
The first step is to locate the shutoff valves under or near the sink and turn off the hot and cold water supplies. As an extra precaution, turn on the faucet to release any built-up pressure before starting.
Disconnect the water lines
Next, disconnect the hot and cold water lines from the faucet. You may need an adjustable wrench or pliers to unscrew the coupling nuts that connect the water lines to the faucet tailpieces. Place a bucket underneath to catch any remaining water in the lines.
Remove mounting hardware
Now you’ll need to remove the mounting hardware that secures the faucet to the sink. This typically includes nuts and washers on the underside of the sink that hold the faucet in place. You may need to remove trim pieces to access them. Remove these mounting nuts with a basin wrench or locking pliers.
Pull out the old faucet
With everything disconnected, you should now be able to lift out the old faucet. Give the area a wipe-down after removing the faucet. You want a clean surface for installing the new faucet.
Avoid common mistakes
Two of the biggest mistakes people make are 1) not turning off the water supply which can lead to flooding, and 2) using too much force which can damage your sink or countertop. Take things slow and be patient. It’s also a good idea to place a towel in the sink to prevent dropped tools and parts from scratching the sink surface.
By following these steps carefully and avoiding common mistakes, you’ll have that old kitchen faucet removed in no time. Now you’re ready to install your new faucet and really get things flowing in the kitchen again!
Connecting the New Kitchen Faucet
Now that you have the necessary tools and parts, it’s time to connect your new kitchen faucet! This final step will have your sink back up and running in no time.
Connecting the Supply Lines
The first thing you need to do is connect the hot and cold supply lines to the faucet. Hand-tighten the lines to the correct hot and cold ports underneath the faucet base. Then tighten the lines with a wrench, being careful not to overtighten.
Next, connect the other end of the supply lines to your water shutoff valves. Again, hand-tighten first and then tighten with a wrench. Turn your water back on slowly and check for any leaks. If there are leaks present, turn the water off and tighten the connections.
Once the connections are secure and watertight, turn the water on fully and test your new faucet to ensure proper hot and cold water flow. Congratulations, your kitchen faucet is now connected!
Common Mistakes to Avoid
Some common mistakes people make when connecting a new kitchen faucet include:
- Not turning off the water supply before starting. This can lead to water damage and frustration.
- Not checking for leaks. Even a small drip can turn into a big problem over time. Double-check all connections for any signs of water.
- Overtightening the supply lines. It’s easy to get overzealous, but overtightening can actually damage the faucet or supply lines. Hand-tighten, then use a wrench to snug the lines up.
- Not testing the faucet before finishing the installation. Turn on the hot and cold water to ensure proper flow and temperature. It’s much easier to fix any issues before putting the finishing touches on your work.
By following the proper steps and avoiding these common mistakes, connecting your kitchen faucet can be an easy DIY task. However, if at any point you feel overwhelmed or concerned, don’t hesitate to contact a licensed plumber. Your kitchen faucet is an important fixture, so take your time and do it right.
Turning the Water Back on and Checking for Leaks
With the old faucet removed and the new one in place, it’s time to turn the water back on and check for any leaks. This final step is critical to ensuring your new kitchen faucet is installed properly and ready to use.
Turn the water supply valves back on
Locate the hot and cold water supply valves under your sink and slowly turn them back on. Do this one at a time, checking connections as you go for any signs of dripping or spraying water. If everything looks dry, turn the faucet on to test.
Check connections
Run the hot and cold water for a minute each, closely examining the faucet base, water supply lines, and connections for leaks or drips. Tighten any nuts or connections as needed. It’s best to do this before the faucet handle is attached, so you have full access. Have towels ready in case of leaks or drips.
Test the new faucet
Once the connections have been checked, you can attach the handle or handles to your new faucet and turn it on to ensure proper flow and temperature. Run the hot and cold water, checking that the water temperature is appropriate and the pressure seems normal. If anything seems off, turn off the water supply valves right away.
Tighten and recheck
After running the new faucet for a few minutes, tighten all connections again. Even if there were no initial leaks, connections can come loose over time. It’s best to check and re-tighten everything before the first use. Repeat the leak check one more time to ensure there are no drips or drops coming from any part of the new faucet or connections.
Your new kitchen faucet should now be fully installed and functioning properly. Turn it on and off a few more times to ensure everything is working as expected before using your kitchen sink as normal. If leaks or other issues come up down the road, refer to your product manual or contact a plumber for help troubleshooting and making repairs. With regular use and maintenance, your new kitchen faucet should provide you with years of hassle-free operation.
Conclusion
You’ve made it this far in the process, so you’re clearly up for the challenge of connecting your new kitchen faucet. With some patience and by following each step carefully, you’ll have your faucet installed and working in no time. Once complete, turn on the water supply and check for any leaks. If all looks good, turn on your faucet and enjoy your handiwork! Connecting a kitchen faucet may seem intimidating, but by taking it slow and avoiding the common mistakes, you’ve got this. Before you know it, you’ll be on to your next DIY plumbing project. If you do run into any issues, don’t hesitate to call in a professional. Your kitchen will thank you for the upgrade.
More kitchen Faucets recommendations
- Top 10 The Best Luxury Kitchen Faucets for Every Budget
- What Is the Highest GPM Kitchen Faucet? Meet the Moen Arbor
- Best Gold Kitchen Faucets of 2023: Top 5 Picks for a Luxurious Look
- Waypoint Cabinets vs KraftMaid: Which is the Better Choice?
- American Woodmark Cabinets: Real Customer Reviews
- Midea Appliances Reviews: What Customers Are Saying
- The Best High-End Kitchen Faucets for Every Budget
- Allen and Roth Kitchen Faucet With LED Light:
- How to install a Moen Kitchen Faucet With Sprayer
- How to Install a Kohler Kitchen Faucet: A DIY Tutorial