We may earn money or products from the companies mentioned in this post.
Easily repair or replace your Delta Single Handle Kitchen Faucet Cartridge with our expert guide and find the right cartridge for your model.
You’ve noticed your Delta kitchen faucet leaking and dripping recently, haven’t you? The culprit is usually a worn-out cartridge inside the faucet that controls the water flow. Don’t worry, replacing or repairing the cartridge yourself is actually pretty easy and will have your faucet working like new again in no time. We’ve got a step-by-step guide to walk you through identifying your exact Delta faucet model and cartridge, how to turn off the water supply, remove the old cartridge, install the new replacement cartridge, and get your faucet handle working properly again. Before you know it, you’ll be back to enjoying a leak-free kitchen sink. Read on to get started – you’ve got this!
Identifying Your Delta Single Handle Kitchen Faucet Model
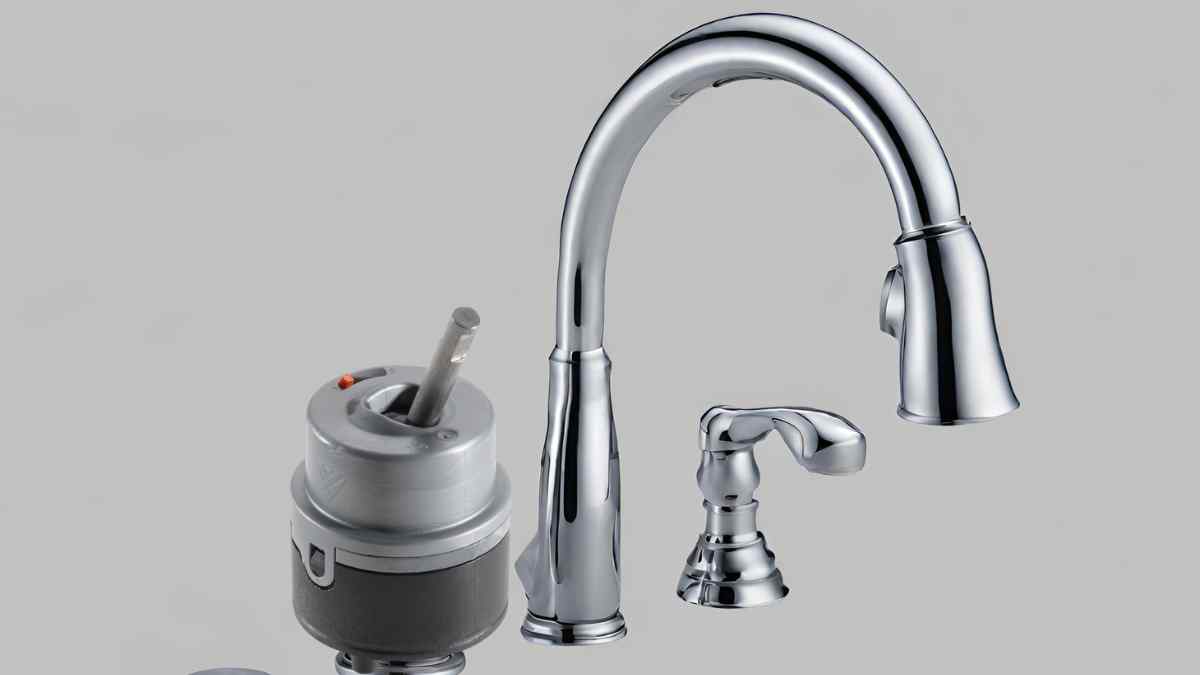
To repair or replace your Delta single handle kitchen faucet cartridge, you first need to determine your specific faucet model. The model number can usually be found on the faucet itself or in your original paperwork. If not, you may be able to identify your model visually. Common Delta models include the Foundations, Lahara, and Leland series.
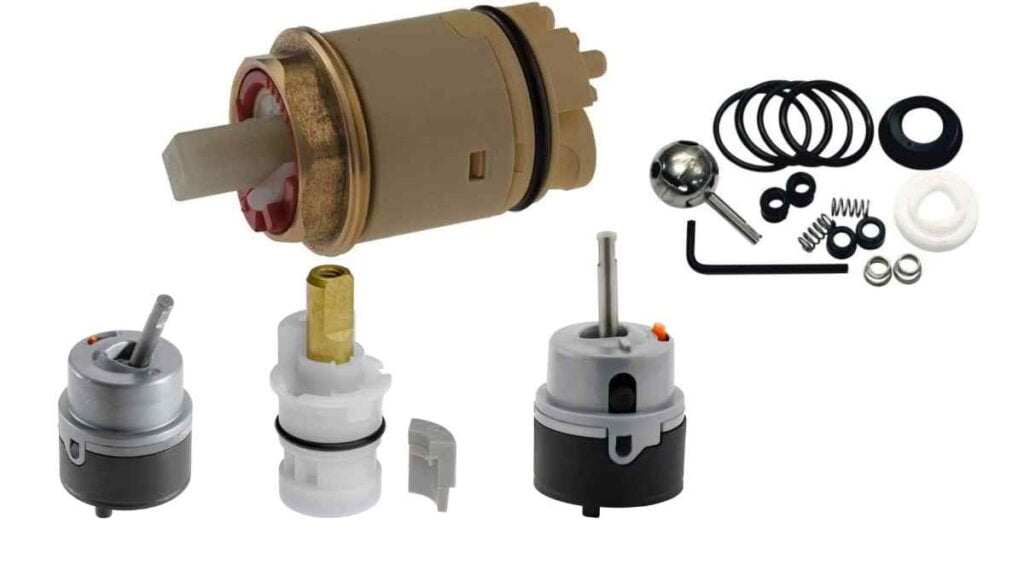
Once you’ve determined your model, find the corresponding cartridge. The most common types are the Delta Faucet 1300 and 1400 series cartridges, which are non-ceramic. Make sure to buy an exact replacement to ensure proper fit and performance. You can find genuine Delta cartridges on the company’s website or at most major hardware stores.
When your new cartridge arrives, turn off the water supply under the sink and place a bucket below the faucet to catch any remaining water. Next, pry off the decorative cap on the handle, then remove the retaining clip or retainer nut inside to free the cartridge. ###Cartridge Removal
Carefully pull out the old cartridge with pliers. Make sure all parts are intact and clear the water lines of any debris before inserting the new cartridge. Then simply slide in the replacement cartridge, replace all the parts in reverse order, and turn the water back on. Test your faucet to ensure proper flow and temperature before using it.
With a little time and patience, you’ll have your Delta kitchen faucet working like new again in no time. Replacing a faulty cartridge is an easy fix that can save the cost and hassle of replacing the entire faucet. Let us know if you have any other questions!
How to Remove the Old Cartridge From Your Faucet
To remove your old cartridge, you’ll first need to turn off the water supply to your faucet. Locate the shutoff valves under the sink and turn them clockwise to close them. Now turn on the faucet to drain any remaining water from the lines.
How to Remove the Cartridge
Next, you’ll want to pry off the decorative cap on your faucet handle to access the retaining clip or retaining nut holding the cartridge in place. Use a flathead screwdriver to gently pry off the cap. Be careful not to scratch the faucet finish.
- Once the cap is off, you may need to remove a retaining clip to release the cartridge. Use pliers to pull out the clip. If there’s a retaining nut instead, turn it counterclockwise with an adjustable wrench to loosen and remove it.
- Now slowly pull the old cartridge straight up and out. It may take some wiggling to fully extract it. Have a rag handy to wipe up any excess water in the faucet body.
- Finally, check that the new cartridge is the correct replacement part for your specific Delta faucet model. Match up the cartridge number to ensure it’s compatible before installing it into your faucet.
With the new cartridge in hand and your faucet fully prepped, you’re ready to install the replacement cartridge and get your faucet working as well as new. Take it slow and be patient – you’ll have your kitchen faucet fixed in no time!
Choosing the Right Replacement Cartridge
To get your Delta faucet flowing again, you’ll need to purchase the correct replacement cartridge for your specific faucet model. Delta uses a few different cartridge styles, so finding the right one is key.
Locate Your Faucet Model Number
The model number is usually located on the underside of the spout, on the back of the faucet base, or in your original paperwork. It will be a series of letters and numbers like RP12345. Write this number down so you have it handy when searching for your replacement cartridge.
Choose Cartridge Type
The three most common types used in Delta faucets are the RP19804, RP40194, and RP50374. The RP19804 is a basic cartridge for some older, non-washer faucets. The RP40194, also known as the “Delta Classic” cartridge, fits many single-handle Delta faucets from after 1994. The RP50374 is a more modern cartridge used in many current Delta faucets.
Check your specific model number to determine which cartridge type you need. You may have to do an online search for your faucet model to find a parts breakdown or call Delta customer service. It’s best to have the cartridge type and part number confirmed before purchasing to ensure you get the correct replacement.
Buy Genuine Delta Parts
For the best performance and to maintain your Delta faucet warranty, purchase genuine Delta replacement cartridges. Aftermarket or generic cartridges may not fit properly and can lead to leaks or other issues down the road. Genuine Delta cartridges can be purchased from many local hardware stores, home improvement centers, or plumbing supply retailers that carry Delta products. You can also buy them directly from Delta’s website.
Following these steps carefully will ensure you get the proper replacement cartridge for your Delta single-handle kitchen faucet. With the correct cartridge in hand and a few basic tools, you’ll have your faucet fixed and flowing in no time. Let us know if you have any other questions!
Installing the New Delta Cartridge
To install a new Delta cartridge in your single handle kitchen faucet, you’ll need to shut off the water supply, remove the old cartridge, and put in the replacement cartridge. Let’s go through the necessary steps:
Shut Off the Water
Locate the shutoff valves under or near your sink and turn them clockwise to cut off the water. This will prevent water from flowing out when you remove the old cartridge.
Remove the Old Cartridge
Use a screwdriver or wrench to loosen the retaining clip or retainer nut that holds the old cartridge in place. Pull out the cartridge, making note of its orientation for reinstalling the new one. You may need to use pliers to get a good grip. Have towels ready to catch any remaining water in the lines.
Check for Debris
Inspect the faucet body for any scale, mineral buildup, or debris before installing the new cartridge. Use a toothbrush or scrubber to clean the area. Rinse well with water to remove any remaining particles to ensure the new cartridge seats properly.
Install the Replacement Cartridge
Line up the new cartridge in the same orientation as the old one. Press firmly until it clicks into place. Hand-tighten the retaining clip or retainer nut.
Turn the Water Back On
Turn the shutoff valves back counterclockwise to restore water flow. Check for any leaks around the new cartridge before using your faucet. Tighten or reseat as needed.
Test Your Faucet
Turn your faucet on to ensure proper temperature and pressure control. The new cartridge should provide smooth handle operation and balanced water flow. If issues continue, the cartridge may be defective or the incorrect model for your faucet. Double-check your faucet details and cartridge specs.
Following these steps carefully and taking your time will allow you to successfully repair or replace the cartridge in your Delta single handle kitchen faucet. Be sure to turn off the water supply and have plenty of towels on hand. A little DIY plumbing knowledge and the right replacement part are all most homeowners need to fix a faulty faucet cartridge. Let us know if you have any other questions!
Troubleshooting Cartridge Problems in Delta Faucets
If your Delta single-handle kitchen faucet is leaking or not functioning properly, the cartridge is typically the culprit. The cartridge controls the water flow and temperature in your faucet. Over time, parts can become worn or damaged leading to drips, decreased water pressure, or difficulty controlling the water temperature.
Before replacing the cartridge, try troubleshooting to determine the exact issue. Turn off the water supply lines under the sink and turn on the faucet to drain any remaining water. Next, check for any visible damage or wear to the cartridge. You may need to disassemble your faucet to access it. If the cartridge looks overly worn, go ahead and replace it.
Common Cartridge Issues
- Leaking from the base of the faucet or around the cartridge: The seals or cartridges are worn or damaged, allowing water to seep out. Replace the cartridge.
- Water temperature is difficult to regulate or goes from hot to cold: The cartridge isn’t properly controlling the mix of hot and cold water. Install a new cartridge.
- Low water flow from the faucet: Sediment buildup or debris caught in the cartridge can restrict water flow. Try cleaning the cartridge or just replace it.
- The faucet handle is loose or won’t stay in place: The cartridge or handle mechanism is worn out. Replace the cartridge to restore full function.
Once you’ve diagnosed the issue, find your faucet model number located on the underside of the spout or handle, or in your owner’s manual. Purchase a genuine Delta replacement cartridge, available on Delta’s website or at most home improvement stores. Follow the directions to remove your old cartridge and install the new one. Turn the water back on and test your faucet to ensure full, leak-free function has been restored before using.
With some basic troubleshooting and the right replacement cartridge, you can easily solve most issues with your Delta single-handle kitchen faucet. Take your time and be sure to make note of how components fit together during disassembly so reinstallation goes smoothly. In no time you’ll be back to enjoying your fully functioning faucet.
Conclusion
That’s all there is to it: all the information you need to restore the free flow of your Delta single handle kitchen tap. Now that you know how to handle it yourself, you may avoid paying for costly plumber call-outs when cleaning or replacing the cartridge. You’ve got detailed instructions, links to purchase the appropriate cartridge for your model, and how-to videos to help you through it. Why do you wait? Turn off the water supply, grab the wrench, and go to work. You’ll be able to enjoy a fully functional kitchen tap again very soon. You’ve got this; go ahead and give yourself a pat on the back! You deserve to take a coffee break; it’s time.
More Delta kitchen Faucets recommendations
- Delta Cassidy Kitchen Faucet: Elegance Meets Functionality
- Delta vs Moen Kitchen Faucets: Which Brand Is Right for You?
- Delta Recertified Faucets: Save Money and Get Top Quality
- Top 5 Best Delta Black Friday Kitchen Faucet Sale: Don’t Miss Out on the Savings!
- Moen vs Delta Kitchen Faucets: Which Brand Is Right for You?
- Delta Pull-Down High Arc Single Handle Kitchen Faucet
- 5 Best Delta Recertified Kitchen Faucets: High Quality, Great Prices
- Delta Single Handle Kitchen Faucet Cartridge Replacement
- Delta 4 Hole Kitchen Faucet: Find the Perfect One for Your Kitchen
- Delta Black Kitchen Faucet: Style and Function for Your Kitchen

