We may earn money or products from the companies mentioned in this post.
Transform your Grey Painted Kitchen Cabinets Before And After. Discover the magic of a fresh coat of paint as we showcase the incredible makeover journey from outdated to modern elegance. Elevate your space and get inspired by our grey painted kitchen cabinets transformations.
You know that moment when you walk into your kitchen and just sigh at how drab and uninspiring the space has become? The cabinets that were once a stylish gray have faded and chipped over time, making your kitchen feel dated and dull. But don’t despair – a fresh coat of paint is all it takes to revive those tired cabinets and transform your kitchen into a modern and elegant space.
In this post, we’ll show you just how easy it can be to take your gray painted kitchen cabinets from outdated to outstanding. With some sanding, priming, and a few coats of chic new gray paint, you’ll elevate your kitchen and fall in love with this space all over again. Get ready to be wowed by some truly amazing before and after pictures, and find all the inspiration and tips you need to create a kitchen makeover of your own. The potential is endless, and it all starts with a simple can of gray paint!
The Allure of Gray: Why Gray Kitchen Cabinets Are So Popular
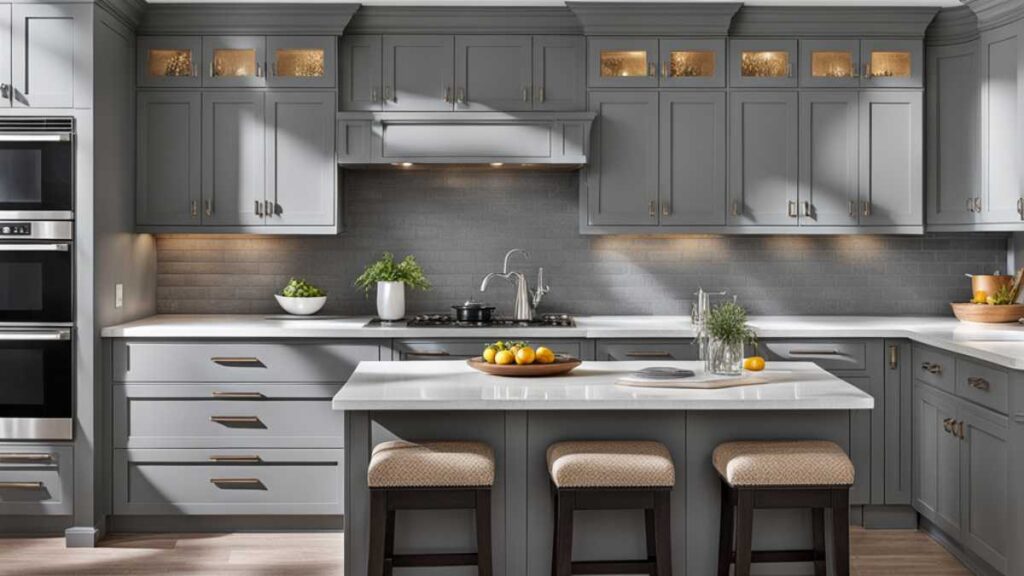
The allure of gray painted kitchen cabinets is undeniable. Gray is a versatile neutral that pairs well with almost any color. Whether you opt for charcoal, slate, or dove, gray cabinets help create a stylish space that’s both warm and modern.
Timeless Style
Gray kitchen cabinets offer a timeless style that won’t fade with trends. Unlike very dark or very light cabinets, gray tones strike a balance that maintains a contemporary yet classic feel. Gray kitchen cabinets blend nicely with almost any décor and ensure your space won’t look outdated for years to come.
Contrast and Depth
Gray cabinets provide a subtle contrast that adds depth to a kitchen. When paired with white or off-white walls, gray cabinets stand out while still feeling bright and open. They also create dimension when combined with wood or stone countertops. The variety of gray hues means you can choose a shade darker or lighter than your countertops and backsplash to achieve your desired level of contrast.
Flexibility and Cohesion
Perhaps the best part about gray kitchen cabinets is their flexibility. You can pair them with a rainbow of accent colors for a fun, eclectic look or keep things simple with neutral accents. Gray also works well as a cohesive base that ties together mixed metals and various wood tones. Whether your style is modern farmhouse, contemporary, or transitional, gray kitchen cabinets unite diverse elements into a cohesive whole.
With endless options for accenting and accessorizing, it’s easy to see why gray kitchen cabinets reign supreme. For a stylish kitchen makeover, you simply can’t go wrong with gray.
Planning Your Gray Kitchen Cabinet Makeover
So you’re ready to give your outdated kitchen cabinets a modern makeover with gray paint. Excellent choice! Gray is a timeless neutral that pairs well with any decor. To ensure a successful DIY cabinet painting project, there are a few important things to consider first.
Supplies
You’ll want high-quality primer, paint, brushes, and rollers designed specifically for cabinets. For primer, use a stain-blocking latex or oil-based formula. For the top coat, choose a satin or semi-gloss cabinet and trim paint in your desired gray shade. Don’t forget painter’s tape, sandpaper, tack cloths, paint trays and more.
Prep work
Clean cabinets thoroughly, then lightly sand to rough up the surface. Wipe away dust with a tack cloth. Apply 2-3 coats of primer, waiting 2 hours between coats. Once dry, lightly sand again and wipe clean.
Paint application
When painting doors and frames, use angled brushes to get into corners and grooves. For flat surfaces, use short-nap rollers. Work in sections, applying 2-3 coats of your gray paint and waiting 2-3 hours between coats. Remove hardware, tape off adjacent walls, and lay down drop cloths to protect floors.
Finishing touches
Reinstall the hardware and you’re done! Your newly gray kitchen cabinets will transform the entire space. Admire your gorgeous work and be proud of the money you saved by DIYing it! With some planning and patience, you’ve achieved a high-end custom look for a fraction of the cost. Enjoy your refreshed kitchen – you deserve it!
Prepping and Priming Your Cabinets for Painting
Prepping your cabinets is the most important step for achieving a smooth finish. Taking your time with this process will ensure professional-looking results.
Cleaning
Give your cabinets a deep clean before painting. Wipe down all surfaces with a degreaser like TSP to remove built-up grease and grime. Scrub any particularly dirty areas. Rinse well with water and let dry completely. This will help the new paint properly adhere.
Light Sanding
Lightly sand your cabinets to rough up the surface. This gives the new paint “tooth” to grip onto. Use fine-grit sandpaper (around 220 grit) and sand in small circles. Wipe away dust with a tack cloth.
Patching Imperfections
Inspect your cabinets closely and patch any holes, dents, or cracks. Use wood filler that matches your cabinet color. Let the filler dry as directed, then sand flush with the surface. Prime any bare wood patches.
Priming
For the most professional results, apply a coat of primer. Primer helps provide an even base coat and allows you to use fewer coats of paint. Use a primer specifically for kitchen cabinets—an enamel undercoat primer works well. Apply with a brush to get into corners and then roll on with a small foam roller. Let the primer dry as directed by the product instructions.
Hardware Removal
Remove all hardware including knobs, pulls, and hinges. Use a screwdriver or drill to remove screws. Place hardware in labeled bags so you know where each piece goes. Fill any holes left behind with wood filler and let dry.
By properly preparing your cabinets before painting, you’ll achieve a smooth, professional-quality finish. Taking the time to clean, lightly sand, patch imperfections, and apply a coat of primer will result in cabinets you’ll love for years to come. With some elbow grease and patience, you’ll be well on your way to a stunning kitchen makeover.
Choosing the Perfect Gray Paint Color

Choosing the perfect gray paint color for your kitchen cabinets can be tricky. There are so many shades of gray to choose from, ranging from light dove gray to charcoal. The key is to find a gray that complements your existing decor and the overall style you want for your kitchen.
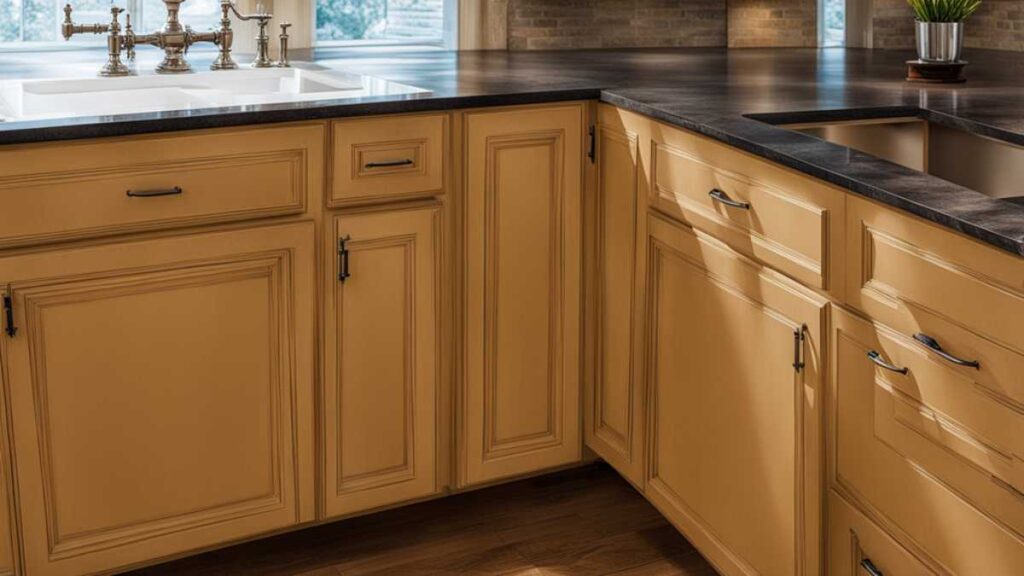
A warm, cozy gray like fog or ash works well for a casual country kitchen. These soft grays pair nicely with wood accents and a rustic vibe. For a sleek contemporary space, consider a medium slate gray or pewter. Deep charcoals and graphites create a dramatic, moody look great for industrial styles.
Think about the undertones in the gray. Grays with blue undertones tend to look more cool and steely, while grays with brown undertones appear warmer. Choosing a gray with the wrong undertones can make your kitchen feel unbalanced. The lighting in your kitchen also affects how gray will look. Grays may appear lighter in well-lit kitchens and darker in kitchens with less natural light.
:
Consider doing some test swatches of your top gray choices on your cabinets to see how they look in your actual kitchen lighting and next to any existing decor. This allows you to compare the grays side by side to determine which is the perfect complement to your space.
Once you’ve selected your ideal shade of gray, you’ll want to use the same color for the walls, trim, and ceilings in your kitchen to create a cohesive look. For the cabinets themselves, use a high-quality primer followed by at least two coats of gray paint for even coverage and a professional finish.
With so many gorgeous grays to pick from, you can’t go wrong. Take your time exploring options and you’ll find the perfect gray to transform your kitchen into a stylish and modern space you’ll love.
Painting Techniques and Tips for Gray Kitchen Cabinets
Painting your kitchen cabinets is a big project, but the results can be stunning. To get professional-looking results, follow these techniques and tips for gray kitchen cabinets:
Clean and Lightly Sand
Wipe down your cabinets to remove grease and grime. Then lightly sand them to rough up the surface so the new paint has something to grip onto. Wipe away dust with a tack cloth.
Prime
For the best results, apply a primer designed for kitchen cabinets. An oil-based primer works well for wood cabinets. Let it dry as directed. Primer helps the paint adhere better and provides an even base coat.
Choose Your Paint
Select a high-quality cabinet paint in your desired shade of gray. For most projects, latex or acrylic paint works great. Get samples of grays you like and see how they look in your space. A medium gray is versatile and pairs well with most decor styles.
Paint the Doors First
Remove cabinet doors and hardware and paint them separately. This allows you to get into all the grooves and edges and results in an ultra-smooth finish. It’s also easier than painting them while they’re still attached to the cabinets.
Use a Paint Sprayer
For the best finish, use an HVLP paint sprayer to apply the primer and paint. Spraying provides an even, professional coat and allows you to get into nooks and crannies. Apply several thin coats, letting each dry as directed. Use a brush to paint corners and details.
Protect Floors and Walls
Lay drop cloths, tape off adjacent walls, and consider removing items from drawers before starting. Overspray can ruin floors and require touch-ups on walls. Protect everything within a few feet of the cabinets.
Re-hang Doors and Hardware
Once the paint is dry, reattach the cabinet doors and hardware. Touch up any spots needed, then apply a clear topcoat like polyurethane for protection. Your gorgeous gray kitchen cabinets are now complete! With some patience and the right techniques, you can achieve a high-end customized look.
Updating Hardware and Accents for a Cohesive Look
Updating the hardware and accents in your kitchen is one of the easiest ways to give your space a cohesive new look after painting the cabinets. Replace dated knobs, pulls, hinges, and more for an instant refresh.
Cabinet Hardware
Swapping out old knobs and pulling for new ones is a quick update that makes a big impact. Choose hardware that complements your new cabinet color for a cohesive look. Satin or matte nickel and black pulls pair well with gray cabinets. Look for simple and streamlined styles for a modern touch.
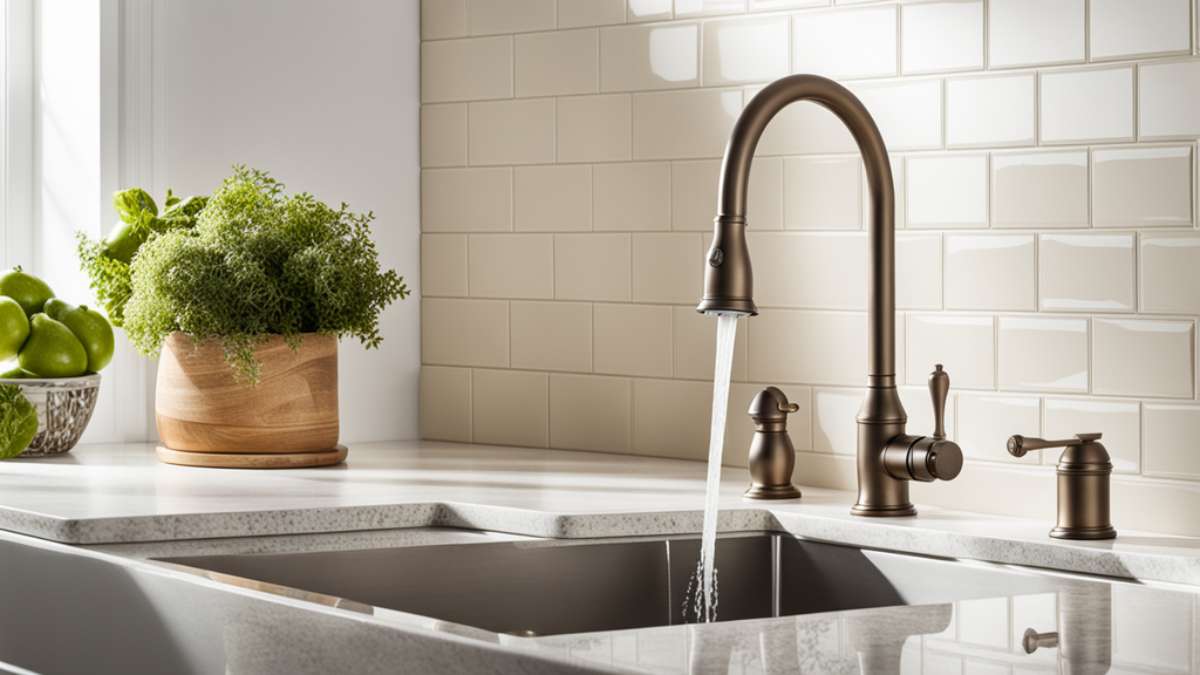
Faucets
An outdated or mismatched faucet clashes with your updated space. Replace old faucets with a stylish new one made of brushed nickel, chrome, or stainless steel. Single-handle pull-down faucets are convenient and pair nicely with contemporary kitchens.
Lighting
New lighting fixtures illuminate your kitchen in an entirely new way. Add pendant lights over an island or peninsula and flush mount or semi-flush fixtures over sinks and counters. Choosing fixtures with a brushed silver, nickel or black finish ties them in with your hardware and fixtures for a cohesive style.
Backsplash
A backsplash is the perfect accent for your newly painted cabinets. Subway tile, stone, concrete, or wood are all stylish options. Keep the backsplash neutral or choose a shade slightly darker than your cabinet color for contrast. Extending the backsplash to the ceiling makes a bold statement in an open-concept space.
Flooring
Outdated flooring ruins the look of your updated kitchen. Vinyl, laminate, tile, stone, and wood are all durable options for kitchens. Choose a flooring material and color that complements your cabinet color and style. Dark wood or tile pair nicely with light gray cabinets while light wood or stone suit dark gray cabinets.
Updating the accents and hardware in your kitchen helps complete the transformation from drab to fab. Making small changes creates a huge impact and leaves you with a space that finally reflects your personal style. With some TLC, your outdated kitchen becomes a stylish and inviting space for making memories.
Clever Storage Solutions for Gray Kitchen Cabinets
When designing your gray kitchen cabinets, clever storage solutions are key. The smart organization helps keep your space tidy and functional. Here are a few ideas to get you started:
Pull-Out Drawers
Install pull-out drawers, especially in base cabinets. They make everything inside easily accessible and help prevent items from getting lost in the back of the cabinet. Use them for pots and pans, utensils, canned goods, and more.
Lazy Susans
Add lazy Susans to corner cabinets to utilize space that is typically hard to reach. They spin for convenient access to everything placed on them. Use them for spices, dried goods, or dishes.
Drawer Dividers
Add drawer dividers to neatly sort and separate items. Use them in utensils, cutlery, and junk drawers to keep everything in its place. Dividers come in a variety of materials like bamboo, stainless steel, and acrylic.
Pull-Out Pantry
Install a pull-out pantry or cabinet organizer to keep food items organized and within sight. Pull-out pantries roll out and often have shelves for snacks, cans, boxes, and other pantry staples. They make it easy to see everything at a glance.
Under-Cabinet Lighting
Add under-cabinet lighting, especially over work areas like sinks, stovetops, and counters. The extra illumination makes tasks easier and helps when looking for items in cabinets. LED strip lights or puck lights are easy to install and discreet.
Cabinet Door Storage
Use the inside of cabinet doors for extra storage. Install racks, baskets, or bins to hold items like cutting boards, kitchen tools, towels, or pot lids. This frees up drawer and cabinet space for other items.
With some simple organizing tools and storage solutions, you can transform your gray kitchen cabinets into a highly functional and clutter-free zone. Keeping everything in its place will make cooking and cleaning a breeze. Your newly organized space will inspire you to create delicious meals and lasting memories.
Styling Your New Gray Kitchen Cabinets
Now that you have your dream gray kitchen cabinets, it’s time to style them and complete the look. Here are some tips to make your new space shine:
Add accent lighting
Install under-cabinet lighting or pendant lights over the island to brighten up your gray kitchen cabinets. The extra illumination will make the space feel more open and airy. Task lighting, like LED strip lights, also helps when prepping and cooking meals.
Include decorative hardware
Swap out basic knobs and pulls for stylish hardware in a contrasting metallic finish like brass, copper, or black. This small change can make a huge impact on a gray kitchen. Look for hardware with interesting shapes, textures, or patterns to elevate the style.
Use decorative accessories
Incorporate touches of color and texture with accessories like colorful serveware, patterned linens, decorative trays, and bowls of fresh produce or flowers. Add a runner or rug in front of the sink and stove for comfort underfoot. Framed art, chopping boards, and cookbooks also make great decorative accents for gray kitchen cabinets.
Contrast with countertops
Choose countertops in a complementary color to your gray cabinets like white quartz or marble for a crisp, clean look. Warm wood butcher blocks or concrete counters create an industrial vibe. For extra drama, select a countertop in a bold hue such as emerald green. The contrast will make your gray kitchen cabinets pop.
Open shelving
Open shelving is a perfect partner for gray kitchen cabinets. It keeps the space feeling airy and prevents the gray from feeling dark or closed in. Use open shelving for frequently used dishes, glasses, and pantry staples. Style the shelves with baskets, books, and greenery for a stylish yet functional design. Leaving some cabinets without doors also achieves an open, casual look.
With some thoughtful styling, your gorgeous new gray kitchen cabinets will become the stunning centerpiece of your home. Enjoy your transformed space!
Stunning Gray Kitchen Cabinet Transformations Before and After
A fresh coat of gray paint can work wonders on outdated kitchen cabinets. Check out these stunning before and after photos of gray kitchen cabinet makeovers. The transformations are truly inspiring.
Before: Dark, Dated Cabinets
The before photos feature dark, dated cabinets that make the space feel small and dreary. The wood tones and cabinet pulls are reminiscent of the 1990s and no longer match the homeowner’s style.
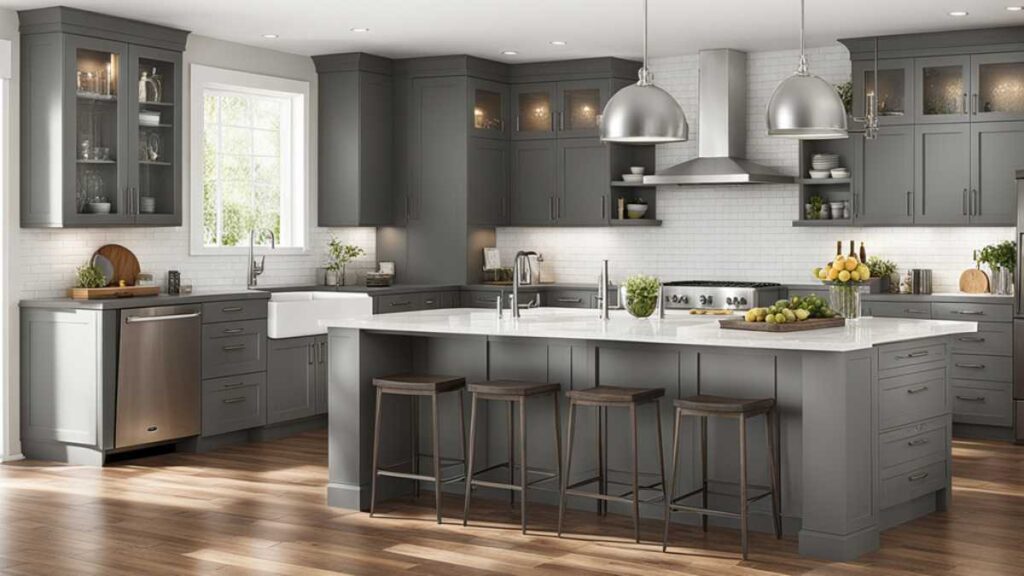
After: Light, Bright and Airy
In the after photos, the gray-painted cabinets completely transform the space. The light, airy shade of gray opens up the room and makes it appear more spacious. The new hardware in a brushed nickel finish gives the cabinets a modern, sleek look. The gray cabinets also pair beautifully with the white countertops and backsplash.
Before: Cherry Cabinets Showing Their Age
Another kitchen featured dark cherry cabinets that had seen better days. While wood cabinets can be beautiful, these particular cabinets make the space feel dark and dated. The homeowners were ready for a change.
After: Stylish Gray Shaker Cabinets
The homeowners opted to paint the cabinets a chic gray shade and replace the doors with Shaker-style doors. The transformation is stunning. The gray Shaker cabinets give the kitchen a stylish, contemporary look. Paired with the white countertops and subway tile backsplash, the space looks bright, open, and inviting.
Before: Outdated Oak Cabinets
Yet another kitchen was stuck in the 1990s with uninspiring oak cabinets. The oak wood tone did not match the homeowner’s desired style for the space.
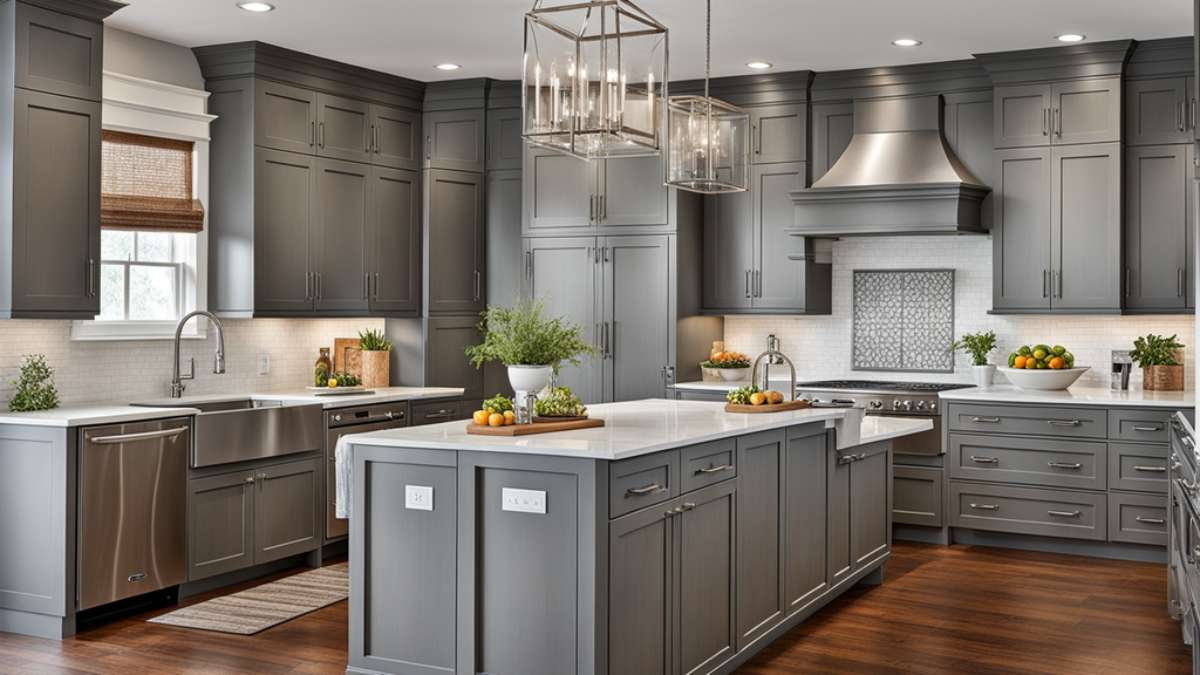
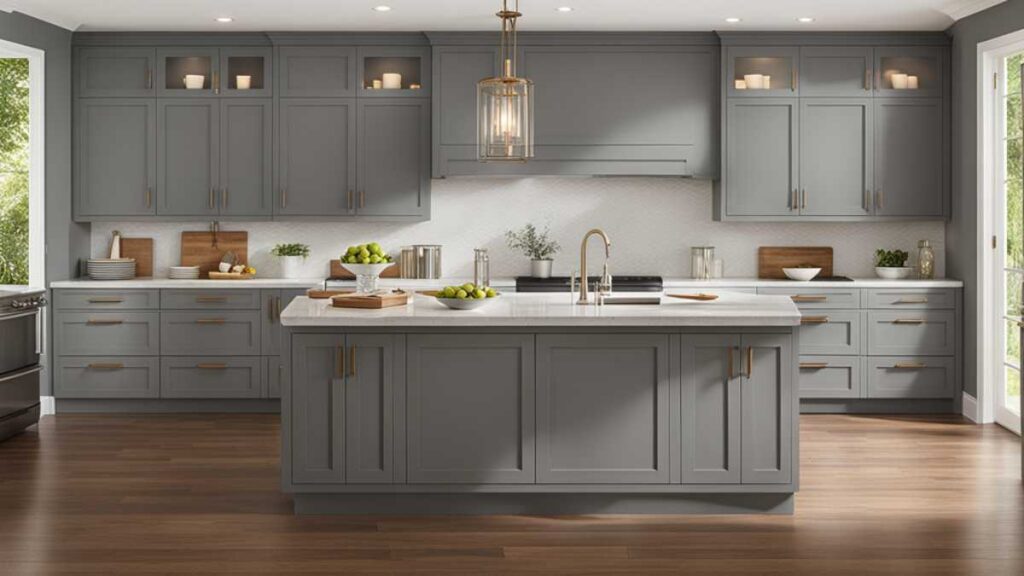
After: Sophisticated Gray Cabinets
A coat of gray paint turned these outdated oak cabinets into a sophisticated showstopper. The rich, gray tone complements the kitchen’s gray and white color scheme. New hardware in a satin nickel finish provides the perfect finishing touch for a kitchen that went from drab to fab.
Get inspired and transform your outdated kitchen cabinets with a fresh coat of inviting gray paint. The results will amaze you! A stylish gray shade can turn a dreary kitchen into the showpiece of your home.
Conclusion
And there you have it—a straightforward do-it-yourself job that can totally change your kitchen. Never undervalue the power of paint—it’s a reasonably priced approach to make a big difference and design a room you’ll like being in. You now have an Instagram-worthy kitchen that you can’t wait to show off to friends and family. Your grey-painted kitchen cabinets have gone from boring to fabulous.
The greatest thing is that you saved a tonne of money by doing it yourself. Are you feeling motivated? This weekend, start the process of releasing your inner interior designer. With a few paint coats and some effort, your renovated kitchen will be a delightful place to cook and create memories in no time.