We may earn money or products from the companies mentioned in this post.
Hey there, DIYer! So you’ve decided to tackle installing a new kitchen faucet yourself. Excellent choice – with the right tools and patience, this is definitely a doable project for a handy homeowner. In this article, we’ll walk you through the step-by-step process for installing a Moen kitchen faucet with a sprayer. By the end, you’ll be enjoying your new faucet and the satisfaction of accomplishing this task yourself. A few basics to start – make sure you have the faucet model number so you have the right supplies, clear your work area, turn off the water supply, and grab your adjustable wrench, basin wrench, plumber’s putty, and towels. Ready to get your hands dirty? Let’s dive in! With some elbow grease and by following these instructions, you’ll have your new Moen kitchen faucet installed in no time.
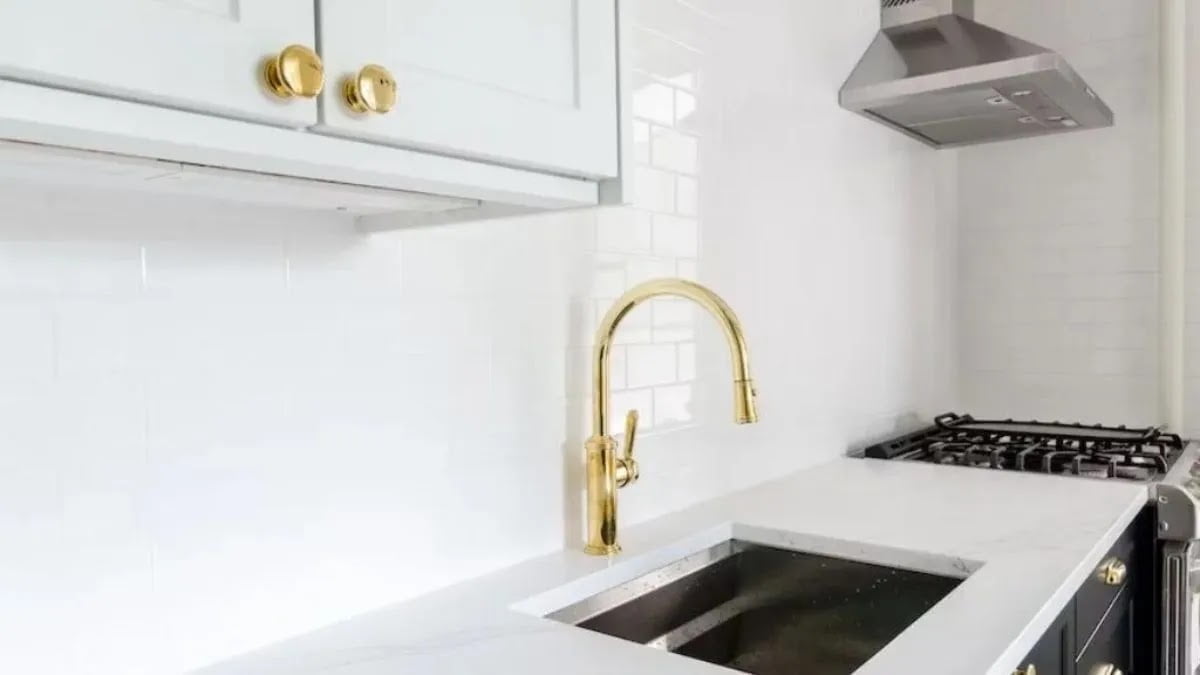
Selecting the Right Moen Kitchen Faucet With Sprayer
Selecting the right kitchen faucet is an important decision. For convenience and functionality, a Moen faucet with an integrated sprayer is a great choice. But with so many options, how do you choose?
First, determine your budget. Moen offers affordable and luxury faucets at a range of price points. Expect to pay between $100 to $500 or more for a quality Moen kitchen faucet with a sprayer.
Next, consider the number of handles. A single-handle faucet offers effortless control of water temperature and flow with one hand. Double-handle faucets provide separate handles for hot and cold but may require adjusting to get the right temperature.
You’ll also want to choose between a pull-down or pull-out sprayer. A pull-down sprayer delivers a powerful spray from a sprout located in the spout. A separate pull-out sprayer offers a flexible hose for easy rinsing and cleaning. Both provide convenience but a pull-down tends to have a sleeker look.
Finally, select a finish that complements your kitchen decor. Popular options include brushed nickel, chrome, oil-rubbed bronze, and matte black. Brushed nickel and chrome have a bright, clean look while oil-rubbed bronze and matte black provide an antiqued, rustic feel.
With some consideration of your needs and options, you’ll find a high-quality Moen kitchen faucet with a sprayer that suits your style and makes kitchen tasks a breeze. And the best part? Moen’s Lifetime Warranty ensures your faucet will keep flowing for years to come.

Tools and Equipment Needed
To install your Moen kitchen faucet with a sprayer, you’ll need to gather a few essential tools and parts.
Tools:
- Adjustable wrench or pliers
- Phillips head screwdriver
- Allen wrench (usually included)
- Flashlight
- Towels
Parts:
Make sure you have all the components that came with your Moen faucet model like:
- Faucet body
- Spray hose and spray head
- Deck plate (if installed on uneven surfaces)
- Mounting nuts
- Supply lines
- Anchors or mounting bolts
You’ll also want to purchase separately:
- Plumber’s putty (for mounting on uneven surfaces)
- Connector hoses to attach supply lines to water shutoff valves
With the proper tools and parts in hand, installing your new Moen kitchen faucet with a convenient side sprayer will be a cinch. The whole process should only take around 30-45 minutes for a DIY beginner. If you run into any issues, don’t hesitate to contact Moen’s customer service for help. Their lifetime warranty has you covered in case anything is missing or needs replacement.
Your kitchen will be looking sleek and stylish in no time. And being able to quickly rinse dishes or wipe up messes with the handy side sprayer will have you wondering why you didn’t upgrade sooner! With Moen’s high-quality and innovative designs, this faucet is sure to serve you well for many years to come.
Turn Off the Water Supply
Before installing your new Moen kitchen faucet, you’ll want to turn off the water supply to avoid any unwanted drips or splashes. Locate the shutoff valves under or near your sink, which control the hot and cold water lines. Give them a quarter turn to cut off the flow of water. If there aren’t individual shutoff valves, turn off the main water supply for your home.
Once the water is off, turn on your faucet to drain any remaining water from the lines and ensure the water flow has stopped completely. At this point, you may also want to place a bucket or towel under the faucet to catch any residual drips.
Disconnect the Old Faucet
With the water supply shut off, disconnect the hot and cold water lines from your existing faucet using an adjustable wrench. You may need to remove some securing nuts to fully detach the old faucet. Place a bucket or towel beneath the faucet again to catch any remaining water that drips from the disconnected lines. Cover the ends of the supply lines with towels to prevent excess dripping.
Remove any putty or plumber’s tape from the surface of the sink or countertop around the faucet base. Wipe the area clean so your new faucet has a smooth surface to adhere to.
Once the old faucet is disconnected and cleared away, you’re ready to begin installing your new Moen kitchen faucet. Double-check that the water supply is still turned off before proceeding to the next steps. If at any point water begins flowing again during installation, turn it off immediately to avoid potential damage or flooding. With some patience and precaution, you’ll have your new faucet installed and running in no time!
Remove the Old Faucet
Removing your old faucet is a crucial first step. Before you get started, turn off the water supply to the sink by locating the shutoff valves under the sink or in the basement or garage. Place a bucket underneath the supply lines to catch any remaining water.
Disassemble and Remove Existing Faucet
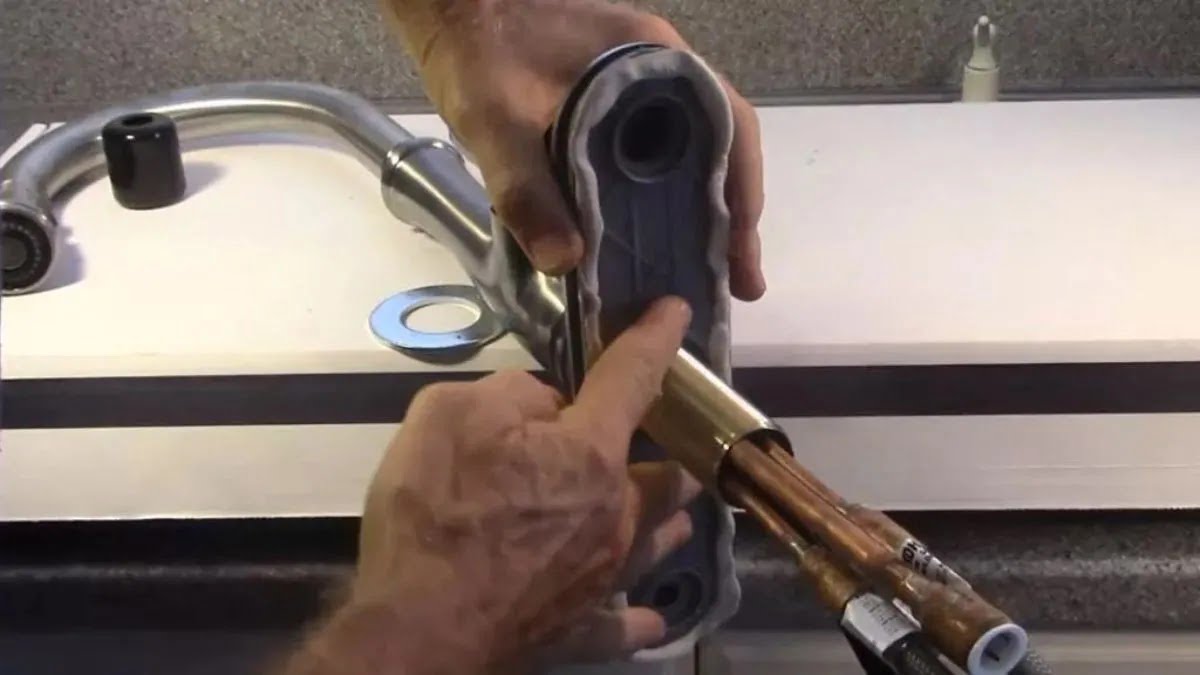
Loosen the mounting nuts that secure the old faucet to the sink. You may need a basin wrench to loosen nuts in tight spaces. Remove any clips or retaining rings holding the sprayer hose in place. Detach the sprayer hose from the old faucet to fully remove it.
Unscrew the hot and cold water lines from the faucet body. Have towels ready to wipe up any excess water. You want the area bone dry before installing the new faucet.
At this point, you should have removed the old faucet, sprayer, water lines, and mounting hardware. Clean the area around and underneath the sink to remove any debris. Ensure the new faucet will have a clean surface to mount to.
Prepare the New Faucet
Unpack your new Moen kitchen faucet and gather the included parts and hardware. Connect the water lines to the appropriate hot and cold ports on the faucet base. Hand-tighten the lines before mounting the faucet.
Attach the sprayer hose to the faucet sprayer port and feed the hose down through the sink opening. If your Moen faucet includes an escutcheon or base plate, place it over the faucet lines and mounting holes at this time.
Mount the New Faucet
From underneath the sink, feed the faucet lines and sprayer hose up through the mounting holes. Hand-tighten the mounting nuts to hold the faucet in place.
Tighten the mounting nuts and water lines with a basin wrench and pliers or wrench. Check that the faucet is evenly mounted and tight, then turn the water back on and check for any leaks. Tighten as needed.
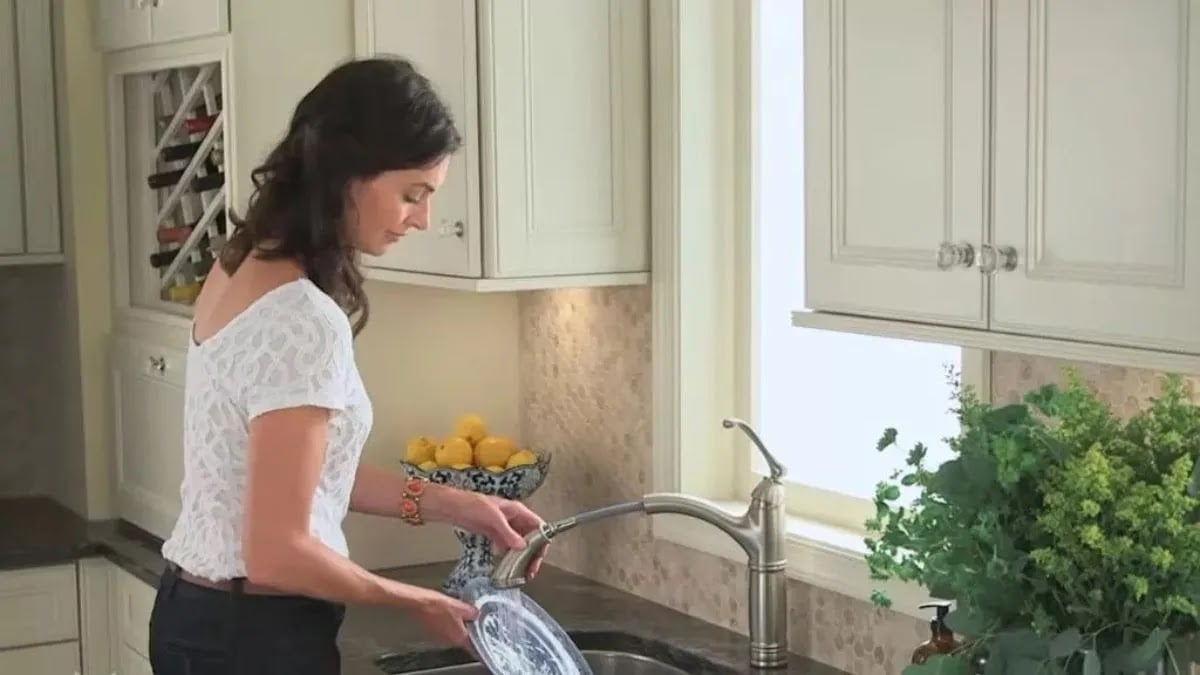
Turn on your new Moen kitchen faucet and admire your handiwork! Check that both the faucet and sprayer are functioning properly. Your upgraded kitchen sink is sure to make all your food preparation and cleanup tasks more enjoyable. Let the cooking begin!
Install the New Faucet Base
Now that you have your new Moen faucet and tools ready, it’s time to remove your old faucet and install the new base.
Remove the Existing Faucet
First, turn off the water supply lines under the sink. Place a bucket underneath to catch any remaining water in the lines. Disconnect the water supply lines from the old faucet. You may need an adjustable wrench or pliers to loosen the nuts connecting the lines. Remove any mounting nuts or screws holding the old faucet in place and lift out the old faucet. Clean the sink surface to remove any debris.
Install the New Faucet Base
Your new Moen faucet will come with a plastic spacer or mounting ring. Place this over the hole in your sink where the faucet will sit. From under the sink, thread the mounting nuts, washers, and mounting screws onto the threaded faucet shanks. Hand-tighten everything for now.
Connect the hot and cold water supply lines to the correct color-coded connections on the new faucet shanks. Use an adjustable wrench to tighten the connections. Turn the water back on and check for any leaks. Tighten as needed.
Double-check that the new faucet is aligned properly on your sink, then tighten the mounting nuts from below with a basin wrench or pliers. Turn on the new faucet to ensure proper water flow and no leaks before use.
Your new Moen kitchen faucet is now installed and ready to make your life in the kitchen more convenient and stylish. Be sure to register your faucet with Moen to activate the warranty. Enjoy your upgraded kitchen sink experience!
Connect the Water Supply Lines
Connecting the water supply lines is a crucial step to installing your new Moen kitchen faucet. The hot and cold water lines deliver water to your faucet, so properly attaching them is important for safe and efficient operation.
Turn Off the Water Supply
The first thing you’ll want to do is locate the shutoff valves under your sink that control the hot and cold water lines. Turn them clockwise to shut off the water supply to your existing faucet. This will prevent any unwanted water flow when you disconnect and attach the new supply lines.
Disconnect the Old Supply Lines
With the water shut off, disconnect the supply lines from your old faucet. You may need to unscrew compression nuts or loosen clips with pliers. Remove the old supply lines completely. Clean the ends of the remaining supply valves with a cloth to remove any grime before connecting the new lines.
Attach the New Supply Lines
Your new Moen faucet will come with flexible braided stainless steel supply lines. Attach one end of the hot water line to the hot water supply valve and the other end to the appropriately marked inlet on your faucet. Repeat the same process for the cold water line. Tighten the connections securely with an adjustable wrench, channel locks, or pliers.
Turn the Water Back On
With the supply lines attached, slowly turn the water back on at the shutoff valves. Check each connection for any leaks as the water pressure builds, and tighten as needed. Once the water is fully on, check your faucet to ensure proper flow and temperature. Your new Moen kitchen faucet with sprayer is now installed and ready to make your culinary life more convenient and stylish!
Be extremely cautious when installing and turning the water back on to avoid damage to your home. If you have any doubts or run into issues, don’t hesitate to contact a licensed plumber to ensure it’s done properly. With some patience and care, you’ll be enjoying your new faucet in no time!
Attach the Sprayer Hose
Now that you have the faucet base installed, it’s time to attach the sprayer hose. This flexible hose allows you to pull out the sprayer from its dock for rinsing dishes or cleaning the sink.
To attach the sprayer hose:
- Locate the sprayer hose—it will be the long, flexible tube with a sprayer head on one end and a weighted end on the other.
- Feed the weighted end of the hose down through the center hole in your sink. This weight keeps the hose from kinking or twisting.
- Pull the hose up through the faucet base until the sprayer head emerges.
- Attach the sprayer head to the end of the faucet base by connecting the quick-connect fitting. This fitting allows for easy installation and removal. Simply push the sprayer head onto the end of the faucet until it clicks into place.
- Tug firmly on the sprayer head to ensure it’s securely connected before using.
- Check to make sure the hose moves freely and has enough slack to extend the sprayer head to all areas of your sink.
- Test your new sprayer to ensure there are no leaks and that the water flow is consistent and strong.
- If needed, you can adjust the flow rate of the sprayer using the set screw on the side of the faucet body. Use a flathead screwdriver to tighten or loosen the set screw.
Your Moen sprayer hose allows for flexible water delivery when you need it. When not in use, the sprayer docks neatly back into the faucet base. Be sure to retract the hose fully to avoid leaks or water spots in your cabinet. By following these steps, you’ll be enjoying the convenience of your new kitchen sprayer in no time!
Turn the Water Back On
Now that your new Moen kitchen faucet is installed, it’s time to turn the water back on and test it out! But first, double-check that everything is tightened, sealed, and connected properly.
Turn the Water Supply Valves Back On
Locate the hot and cold water supply valves under the sink that you turned off at the beginning of the installation. Slowly turn each valve counterclockwise to open the water flow back up. As the water starts running again, check closely around the faucet base, water supply lines, and sprayer hose for any leaks or drips. Tighten as needed.
Once the water is fully on, turn on your new Moen kitchen faucet to check the water temperature and pressure. The water should run clear without any bursts, spurts, or uneven flow. If water is leaking from the base of the faucet or water lines, turn off the water supply valves again and tighten the retaining clip or mounting nuts before turning the water back on.
Test your pull-down faucet sprayer to ensure the hose retracts smoothly and the different spray functions (stream, spray, pause) are working properly. Wipe away any excess plumber’s putty or silicone around the base of the faucet for a clean finish.
Congratulations, your new Moen kitchen faucet is ready to make meal prep and cleanup a breeze! Be sure to refer to the specific model’s user guide for any additional tips on use, care, or troubleshooting. Moen’s customer support team is also available to help answer any questions you may have about your new kitchen faucet.
Enjoy your newly upgraded kitchen sink area and happy cooking! Let the dicing, chopping, rinsing, and entertaining begin.
Test Your New Moen Kitchen Faucet With Sprayer
Now that your Moen kitchen faucet with sprayer is installed, it’s time to test it out and make sure everything is working properly.
Turn the water supply back on and check under the sink for any leaks. Tighten any connections as needed. Once everything looks good, turn on the hot and cold water taps to flush out any debris from the supply lines. Run the water for 30 seconds.
Next, check that the sprayer hose retracts as it should. Pull out the sprayer hose to extend it, then release it to ensure it retracts back into the spout. If it’s not retracting, you may need to tighten the connection between the sprayer hose and the faucet.
Test the water temperature to ensure you have hot and cold water. If the water isn’t heating up, you may need to turn up your water heater temperature or check that the hot water supply line is connected properly under the sink.
Check that the water pressure is adequate by turning on the faucet to a medium flow rate. The water stream should be steady and even. If pressure seems low, you may need to turn up your home’s main water valve to increase pressure.
Try out any special sprayer functions like “stream” or “spray” to make sure they are working. The sprayer should transition between the different modes smoothly when you turn the selector switch.
Finally, turn on the faucet and sprayer at the same time to check they can operate together without issues. Let the water run for a minute to rinse away any remaining debris.
Once everything checks out, you can turn off the water and enjoy your new Moen kitchen faucet with a sprayer! Be sure to wipe down any water spots and you’re all set. If you notice any leaks or other problems after testing, turn off the water supply and disconnect the water lines to recheck the installation.
Conclusion
Well done, you now have a shiny new Moen kitchen faucet installed and ready to make your life in the kitchen easier. Turn on the water and enjoy how the pull-down sprayer gives you extra reach and flexibility. Your hands will stay drier and your dishes will get cleaner. With this upgrade, you’ve increased your home’s function and value. More importantly, you’ve gained confidence in your plumbing skills. Tackling home improvement projects yourself is rewarding. Celebrate this accomplishment and start thinking about the next DIY task to master. The possibilities are endless when you realize you can do quality work yourself.
More kitchen Faucets recommendations
- Top 10 The Best Luxury Kitchen Faucets for Every Budget
- What Is the Highest GPM Kitchen Faucet? Meet the Moen Arbor
- Best Gold Kitchen Faucets of 2023: Top 5 Picks for a Luxurious Look
- Waypoint Cabinets vs KraftMaid: Which is the Better Choice?
- American Woodmark Cabinets: Real Customer Reviews
- Midea Appliances Reviews: What Customers Are Saying
- The Best High-End Kitchen Faucets for Every Budget
- Allen and Roth Kitchen Faucet With LED Light: