We may earn money or products from the companies mentioned in this post.
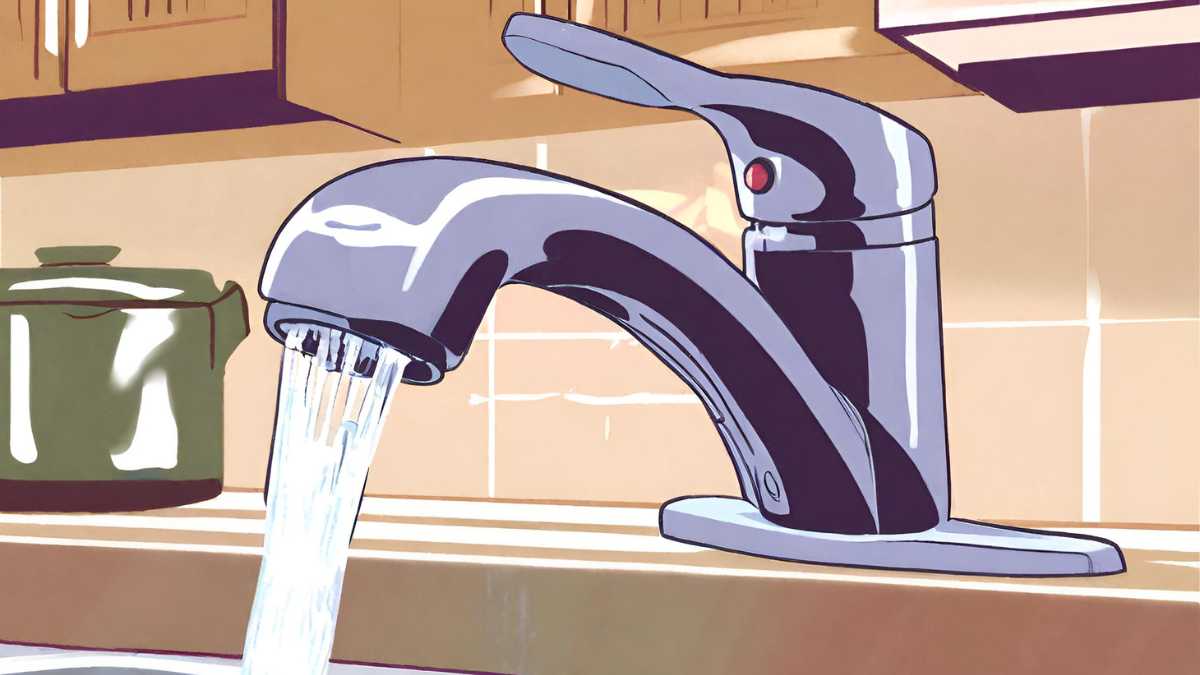
A Kitchen Faucet Leaks from Handle often indicates worn O-rings or seals. Tightening the handle or replacing the damaged parts usually remedies the problem.
Kitchen faucet issues are common, and a leaky handle can be both annoying and wasteful. Tackling this repair promptly can save water and prevent further damage to your faucet’s internal components. Understanding the mechanics behind faucet leaks is crucial for any homeowner, as it arms you with the knowledge to diagnose and fix minor issues before they escalate.
Typically, the culprits behind such leaks include deteriorating seals, failed washers, or loose parts that compromise the integrity of the faucet’s structure. Simple to moderate DIY skills can lead to a quick fix, restore the faucet to proper function, and maintain the kitchen’s efficiency. Addressing a leaky faucet handle swiftly not only increases the longevity of the fixture but also contributes to a more sustainable household.
Introduction
Kitchen faucet leaks from the handle can signify worn parts or improper installation. These issues may lead to inconvenient drips or increased water bills, demanding timely repair or replacement for efficient kitchen operations.
Faucets are like the unsung heroes of our kitchens, dutifully providing water day in, and day out. But when a leak interrupts this flow, it is not just an annoyance; it’s a call to action to understand what’s wrong and get it fixed.
The Common Culprits Of Kitchen Faucet Leaks
Identifying the source of a leaky kitchen faucet is the first step toward a solution. Here are some usual suspects:
- Damaged O-rings: These provide a tight seal but can wear out.
- Worn-Out Cartridge: The cartridge controls water flow and temperature.
- Faulty Washer: Washers can degrade over time, becoming ineffective.
- Improper Installation: Sometimes leaks stem from faucets that weren’t installed correctly.
Diy Fixes To Stop The Drip
Before you roll up your sleeves and tackle the leak, consider these DIY remedies:
- O-Ring Replacement: A common and simple fix for handle leaks.
- Cartridge Exchange: Swapping out an old cartridge can often rectify the problem.
- Washer Refitting: Placing a new washer might seal the deal on that drip.
- Tightening Connections: Ensuring all parts are snug can sometimes stop a leak.
Remember, a leaky faucet isn’t just a household hassle; it’s a call to conserve water and prevent further damage. With the right approach, you can fix that faucet, save water, and maintain the harmony of your home’s busiest room.
Identifying The Problem
Experiencing a kitchen faucet that leaks from the handle can be frustrating and indicative of underlying issues. Quick identification and repair of the problem can prevent water wastage and potential damage to the kitchen sink area.
Discovering a leak in your kitchen faucet can be an inconvenience that disrupts your daily chores. Often, the leak originates from the handle, indicating an issue that requires attention. Time to roll up your sleeves and play detective as you pinpoint the cause of your leaky kitchen faucet.
Common Signs Of A Handle Leak
Before delving into the tools and replacement parts, it’s essential to confirm that the leak is indeed coming from the faucet handle. Observing a few telltale indicators will guide your investigation:
- Puddles around the base: Water accumulation suggests a potential leak from the handle.
- Dripping sounds or visible water: When you witness water either dripping or a stream coming from the handle area.
To properly address a kitchen faucet leak, first, identify the problem’s source. Many issues could be causing the drip, and a systematic check can reveal the culprit.
- Worn O-rings: These small rubber rings can degrade over time, leading to leaks at the base of the handle.
- Corroded valve seat: A corrosion build-up may compromise the seal and allow water to leak from the handle.
- Faulty cartridge: This is a common issue in cartridge-type faucets, where seals within the cartridge wear out.
Steps To Trace The Leak’s Origin
Once you’ve noticed the common signs of a leak, the next step is to trace its origin. This is where a strategic approach can save you time and effort:
- Inspect the O-ring and cartridge: Open the handle and check for worn-out parts.
- Check the water lines: Sometimes, the leak may come from loose or damaged lines feeding into the faucet.
Tips For Accurate Leak Diagnosis
Detecting a faucet leak with precision prevents unnecessary repairs and replacements. Here are several tips to ensure you’re on the right track:
- Dry and observe: Wipe the area and watch where the water reappears to determine the leak’s location.
- Apply pressure: Gently move the handle and apply pressure in different directions to see if the leak’s severity changes.
Navigating the maintenance of your kitchen faucet doesn’t have to be daunting. By closely examining the signs and identifying the underlying problem, you’re well on your way to a leak-free kitchen. Remember, staying observant and methodical in your approach is key to a successful DIY plumbing fix.
Tools And Materials
Repairing a leaky kitchen faucet requires the right tools and materials. Essential items include a set of wrenches, plumber’s tape, O-rings, and valve seats to ensure a watertight seal and smooth operation.
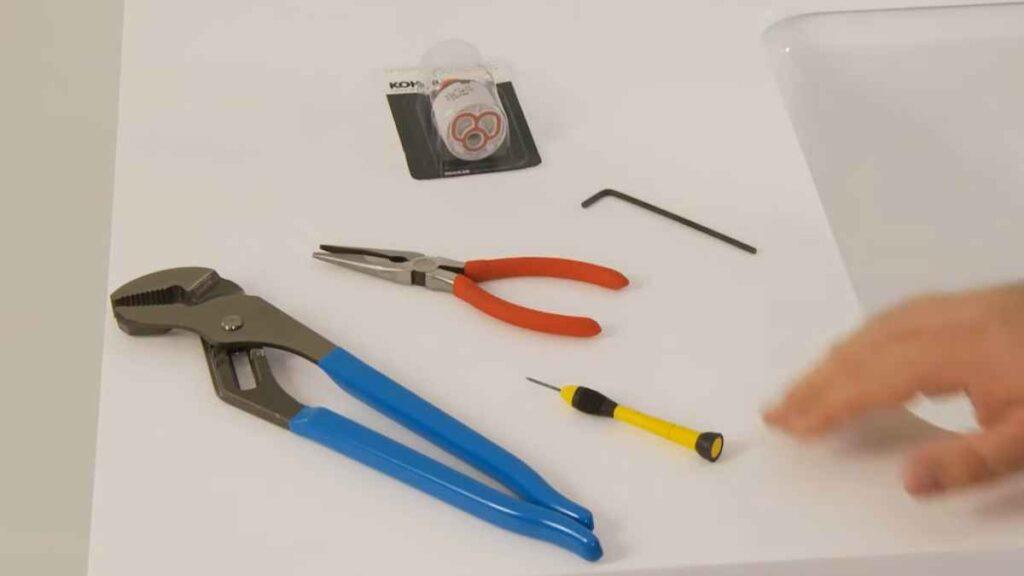
Embarking on a DIY faucet repair? You’re going to need the right tools and materials to tackle that pesky leak emanating from the handle. Before you dive in, let’s ensure you’re prepared. Setting yourself up with the necessary items can transform a frustrating chore into a straightforward task.
Necessary Tools
Preparing the correct tools is the critical first step in fixing your kitchen faucet leak. A proper toolset ensures you can dismantle and reassemble the faucet components with precision:
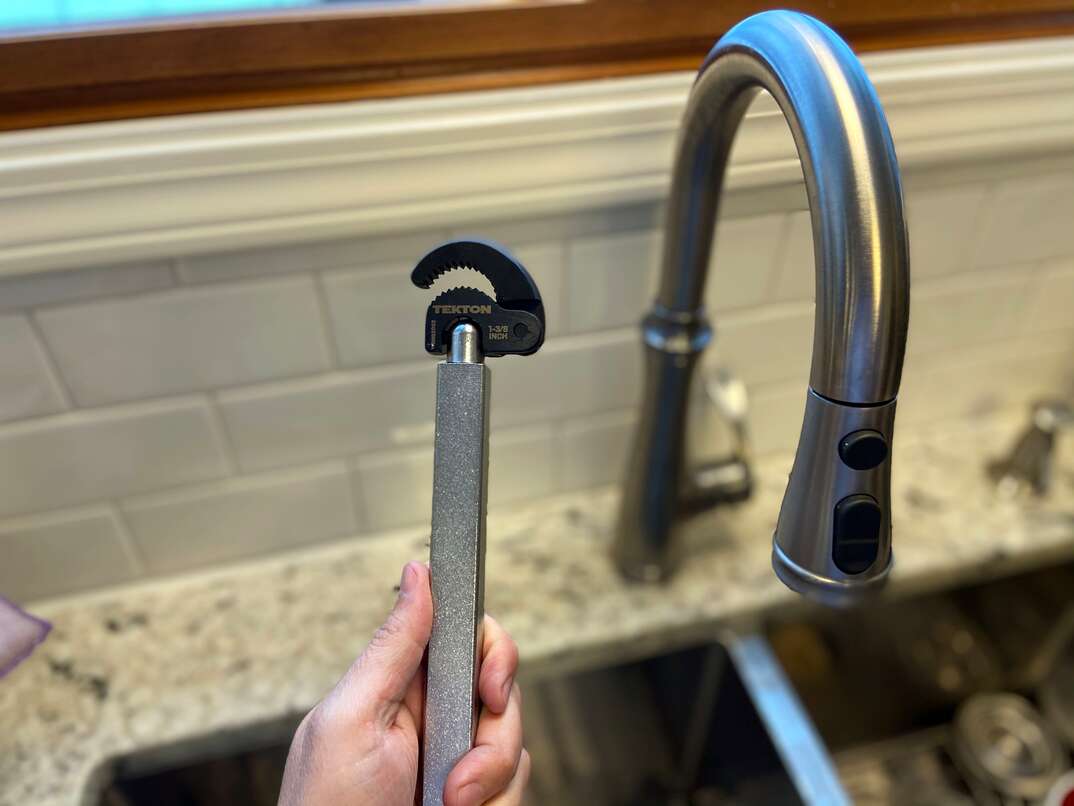
- Adjustable wrench: For loosening and tightening nuts.
- Allen wrench set: To remove handle setscrews found on many faucet designs.
- Screwdrivers (flat-head and Phillips): For disassembly of various faucet parts.
- Slip-joint pliers: Helpful for gripping and turning parts.
Replacement Parts And Sealants
Once you have your tools in order, the next step is to have the right materials on hand:
Faucet leaks often stem from worn-out components, so obtaining the correct replacements before starting your repair job will save you time and hassle. These materials often include:
- O-rings and washers: Crucial for creating water-tight seals within the faucet assembly.
- Cartridge or valve: Specific to your faucet model, these regulate water flow and might be the culprit behind the leak.
- Plumber’s grease: Aids in lubricating parts during reassembly for smoother operation.
- Thread seal tape: Assists in sealing pipe threads to prevent leaks at connections.
Equipping yourself with the above tools and materials will have you well on your way to saying goodbye to that troublesome faucet leak. Remember, patience and attention to detail are your allies in this endeavor. Tackle the project with confidence, and enjoy the rewards of a leak-free kitchen faucet.
Step-by-step Guide
Discover the essential steps to fix a leaky kitchen faucet handle with our comprehensive guide. Master the simple techniques for hassle-free repair and stop water wastage with confidence.
A leaking kitchen faucet handle can be an annoying issue, not to mention a wasteful one in terms of water and energy. Before you call in a professional, there are several steps you might consider attempting to fix the problem yourself.
Let’s guide you through a practical approach to tackling that pesky kitchen faucet leak step by step.
Identifying The Type Of Faucet
First and foremost, determine what kind of faucet you’re dealing with. The internal mechanisms can vary widely:
- Compression valves use rubber washers to control water flow.
- Cartridge types have a movable stem cartridge that regulates the flow.
- Ceramic-disk faucets are built with durable ceramic discs.
- Ball-type faucets have a ball bearing to manage water circulation.
Understanding your faucet’s design is crucial to knowing how to fix the leak properly.
Shutting Off The Water Supply
Before beginning any repair work:
- Locate the valves under the sink and turn them clockwise to shut off the water.
- Open the faucet to release any remaining water and pressure in the lines.
- Block the drain with a rag to prevent losing small parts.
Ensuring the water is off is a safety measure to prevent flooding or water damage.
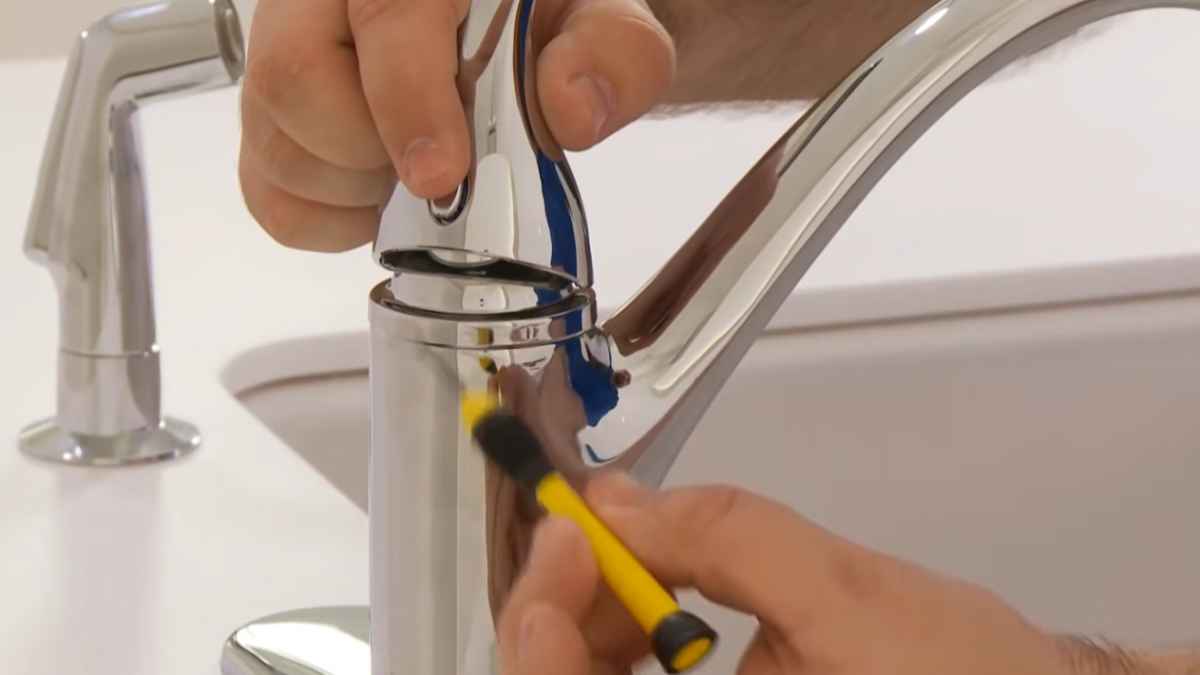
Dismantling The Faucet Handle
Remove the handle to inspect the internal parts:
- Depending on the model, pry off the decorative cap and unscrew the handle.
- Some models may require an Allen wrench or a screwdriver.
- Keep all removed parts in order and in a safe place to avoid loss.
This step is where you’ll gain access to the parts that can be causing the leak.
Inspecting O-rings And Washers
Once you’ve removed the handle, look for worn-out components:
- Check the O-rings for any signs of wear or damage.
- If you have a compression faucet, examine the rubber washers as well.
Replacing these parts is often a straightforward and inexpensive fix.
Reassembling The Faucet
After any faulty parts have been replaced:
- Carefully put the faucet handle back together following the reverse order of how you dismantled it.
- Tighten all screws and fittings, but make sure not to over-tighten as this could damage the new parts.
A correctly reassembled faucet ensures that what you’ve fixed remains intact and operational.
Testing For Leaks
The final step involves verification:
- Turn the water supply back on by twisting the valves counterclockwise.
- Monitor the faucet for leaks as you gradually increase the water flow.
A leak-free test concludes that your DIY repair was a success. If the leaking persists, it may be time to consult with a professional plumber.
By following these steps with care and attention, you’ll not only save money on potentially expensive plumbing fees but you’ll also gain a better understanding of how your kitchen faucet operates. With a proactive approach and a bit of elbow grease, that leaky handle can be just a distant memory.
Preventive Maintenance Tips
Regular maintenance of your kitchen faucet can prevent leaks at the handle. Simple steps such as routinely checking for wear and promptly replacing worn O-rings or washers can avert water waste and potential damage.
Spotting an unexpected puddle of water under your sink can be a frustrating discovery—commonly, the unsuspecting kitchen faucet is to blame. Whether it’s a minor drip or a concerning stream, keeping your kitchen faucet in prime condition not only prevents water wastage but can also save you from unexpected plumbing costs.
Let’s dive into the practical steps you can take to ensure the longevity and functionality of your kitchen faucet.
Regular Inspection Of Components
Keeping your kitchen faucet leak-free starts with staying ahead of wear and tear. It’s crucial to:
- Check O-rings and washers periodically: These components are often the culprits for leaks. Inspect them for signs of damage or degradation and replace them if necessary.
- Tighten any loose parts: Over time, nuts and screws may loosen. Gently tighten these parts to ensure everything is secure, avoiding over-tightening which can cause damage.
Lubricate Moving Parts
Just like any mechanism with moving parts, your faucet requires lubrication to operate smoothly:
- Use a silicone-based lubricant: Apply this to any movable parts such as handles or spouts. This will reduce friction and prevent excess wear.
- Regularly apply as part of your maintenance routine: Ensuring that lubrication is a regular part of your kitchen faucet maintenance will keep the handles moving easily and reduce the strain on the internal components.
Avoid Overusing The Handle
Like any device, faucets have a lifespan, and overuse can shorten this considerably. Be cautious to:
- Handle with care: Gently turn the faucet on and off to prevent unnecessary stress on the handle mechanism.
- Educate all users in the household: Make everyone aware of the importance of treating the faucet with respect to prolong its life.
Clean Faucet Aerator Regularly
A clogged aerator can lead to water pressure problems that stress your faucet’s infrastructure, so it’s important to:
- Remove and rinse the aerator: Unscrew it and rinse out any debris under running water.
- Soak in vinegar if needed: If you notice mineral build-up, soaking the aerator in vinegar can help dissolve these deposits.
Install A Water Softener
Hard water can wreak havoc on plumbing fixtures including kitchen faucets due to the minerals it contains:
- Invest in a water softener system: This can greatly reduce the mineral content in your water, thus preserving not only your faucet but all your water-using appliances.
- Regularly test your water: Knowing the hardness level can help you adjust your water softener accordingly or decide if one is necessary.
Incorporating these preventive measures can extend the life of your kitchen faucet, keep it looking great, and ensure consistent performance—all while conserving water and saving money on potential repairs. A diligent eye and a bit of care can keep those irritating leaks at bay, letting you focus on the joys of cooking and the company in your kitchen.
When To Seek Professional Help
A persistent drip from a kitchen faucet handle suggests it’s time for professional intervention. Expert plumbers swiftly address such leaks, preventing water wastage and avoiding further damage.
Discovering a leak in your kitchen faucet can be a nuisance that disrupts the harmony of your daily routine. While it’s tempting to grab a wrench and get to work, knowing when to call in the experts is essential to prevent further damage to your plumbing and ensure your faucet functions optimally.
Identifying The Leak Source
Before reaching out for professional assistance, it’s crucial to pinpoint where the leak is coming from. This step helps determine the complexity of the issue:
- Handle Base: Water seeping out of the area where the handle meets the faucet might suggest a worn O-ring or seal.
- Spout Base: If the leak emerges from the spout’s base, the issue could involve corroded valve seats or worn-out washers.
- Underneath the Sink: Leaks appearing under the sink could indicate loose connections or compromised supply lines.
Should these inspections leave you perplexed, or if you find multiple sources of leakage, it’s prudent to consider seeking professional help.
:
Certain scenarios strongly suggest that a professional plumber’s expertise is necessary:
- Persistent Leaking: If the leakage persists despite replacing seals or washers, the problem may be more complex than it appears.
- Multiple Leak Points: Multiple leak sources can be indicative of systemic issues within the faucet mechanism or pipes.
- Lack of Tools or Know-How: Not having the right tools or confidence in your DIY abilities is a strong sign to call a plumber.
- Signs of Water Damage: Stains or deterioration caused by the leak call for a thorough examination by a professional to prevent structural damage.
In these instances, a licensed plumber will offer not only the right tools but also the expertise to diagnose and resolve your faucet troubles effectively.
Tackling kitchen faucet leaks demands a balance between DIY efforts and knowing when to hand over the reins to a skilled professional. Trust your instincts—if the leak feels overwhelming or you notice signs suggesting a larger problem, don’t hesitate to seek out a plumber to ensure a swift and correct fix.
Your faucet and your peace of mind will thank you for it.
Credit: www.homeserve.com
Frequently Asked Questions For Kitchen Faucet Leaks From Handle
Why Does My Kitchen Faucet Handle Leak?
How Can I Fix A Leaking Faucet Handle?
What Tools Are Needed For Faucet Leak Repair?
Can A Diy Repair Solve Faucet Handle Leaks?
Conclusion
Tackling a kitchen faucet leak quickly is key to avoiding water damage. By identifying common issues, such as worn O-rings or faulty valve seats, you can make simple repairs yourself. Remember, routine maintenance and timely fixes can prevent bigger headaches down the line.
Keep your faucet in top shape to ensure a leak-free kitchen routine.
More kitchen Faucets recommendations
- Top 10 The Best Luxury Kitchen Faucets for Every Budget
- What Is the Highest GPM Kitchen Faucet? Meet the Moen Arbor
- Best Gold Kitchen Faucets of 2023: Top 5 Picks for a Luxurious Look
- Waypoint Cabinets vs KraftMaid: Which is the Better Choice?
- American Woodmark Cabinets: Real Customer Reviews
- Midea Appliances Reviews: What Customers Are Saying
- The Best High-End Kitchen Faucets for Every Budget
- Allen and Roth Kitchen Faucet With LED Light:
- How to install a Moen Kitchen Faucet With Sprayer
- How to Install a Kohler Kitchen Faucet: A DIY Tutorial