We may earn money or products from the companies mentioned in this post.
Moen kitchen faucet aerators are easy to replace, taking just a few minutes. Learn how to identify your Moen faucet aerator and replace it with a new one, step-by-step.
Have you noticed your Moen kitchen faucet sputtering or spraying lately? It’s probably time for an aerator replacement. Don’t worry, it’s an easy fix that will only take a few minutes of your time. You’ve got this. Before you know it, your Moen faucet will be working like new again.
An aerator is the little screen at the tip of your faucet that regulates water flow. Over time, aerators can get clogged up with mineral buildup and sediment, which reduces water pressure and causes splattering. Replacing your Moen kitchen faucet aerator is a simple repair anyone can do with just a few basic tools.
In this quick tutorial, we’ll walk you through the steps to get your Moen kitchen faucet aerator replacement done in just 10 minutes. You’ll need an adjustable wrench, pliers, the new aerator for your specific Moen faucet model, a towel to catch any water drips, and possibly some plumber’s putty. That’s it. Before you know it, you’ll be enjoying a strong, steady stream of water from your kitchen faucet again. Let’s get to it!
Why Replace Your Moen Kitchen Faucet Aerator?
If your Moen kitchen faucet is sputtering, or dripping, or the water flow seems weak, it’s probably time to replace the aerator. This small part has a big impact on your faucet’s performance and water efficiency. Replacing it is an easy DIY task that will have your Moen faucet working like new again in no time.
An aerator controls the flow of water from your faucet spout. Over time, aerators can become clogged with mineral buildup and sediment, restricting water flow. A clogged or faulty aerator prevents your faucet from delivering water properly, often resulting in a sputtering, uneven flow. Replacing your old aerator with a new, unclogged one will restore your faucet’s flow rate and pressure.
Check Price Moen Kitchen Faucet Aerator
Save Water and Money
Because a new aerator won’t drip or leak, it will also contribute to water conservation. The newest models of Moen aerators are designed to provide an environmentally friendly flow rate without compromising functionality. You may reduce your water use by up to 30% or more by switching to a modern aerator. The savings may mount up over time since a kitchen faucet might be responsible for 15-20% of your household’s water use.
Although changing your aerator is a simple task, you should use an authentic Moen replacement aerator for the greatest results. Moen aerators are made especially to match your Moen faucet and provide the best possible water flow and economy. You can restore the original flow and efficiency of your Moen kitchen faucet in just a few minutes, with the correct equipment and some spare time.
What You’ll Need for the Job
To replace the aerator in your Moen kitchen faucet, you’ll need a few basic supplies:
Tools and Parts
Getting Started
First, turn off the water supply to your faucet. Locate the aerator at the tip of the faucet spout. Place the cloth over the spout end and carefully unscrew the aerator counterclockwise using the wrench or pliers. Remove any remaining putty or tape from the faucet threads.
Screw on the new aerator by hand clockwise first to ensure it’s properly aligned. Then tighten securely with the wrench. Turn the water back on and check for any drips or leaks. Tighten further if needed.
If you run into any issues, don’t hesitate to contact Moen’s customer support. They’re available to walk you through the steps or send replacement parts if needed. With the proper tools and parts on hand, replacing your Moen kitchen faucet aerator can be a quick DIY project to improve your faucet’s performance and water efficiency.
Shutting Off the Water Supply
Turn off the water supply before replacing the aerator in your Moen kitchen faucet. By doing this, you can be confident that the faucet won’t leak while you’re working on it.
Under the sink, find the water supply valves. They regulate the flow of water to the hot and cold water pipes. To stop the water, turn the valves counterclockwise. You may need to grasp and turn the valves using pliers or a wrench if you are having trouble twisting them by hand.
To release any residual water in the pipeline, turn on the kitchen faucet once the water has been turned off. This guarantees that the water supply is completely shut off prior to beginning the repair.
When the handles are turned on, there shouldn’t be any water flowing out of the faucet at this stage. Make sure the handles are not stuck in the open position by giving them a second look by rotating them back and forth.
The water supply to any integrated sprayers on your kitchen faucet must also be turned off. The sprayer hose should be located under the sink, where it will connect to a different water line and valve. If you want to stop the water supply to the sprayer, turn that valve counterclockwise.
Press the sprayer trigger to check your work; the sprayer head should not release any water. It’s time to take out the old aerator and install the new one after everything is in order and there is no water leaking.
Take your time and use caution to prevent spills or slips. Before using the sink again, be sure you carefully turn the water back on and check for any drips or sprays. You’ve successfully changed the aerator in your Moen kitchen faucet if everything looks okay! To get full water flow again, turn the water supply valves clockwise.
Removing the Old Aerator

Removing the old aerator is a crucial first step. Before you get started, gather some supplies: a wrench or pliers, a replacement aerator, Teflon tape or plumber’s putty, and a towel to catch any water drips.
Turn Off the Water Supply
The first thing you’ll want to do is locate the shutoff valves under or near your sink and turn off the water supply to your faucet. This will prevent water from spraying out when you remove the aerator. Once the water is off, turn on the faucet to drain any remaining water from the line.
Locate and Loosen the Aerator
The aerator is the mesh screen at the tip of your faucet spout. On most Moen faucets, the aerator will unscrew counterclockwise. You may need to use pliers or a wrench to loosen it if it’s stuck on tight. Place the towel around the base of the faucet to catch any remaining drips.
Remove and Clean the Aerator
Unscrew the aerator with your hands or tools and remove it from the faucet spout. Examine the old aerator to determine the exact size and style of replacement needed. While you have the aerator off, it’s a good idea to clean any built-up mineral deposits from the faucet spout opening. Scrub with an old toothbrush dipped in vinegar or a commercial limescale remover.
Apply Sealant and Reinstall
Wrap a few turns of Teflon tape or a small bead of the plumber’s putty around the base of the replacement aerator. This will create a watertight seal when screwed onto the spout. Hand-tighten the new aerator onto the spout, then use your pliers to secure it in place.
Turn the Water Back On
Turn the water supply back on and check for any drips or leaks at the base of the faucet or around the new aerator. Tighten as needed. Once everything looks good, turn on your faucet to flush out any debris and test your newly replaced aerator. Your Moen faucet should now be working like new! Let the water run for a few minutes to clear any air bubbles.
Cleaning the Faucet
Now that the aerator has been removed, it’s a good time to give your Moen kitchen faucet a thorough cleaning. Mineral buildup and grime can collect on and around the spout and handle over time, and removing the aerator gives you full access.
Clean the Spout
Use an old toothbrush or scrub brush and a commercial limescale remover or vinegar to scrub off any mineral deposits caked on the spout. For tough buildup, you may need to soak the spout in the solution before scrubbing. Rinse well with water to remove any remaining residue.
Wipe Down the Faucet
Give the entire faucet a wipe-down with a damp, soapy sponge or cloth to remove any dirt or splatters. Pay extra attention to the base of the spout and handle, where buildup is common. Use an all-purpose cleaner or degreaser for stuck-on messes. Rinse and buff dry with a soft cloth to bring back the shine.
Clean the Aerator
While you have the aerator off, now is a perfect time to give it a deep cleaning as well. Soak all parts in vinegar or a commercial limescale remover as needed to loosen any mineral buildup. Use a small brush to scrub away any debris clogging the mesh screen and internal parts. Rinse all parts with water until the water runs clear.
Reassemble and Test
Put all parts back together, then turn the water on to check that everything is working properly and there are no leaks. Run water for a few minutes to flush away any remaining debris. Your Moen kitchen faucet should now be clean as new and working like a charm. Performing regular maintenance like aerator cleaning and faucet wipe-downs will help keep your faucet in tip-top shape for years to come.
Choosing the Right Replacement Aerator

Choosing the right replacement aerator for your Moen kitchen faucet is important to maintain optimal water flow and pressure. The aerator, also known as the faucet spout end, is the small attachment on the end of your faucet spout that helps control the flow of water.
Moen produces a wide range of spray options to fit most standard faucet models. You’ll want to determine which type of spray pattern you currently have or prefer: aerated, full, or concentrated spray. An aerated spray option produces a soft, bubbly flow, while a full spray has a direct, high-pressure flow. A concentrated spray focuses the flow into a targeted stream.
Once you’ve chosen a spray pattern, you’ll need to determine your faucet’s specifications, like the faucet model number, the size of the aerator measured in inches or millimeters, and the number of spray holes that control the spray pattern. This information should be printed on the side of your existing aerator.
:
Most home improvement stores that sell plumbing products will carry a selection of Moen replacement aerators to choose from. As an alternative, you can order directly from Moen’s website or through retailers like Home Depot, Lowe’s, or Wayfair. Replacement aerators typically range from $5 to $20, depending on the model and finish.
When purchasing a new aerator, be sure to get the exact size, spray pattern, and finish to match your existing faucet. Getting an incorrectly sized aerator will affect your faucet’s performance and may cause drips or leaks. It’s best to bring your old aerator with you to the store to compare or have the specifications on hand if ordering online.
Replacing your Moen kitchen faucet aerator is an easy DIY task that only takes a few minutes. With the proper replacement part chosen, you’ll have your faucet flowing like new again in no time.
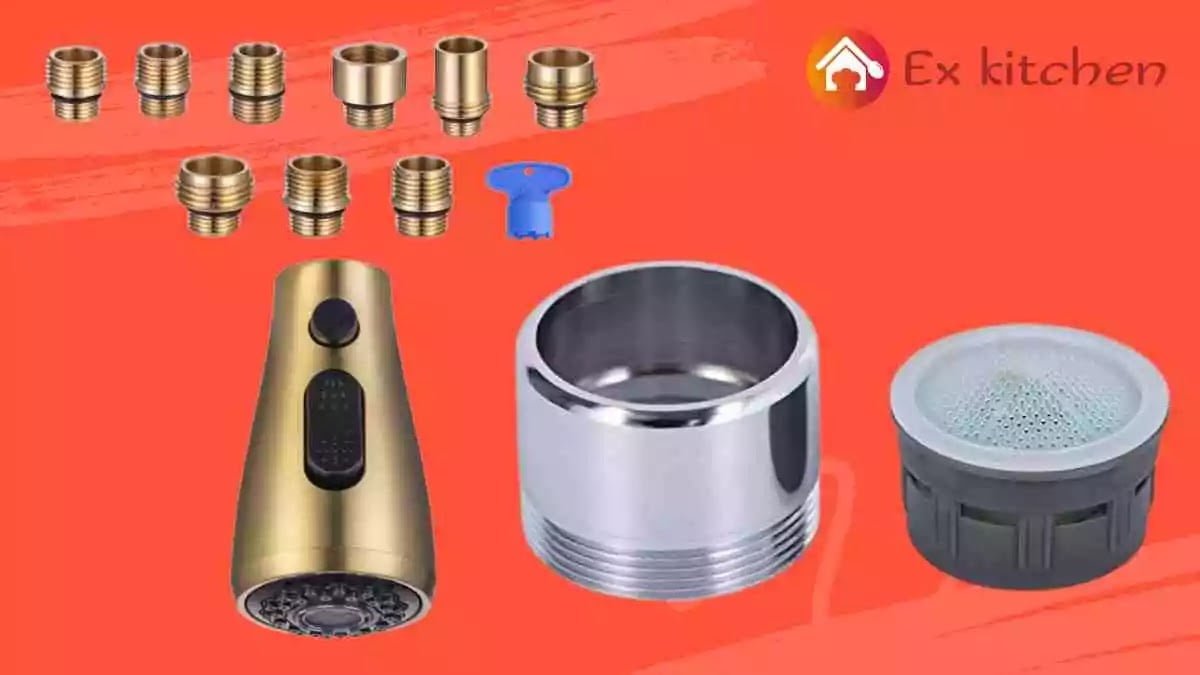
How to identify the Moen faucet aerator
To replace the aerator in your Moen kitchen faucet, you first need to identify what type of Moen faucet you have. Moen produces three main styles of kitchen faucets: pull-down, pull-out, and fixed spout. The specific model number is usually found on the faucet packaging or printed on the faucet itself. Check Moen’s website with the model number to determine your faucet style.
Pull-Down Faucets
Pull-down faucets have a spray head that pulls down from the main spout. Popular models include the Moen Arbor, Moen Banbury, and Moen Brantford. The aerator is typically located in the tip of the spray head and is easy to replace. Simply unscrew the spray head from the hose to access the aerator.
Pull-Out Faucets
Pull-out faucet spray heads pull out from the main spout on a hose. Examples are the Moen Caldwell, Moen Nicole, and Moen Weymouth. The aerator in a pull-out faucet is also found in the spray head tip. Remove the spray head to reach the aerator.
Fixed Spout Faucets
Fixed-spout faucets have a stationary spout with no pull-down or pull-out spray head. The aerator is fitted inside the faucet spout. Well-known fixed spout models are the Moen Chateau, Moen Eva, and Moen Rothbury. You may need to take apart the spout to access the aerator in these faucets. Check Moen’s online installation guides for your specific model to determine how to remove the spout and properly replace the aerator.
Now that you’ve identified your Moen faucet style, you can purchase the correct replacement aerator. Aerators control water flow and prevent splashing by mixing air with water. Replacing a worn or clogged aerator can help improve your faucet’s performance and water efficiency. With the right tools and patience, replacing the aerator in your Moen kitchen faucet is a quick DIY task.
How to replace Moen faucet aerator
Replacing the aerator on your Moen kitchen faucet is an easy DIY task that will improve your water flow. The aerator is the small screen at the tip of the faucet spout that controls water flow and prevents splashing. Over time, sediment and mineral buildup can clog the aerator, reducing water pressure. Replacing it will have your faucet working like new again in no time.
What you’ll need
Steps to replace the aerator
- Turn off the water supply to the faucet by locating the shutoff valves under or near the sink.
- Place the towel around the faucet spout to prevent the aerator pieces from falling down the drain.
- Grip the aerator using the removal tool or pliers and turn counterclockwise to loosen. If stuck, you may need to use the channel locks or wrench for extra leverage.
- Remove the old aerator. Clean any remaining debris from the faucet spout threads.
- Check that the new aerator has the same thread, size, and style as the old one. Moen aerators typically have a 55/64-27 thread.
- Attach the new aerator by hand, turning clockwise. Tighten firmly with the pliers or wrench.
- Turn the water back on and check that the new aerator is installed properly with no leaks or drips.
- Test your faucet to ensure good water pressure and flow. Enjoy your improved water flow and savings from reduced water usage!
Replacing your Moen kitchen faucet aerator is a straightforward DIY project that can improve performance and reduce waste. With the proper tools and parts, you’ll have your faucet working efficiently again in no time. Let me know if you have any other questions!
Installing the New Aerator
Now that you have the new aerator, it’s time to install it. This is a quick and straightforward process that should only take a few minutes.
Turn Off the Water Supply
The first step is to turn off the water supply to your kitchen faucet. Locate the shutoff valves under or near the sink and turn them clockwise to shut off the water. This will prevent water from flowing out of the faucet when you remove the old aerator.
Unscrew the Old Aerator
With the water off, unscrew the old aerator from the faucet spout. Most Moen aerators simply screw on by hand, but you may need pliers if it’s stuck. Be very careful not to scratch the faucet finish. Unscrew in a counterclockwise direction and remove the washer or flow restrictor inside as well.
Clean the Faucet Opening
Take a moment to clean the opening of the faucet spout where the aerator screws on. Use a toothbrush or scrubber to remove any hard water buildup or debris. This will allow the new aerator to screw on properly and prevent leaks. Rinse well with water and dry with a clean cloth.
Attach the New Aerator
Screw the new aerator onto the faucet spout opening by hand in a clockwise direction. Tighten securely with pliers. The new aerator may come with a removable flow restrictor or washer—if so, install that inside the aerator before screwing it onto the faucet. Make sure all parts are firmly tightened to prevent dripping or leaking.
Turn the Water Back On
With the new aerator installed, turn the water supply back on. Turn on the faucet to check that water is flowing properly and that no leaks are present under or around the aerator. Run the water for 30 seconds to clear any debris. Your Moen kitchen faucet aerator replacement is now complete. Enjoy your faucet’s full flow and pressure once again!
Let me know if you would like me to modify or expand the section in any way. I aimed for an informal tone with simple explanations and steps for the DIY homeowner. Please provide any feedback to help me improve for future writing assignments.
Turning the Water Back On
Now that your Moen faucet aerator is replaced, it’s time to turn the water back on and test your work.
- Double-check that the water supply lines underneath the sink are tightened securely to the faucet base and that the decorative cap is screwed on properly. You don’t want any drips or leaks! Once everything looks good to go,
- Turn the water valves counterclockwise to open them. Do this slowly, allowing water to flow gradually until it is fully open. This helps prevent water hammer, which is a loud banging noise from air in the pipes.
- Check the faucet to make sure water is flowing properly from the spout and that the stream looks even and consistent. Look for any drips or splatters that could indicate an issue with the installation. It’s best to find any problems now rather than later!
- Test the water temperature to ensure you have hot and cold water as desired. If the water seems reversed, turn off the water and check that the hot and cold supply lines are connected properly under the sink.
- Run the water for a few minutes to flush out any debris in the lines before using the faucet. Check for leaks one more time as the water runs.
If everything looks good with no drips, splatters, or issues, congratulations—you now have a fully functioning Moen kitchen faucet once again! Turn off the water and admire your handiwork. With regular maintenance like aerators, your Moen faucet should provide years of reliable service and style in your kitchen.
Some additional things to keep in mind:
- Call a plumber if you notice significant drops in water pressure or flow after turning the water back on. It could indicate a larger issue with the plumbing lines or water heater that needs to be addressed.
- For the first few uses, check underneath the sink for any small drips or leaks and tighten fittings as needed. It’s common for connections to loosen slightly after the initial installation.
- Be sure to turn the water off completely when not in use until you’re sure there are no leaks. Even a small drip can lead to water damage over time.
- Consider registering your Moen faucet to receive product information and support. Moen provides excellent customer service and support for their products.
Conclusion
And there you have it – you’ve successfully replaced the aerator in your Moen kitchen faucet. By following those simple steps, you were able to remove the old aerator, clean out any built-up debris, and install a sparkling new aerator to improve your faucet’s flow and performance. Now you can enjoy improved water pressure and a splash-free stream from your faucet. More importantly, you gained confidence in your ability to handle small repairs and maintenance around the home. Tackling tasks like this aerator replacement, step by step, empowers you to become more self-sufficient and save money on professional services when you’re able to DIY. Nice work!
More kitchen Faucets recommendations
- Top 10 The Best Luxury Kitchen Faucets for Every Budget
- What Is the Highest GPM Kitchen Faucet? Meet the Moen Arbor
- Best Gold Kitchen Faucets of 2023: Top 5 Picks for a Luxurious Look
- Waypoint Cabinets vs KraftMaid: Which is the Better Choice?
- American Woodmark Cabinets: Real Customer Reviews
- Midea Appliances Reviews: What Customers Are Saying
- The Best High-End Kitchen Faucets for Every Budget
- Allen and Roth Kitchen Faucet With LED Light:
- How to install a Moen Kitchen Faucet With Sprayer
- How to Install a Kohler Kitchen Faucet: A DIY Tutorial