We may earn money or products from the companies mentioned in this post.
Learn how to replace and troubleshoot a Moen kitchen faucet sprayer with
our step-by-step guide. We also cover common problems and solutions.
It sounds like the sprayer on your Moen kitchen faucet no longer works or
doesn’t work as well as it used to. Oh well. It’s so much easier to clean
dishes and fill pots with those helpful little sprayers. The good news is that
even if you don’t know much about plumbing, you can fix or replace your Moen
sprayer. There are some things that might be wrong with your sprayer that we
will talk about in this piece. If it’s time for a new Moen sprayer, we’ll show
you how to easily put it in yourself. You can do this yourself in less than an
hour instead of calling a plumber and paying a lot of money. With just a few
simple tools and a quick trip to the hardware store for parts, you can quickly
rinse vegetables and blast off tough messes. Allow us to begin!
Overview of Moen Kitchen Faucets and Sprayers
Moen is one of the most well-known brands of kitchen faucets and accessories.
They are known for high-quality, stylish designs as well as useful features
like pull-down spouts and retractable sprayers. Their faucets and sprayers
allow you to easily switch between an aerated stream and a powerful spray.
The Moen Pull-Down Kitchen Faucet

The most popular style of Moen kitchen faucet is the pull-down faucet.
This type of faucet has a spout that pulls down into a sprayer. The
sprayer gives you an extended range of motion, allowing you to spray and
rinse anywhere in and around your sink. When you’re done spraying, the
spout retracts back into place. This is a very convenient feature to
have in a kitchen faucet.
Some of the spray options you’ll find on Moen pull-down faucets
include:
- Aerated stream: a regular flow of water, good for filling pots and washing
dishes. - Power spray: a more forceful spray for rinsing and cleaning.
- Boosted stream: An extra-powerful spray for stubborn stuck-on messes.
- Pause: Stops the flow of water completely with the press of a button.
Moen is known for high-quality kitchen faucets, and their pull-down models
with retractable sprayers are innovative and stylish and make kitchen tasks
easier and more convenient. If you ever need to repair or replace parts like
sprayers or hoses, Moen provides excellent customer service and support. Their
products are also backed by lifetime warranties for added peace of mind.
When to Replace Your Moen Kitchen Faucet Sprayer

If your Moen kitchen faucet sprayer is on the fritz, it may be time for a
replacement. Here are some signs that you need a new sprayer:
Leakage
If water is dripping or spraying from your sprayer when it’s not in use, it
likely has internal damage or wear and tear that requires replacement.
Continued use could lead to more water waste and possibly water damage.
Poor Spray Pattern
If the spray from your sprayer is weak, uneven, or nonexistent, the internal
parts have probably broken down or become clogged over time. A new sprayer
will restore the full range of spray settings you’re used to.
Handle Issues
If the sprayer handle sticks, doesn’t retract or doesn’t activate the spray
at all, it needs to be swapped out. The handle mechanisms contain small
internal parts that commonly fail after years of regular use.
Age and Appearance
If your Moen sprayer is more than 5-7 years old or looks visibly worn or
corroded, replacement may be your best option to avoid unpredictable issues
down the road. Newer sprayer models also often include improved features.
Replacing a Moen sprayer is usually an easy DIY project that requires no
special tools. Simply turn off the water supply, unscrew the old sprayer,
apply the plumber’s putty to the base of the new sprayer, and screw it on.
Test your work, wipe away any excess putty, and you’re all set with a fully
functioning sprayer again. Buying a new Moen sprayer every few years is a
small price to pay for the convenience and functionality it adds to your
kitchen.
Removing the Old Sprayer From Your Moen Faucet

Removing the old sprayer from your Moen faucet is usually pretty
straightforward. However, if it’s stuck or damaged, you may need a few tools
and some patience to get it off.
Turn Off the water supply.
The first step is to locate the water supply valves under or near your sink
and turn them clockwise to shut off the water. This will prevent water from
spraying out when you remove the old sprayer.
Loosen Sprayer Hose
The sprayer hose connects the sprayer to the faucet base. You may need to
loosen this connection using a wrench or pliers. Grip the coupling nut that
connects the hose to the faucet base and turn counterclockwise. Apply firm and
steady pressure. If it’s stuck, you can try tapping it with a wrench to help
loosen the connection.
Remove Sprayer Head
Once the hose is loose, you can unscrew the sprayer head. This is the part
that actually sprays the water. Grip the base of the sprayer head and turn
counterclockwise by hand. If it doesn’t budge, wrap a rag around the base to
improve your grip, and try again with pliers. As a last resort, you may need
to cut the hose to fully remove the sprayer head.
Clean the Faucet and Prepare for a new sprayer.
With the old sprayer removed, clean the area around the faucet to remove any
built-up grime before installing a replacement sprayer. Flush the water lines
by turning the water back on for a few seconds. This removes any debris. Turn
the water off again until your new Moen sprayer is ready to be installed.
Removing an old kitchen faucet sprayer may require some troubleshooting to
work through stuck or damaged parts. With patience and the proper tools,
however, you can get your Moen sprayer off and your faucet ready for a new
replacement sprayer. Let me know if you have any other questions!
Choosing the Right Replacement Moen Sprayer

When it’s time to replace the sprayer on your Moen kitchen faucet, you have a
few options to choose from. Moen offers sprayers in different styles,
finishes, and flow rates to suit your needs and match your faucet.
Sprayer Styles
Moen produces several types of sprayers:</span >
- Aerated stream: Provides a gentle, bubbly flow of water. Great for filling
pots and rinsing delicate items. - Full spray: a forceful, wide spray for effective rinsing and cleaning.
- Berrysoft is a soft, rubber spray that’s safe for washing produce.
- Pause button: This button allows you to temporarily stop and restart the
water flow with the push of a button.
Choose a sprayer based on how you use your kitchen sink the most. If you wash
a lot of dishes and produce, a full spray or Berrysoft sprayer would work
well. For casual use, an aerated stream should do the job.
Finishes
Moen sprayers come in various finishes, like:
- Chrome: A sleek, mirror-like silver finish that fits any decor.
- Brushed nickel: a warm, satin gray finish with a brushed texture
- Bronze: a deep, rustic brown shade with a matte finish.
- Black: A modern, bold matte black finish.
Select a finish that matches your existing faucet for a coordinated look, or
choose a contrasting finish to make a stylish statement.
Flow Rate
Higher flow rate sprayers, around 2.2 gallons per minute (GPM), provide more
powerful water pressure that’s great for heavy-duty rinsing and cleaning.
Lower flow rates around 1.5 GPM are more eco-friendly while still offering
adequate pressure for most tasks. Choose a flow rate based on your needs and
preferences.
With several options to choose from, you can find a Moen replacement sprayer
that’s perfectly suited to your needs, style, and kitchen decor. Check with
your local hardware store or order the part number for your specific faucet
model on Moen’s website to get the right sprayer for your faucet.
Installing a New Moen Kitchen Faucet Sprayer
When your Moen kitchen faucet sprayer starts malfunctioning or leaking, it’s
usually best to replace it. Installing a new sprayer is an easy DIY project
that only takes about 15–30 minutes. You’ll need a few basic tools and the new
Moen sprayer replacement part.
Tools Needed
To replace your Moen sprayer, you’ll need:</span >
- Adjustable wrench or pliers
- Allen wrench (possibly)
- Towel
- New Moen sprayer (purchased from Moen or home improvement store)
Turn Off the Water Supply
Before starting, turn off the hot and cold water supply lines under the sink.
Place the towel in the sink to catch any remaining drips.
Remove Existing Sprayer
Use the wrench to unscrew the retaining nut that holds the old sprayer in
place. This nut will either be round or hexagonal. Once unscrewed, you may
need to use pliers to grip and twist the sprayer from its dock to fully remove
it. Be very careful not to damage the faucet finish.
Install a new sprayer
Your new Moen sprayer will come with instructions for installation. In most
cases, you simply slide the sprayer onto the faucet dock until it clicks into
place. Hand-tighten the retaining nut, then use the wrench to tighten another
1/4 turn. Do not over-tighten.
Turn the water back on and Test
Turn the water supply back on and check for any leaks at the connection point.
Run the water to test your new sprayer. Make any final tightening adjustments
as needed.
With a few basic tools and parts, replacing a Moen kitchen faucet sprayer is
an easy DIY fix. However, if you run into issues or the sprayer continues to
leak or malfunction, it’s best to contact Moen support for guidance to avoid
potential damage. Their helpful customer service and a lifetime warranty on
parts will get your kitchen faucet back to working order in no time.
Troubleshooting Common Moen Sprayer Problems
If your Moen kitchen sprayer is acting up, there are a few common issues that
are typically easy to fix yourself. Let’s go through the main problems and
troubleshooting steps to get your sprayer working like new again.
Sprayer Not Working At All
First, check that the water supply to your faucet is turned on. If it is, the
issue could be a stuck or damaged diverter mechanism (the part that switches
water flow between the faucet spout and the sprayer). Try toggling the
diverter button or switching a few times to loosen it. You can also try gently
tapping the diverter to free it up. As a last resort, you may need to replace
the diverter.
Sprayer Not Retracting
If your sprayer hose won’t retract back into the spout, the retractor spring
inside is probably stuck or broken. This can often be fixed by manually
pulling the hose out, applying lubricating oil to the hose and spring, and
manually retracting and extending the hose a few times to loosen it up. Wipe
away any excess oil when done. If that doesn’t work, the retractor spring will
need replacement.
Low or No Water Pressure
Mineral buildup or debris caught in the sprayer head can reduce water flow.
Unscrew the sprayer head and soak it in vinegar and water solution to dissolve
any mineral buildup. Use a toothpick or needle to unclog any debris in the
small sprayer holes. Be very gentle to avoid damage. If the issue continues,
you may have a damaged O-ring or washer inside the sprayer head or hose that
needs replacement.
Leaking Sprayer
If you notice water dripping from the sprayer head or hose, first check that
all connections and fittings are tight. Tighten as needed with an adjustable
wrench. If leaks continue, the internal O-rings or washers are worn or
damaged, and the sprayer head assembly will need replacement.
Following these steps should help get your Moen sprayer back in working order.
However, for any complex repairs or replacements, it’s best to contact Moen
customer service for guidance to avoid voiding your faucet warranty. They can
walk you through repairs or arrange a replacement sprayer if needed.
Fixing a Leaking Moen Sprayer Hose
If your Moen kitchen faucet sprayer is leaking, it likely needs a new hose or
o-ring. Replacing these parts is an easy DIY fix that will have your sprayer
working like new again in no time.
Turn off the water supply
The first step is to turn off the water supply to your kitchen faucet. Locate
the shutoff valves under or near the sink and turn them clockwise to cut off
the flow of water. Have some towels on hand to wipe up any remaining water in
the hose or sprayer head.
Disconnect the sprayer hose
With the water off, disconnect the sprayer hose from the faucet base or
sprayer holder. The hose is connected using a quick-connect fitting that you
simply pull or unscrew to release. Have a bucket below to catch any excess
water still in the hose.
Inspect and replace O-rings
Examine the o-rings or gaskets inside the quick-connect fittings at both ends
of the hose. If they look worn, cracked, or misshapen, they likely need
replacement. Take the o-rings to your local hardware store to find matching
replacements. Lubricate the new o-rings with the plumber’s grease and
reinstall them in the proper position.
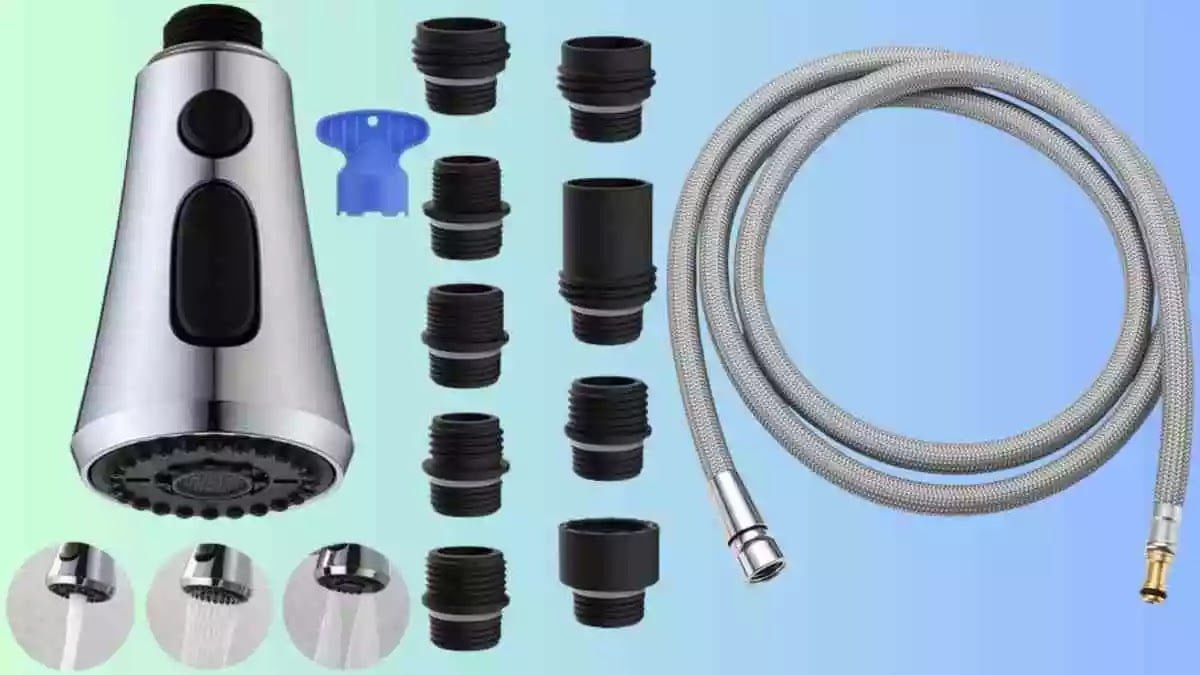
Replace the sprayer hose
If replacing the o-rings does not solve the leak, it’s best to replace the
entire hose. Purchase a compatible Moen sprayer hose replacement that matches
your faucet model. Reconnect the new hose to the faucet base and sprayer head,
ensuring all parts are fitted snugly.
Turn the water back on
Turn the water supply back on under the sink and check for any leaks. Tighten
any connections as needed. Once everything looks dry, test your new sprayer
hose to ensure there are no more leaks or issues.
With a few basic steps and parts, you can have your Moen kitchen faucet
sprayer fixed and working properly again. Be sure to turn off the water
supply, examine o-rings and connections for wear or damage, and either repair
or replace parts as needed to solve any leaks. If you run into any issues,
don’t hesitate to contact Moen’s customer service for additional help and
support.
Unclogging a Clogged Moen Faucet Sprayer
A clogged Moen faucet sprayer can be frustrating, but luckily it’s usually an
easy fix. Here are the steps to unclog your Moen kitchen faucet sprayer:
Turn Off the Water
The first thing you’ll want to do is turn off the water supply to your kitchen
faucet. Locate the shutoff valves under or near the sink and turn them
clockwise to cut off the water flow. This will prevent excess water from
spraying out when you disassemble the faucet sprayer.
Disassemble the Sprayer Head
Next, you’ll need to take apart the sprayer head. This typically just involves
unscrewing the spray face or aerator at the tip of the sprayer wand. Use a
wrench or pliers to loosen this part counterclockwise. Remove any washers or
screens inside and set them aside.
Clear Out any Clogs
Once you have the sprayer head disassembled, you may see an obvious clog you
can clear out with a toothpick or needle. Mineral buildup like limescale can
often be scrubbed away. If there’s no visible clog, run the sprayer under hot
water to flush it out, or use a commercial limescale remover according to
directions. You can also try using a pipe cleaner or scrub brush to loosen any
stuck-on debris inside the sprayer head and hose.
Reassemble and Test
Put the sprayer head back together by screwing on the spray face clockwise
with your fingers, then tightening it with the wrench. Make sure any washers
or screens are put back in the proper order. Turn the water supply back on and
test your sprayer. If the clog remains, you may need to remove additional
parts, like the hose, or check for clogs further down the line. Call a plumber
if needed.
By following these steps, you should be able to get your Moen sprayer
unclogged and working like new again. Letting faucet sprayers get too clogged
over time can damage them, so perform regular maintenance like this to keep
your Moen faucet in tip-top shape.
Conclusion
So there you have it—a quick guide to help troubleshoot or replace your Moen
kitchen faucet sprayer. Moen makes quality faucets and parts, so with some
basic tools and patience, you can likely resolve any issues yourself and avoid
calling an expensive plumber. If all else fails and a replacement is needed,
Moen’s lifetime warranty has you covered. Now get out from under that sink,
wash up, and get cooking; your kitchen tasks will be back to smooth sailing in
no time. And remember, for any future plumbing needs, Moen’s customer support
team is just a phone call away, ready to help you keep your kitchen faucet
flowing freely for years to come.
More kitchen Faucets recommendations
- Top 10 The Best Luxury Kitchen Faucets for Every Budget</a >
- What Is the Highest GPM Kitchen Faucet? Meet the Moen Arbor</a >
- Best Gold Kitchen Faucets of 2023: Top 5 Picks for a Luxurious Look</a >
- Waypoint Cabinets vs KraftMaid: Which is the Better Choice?</a >
- American Woodmark Cabinets: Real Customer Reviews</a >
- Midea Appliances Reviews: What Customers Are Saying</a >
- The Best High-End Kitchen Faucets for Every Budget</a >
- Allen and Roth Kitchen Faucet With LED Light:</a >
- How to install a Moen Kitchen Faucet With Sprayer</a >
- How to Install a Kohler Kitchen Faucet: A DIY Tutorial</a >