We may earn money or products from the companies mentioned in this post.
Learn how to expertly White wash Kitchen Cabinets for a fresh, modern look that adds charm and character to your home. This easy-to-follow guide includes step-by-step instructions, tips, and tricks for a stunning transformation.
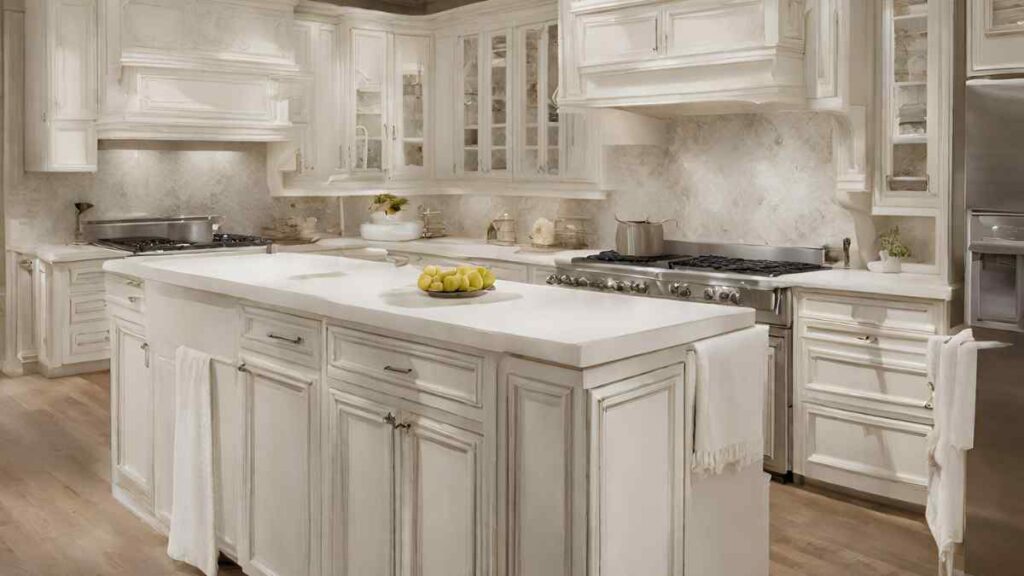
You want to quickly update your kitchen without doing a major remodel. A simple do-it-yourself project that may dramatically change the appearance and feel of your room is white washing your cabinets. You can obtain a chic distressed finish that opens up and airs up your kitchen in only one weekend. You’ll be enjoying your updated kitchen in no time if you follow our step-by-step instructions. All you need to give your kitchen a modern farmhouse feel and some rustic charm is paint, brushes, and a little elbow sweat.
Assessing Your Kitchen Cabinets for White Washing
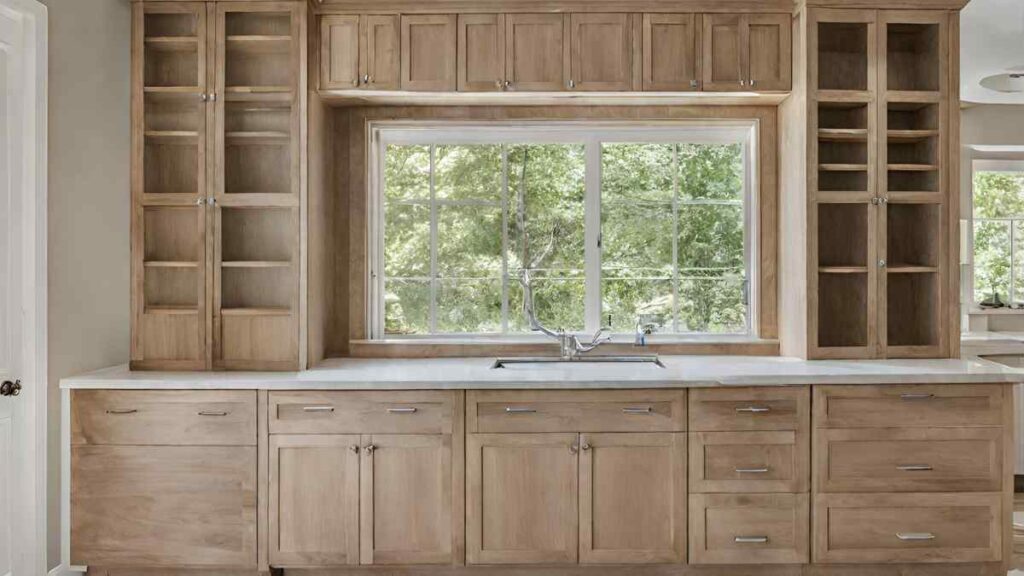
Before you start painting, inspect your cabinets to determine if they’re suitable for white washing. Cabinets with a smooth, non-porous surface and minimal wood grain are ideal. Oak, maple, and MDF cabinets work well, while pine can be more difficult to white wash evenly.
Check for any damage or imperfections and repair as needed. Fill in any holes, cracks, or seams with wood filler and sand until smooth. Wipe away dust with a tack cloth to ensure a clean surface for painting.
Consider the cabinet door style and hardware. Cabinet doors with inset panels may require extra attention to get an even coat of white wash. And although not always necessary, you may want to remove cabinet hardware, like knobs and pulls, prior to painting for easier access and to avoid drips.
Think about the look you want to achieve. A thicker white wash will allow more of the wood grain to show through for a rustic feel, while a thinner coat will result in a smoother, more opaque finish. Test different dilution ratios on a small area of the cabinet to find your perfect shade of white before applying it to the entire kitchen.
Assess the cabinets one final time to determine the best approach. For cabinets in good condition, a white wash treatment should work great. However, cabinets with damage or an unsuitable surface may require priming and painting instead for best results. With the proper prep and technique, white washing your kitchen cabinets can lead to a stunning makeover. But if you have any doubts, consider consulting a professional to ensure it’s done right.
Gathering the Necessary Supplies for White Washing Cabinets
To white wash your kitchen cabinets, you’ll need to gather a few supplies. The main things you’ll need are:
- White wash stain or paint: For kitchen cabinets, a stain is typically easier to work with and provides a more natural, rustic look. White wash paint can also work well and may provide better coverage in fewer coats. Either way, choose a product specifically meant for distressing wood.
- Paintbrushes: Have a variety of angled brushes in different sizes on hand for the best control and results. Disposable brushes can save cleanup time.
- Paint tray or container: You’ll want something to pour your white wash into for easy access while painting. Disposable trays with liners make cleanup a breeze.
- Paintbrush cleaner: For oil-based products, you’ll need paint thinner to properly clean your brushes. For water-based, plain water will do.
- Drop cloths: Protect your floors, countertops, and any surfaces from drips and splatters. Canvas drop cloths are reusable and hold up well to paint.
- Painter tape: Use tape to protect any areas you don’t want to paint like trim, handles, or edges. Remove the tape as soon as you’re done painting for the cleanest results.
- Rags: Have clean rags on hand to wipe away drips, splatters, and mistakes as you go. Tack cloths are ideal for smoothing the final coat.
- Protective gear: Don safety gear like gloves, eye protection, and old clothes or an apron. White wash can splatter and stain.
- Sandpaper: Lightly sanding between coats will help the next coat of white wash adhere better. Use fine-grit sandpaper (220 grit or higher) for a smooth finish.
- Sealant (optional): For added protection, apply a sealant like polyurethane 2-3 days after your final coat of white wash. This is especially useful for high-traffic areas like cabinets.
Prepping and Cleaning Cabinets Prior to White Washing
To get started, empty out and wipe down your cabinets. Remove doors, drawers, and hardware, and wipe down all surfaces with a degreaser like TSP or a commercial cabinet cleaner and a scrub brush. Rinse well with water and let dry completely. This step is important to provide a “tooth” for the paint to adhere to.
Next, fill any holes, scratches, or imperfections in the wood with wood filler that matches your cabinet finish. Let the filler dry, then sand smooth. Apply a coat of primer for the best results, especially if you’re painting over a dark wood or laminate. Oil-based primer works well for cabinets. Let the primer dry as directed.
Now you’re ready to paint! For white washing cabinets, use latex or chalk paint in the color of your choice. A popular creamy white color is Swiss Coffee by Behr. You’ll also need glaze or whitewash pickling stains, paintbrushes, lint-free cloths like cheesecloth, and a sealant like polyurethane.
Apply a coat of paint to the cabinets and let dry. Next, dip your brush in the glaze and wipe off excess on a cloth so the brush is damp but not dripping. Use light, random strokes to brush the glaze onto the corners and crevices of the cabinets for an antiqued look.
Use a clean, damp cloth to wipe away the glaze from the flat cabinet faces, leaving it mostly in the recesses. This creates a weathered, whitewashed effect. Add additional coats of glaze and wipe away until you achieve your desired aged patina.
Finally, apply 2-3 coats of sealant like polyurethane with a brush to protect your new finish. Reinstall the hardware and you’re done. Your freshly whitewashed cabinets will add cottage charm and homey appeal. With some TLC, your whitewashed cabinets can last for many years to come.
Choosing the Right White Wash Paint and Finish
When it comes to white washing your kitchen cabinets, the paint you choose is critical. There are several options for white wash paint, from latex and chalk paint to milk paint. For most DIYers, latex or chalk paint are good options as they are easy to work with and provide great coverage.
For a whitewash finish, you’ll want paint that is opaque enough to cover the underlying wood but that can also be manipulated to let some of the wood grain show through. A paint that is too thin won’t provide enough coverage, while a paint that is too thick won’t distress well. Latex or chalk paint at around 100-150 grit will work nicely. You’ll also want to paint with a matte or eggshell sheen rather than a high-gloss finish for an authentic white wash look.
Once you’ve selected your paint, you’ll need to choose a topcoat sealer. A matte polyurethane or wax will seal the paint without altering the white wash effect. Water-based polyacrylic or wax specifically for chalk paint also works well. The sealer you choose depends on the level of protection you want. Polyurethane provides the most protection while wax offers minimal protection but maintains the rustic patina.
For the white wash technique, you’ll be watering down the paint, so keep that in mind when determining how much paint to purchase. It’s best to buy too much paint rather than not enough. Be sure to test the paint and techniques on an inconspicuous cabinet or board first to ensure you get the look you want before painting your entire kitchen.
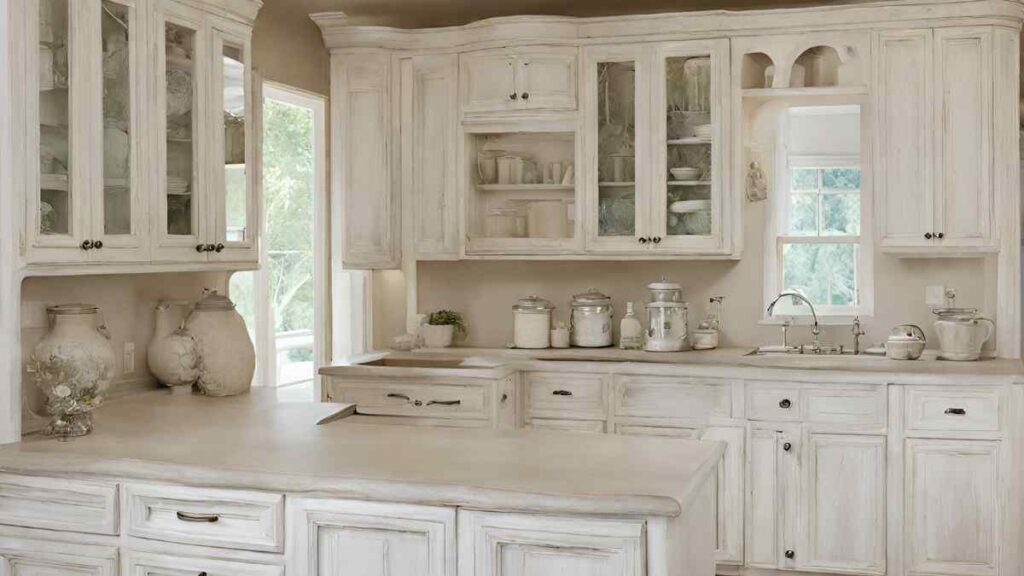
With some experimenting, you’ll find the perfect combination of paint, dilution, and sealer to achieve a stunning white wash finish on your kitchen cabinets. Your freshly painted cabinets will add lots of cottage charm and a sense of airiness to your kitchen. The white wash technique results in a custom, one-of-a-kind look that you can be proud to call your own creative handiwork.
Step-by-Step Instructions for White Washing Cabinets
Now that you’ve gathered all your supplies and prepped the area, it’s time to dive into whitewashing your kitchen cabinets. This process is simple but does require patience. Take your time and don’t rush—the results will be well worth it!
Clean the Cabinets
First, thoroughly clean your cabinets to remove any dirt or grease. Use a degreaser or heavy-duty cleaner and scrub them down. Rinse well with water to remove all residue. Allow cabinets to dry completely before moving on to the next step.
Lightly Sand
Lightly sand the cabinet surfaces with fine-grit sandpaper (around 220 grit) to rough them up a bit. This will help the white wash bond better. Wipe away dust with a tack cloth.
Apply a Base Coat (Optional)
For darker wood cabinets, apply a base coat of primer to help the white wash show through better. Let the primer dry as directed.
Mix the White Wash
Mix one part white paint (in a satin or semi-gloss finish) and one part water or paint extender. For a lighter wash, use more water. For a heavier wash, use less water. You want it to be thin and runny.
Brush it On
Using a paintbrush, liberally apply the white wash onto one cabinet section at a time. Work it into the grooves and details. Let it sit for 3 to 5 minutes, then use a clean, wet rag to wipe off the excess in the direction of the wood grain. Repeat on all cabinets.
distress (Optional)
Once dry, you can distress the cabinets by sanding edges and corners to show some of the wood beneath for an antique look. Wipe away dust before sealing.
Seal the Cabinets
Apply 2-3 coats of polyurethane sealant, waiting 2 hours between coats. This protects your new finish and provides durability.
Re-install Hardware
Re-install your cabinet hardware and you’re done! Enjoy your bright, refreshed kitchen. The white wash technique adds loads of rustic charm and a cozy cottage feel.
Applying a Top Coat for Protection and a Sheen
Once your white wash coats are dry, it’s time to apply a protective topcoat. A topcoat seals the white wash and provides protection from stains, scratches, and yellowing. It will also add a subtle sheen for a polished look.
Polyurethane
For the most durable topcoat, use a water-based polyurethane. Look for a product specially formulated for use on painted or whitewashed surfaces. Apply 2-3 coats, waiting 2 hours between coats. Polyurethane dries hard and provides the best protection for your cabinets. However, it has a strong odor, so proper ventilation is important.
Wax
For a more natural finish with less odor, use a wax topcoat like beeswax or butcher block wax. Wax soaks into the wood and white wash, protecting it from stains and scratches while still allowing the wood to breathe. It provides a soft sheen and matte finish. Apply 2-3 coats of wax, buffing each coat with a soft cloth to bring out the sheen. Re-wax every 6-12 months to maintain protection.
Paint
You can also use the same white paint you used for the wash coat as a topcoat. Apply 1-2 thin coats, waiting 2 hours between coats. Paint provides good protection and coverage but may appear slightly uneven over the wash coat. For best results, consider diluting the paint by 25% for the topcoat.
- Ventilate and wear proper respiratory protection based on the products you choose.
- Lightly sand between all topcoats with 220-grit sandpaper for the best adhesion. Wipe away dust with a tack cloth.
- Allow the final topcoat to cure as directed before reinstalling the hardware and knobs.
- Consider a sealant for areas around the sink and countertops that may see excess moisture.
The topcoat is a crucial final step that will help your white washed cabinets look their best for years to come. Take your time and apply thin, even coats for a professional quality result you’ll love. Your kitchen will be transformed!
Decorating White Washed Cabinets: Hardware, Accents, and More
Once your cabinets are white washed to perfection, it’s time to add the finishing touches that will make them really shine. Hardware, accents, and decorations are easy ways to customize your new white cabinets and make the space your own.
Hardware
New hardware is an easy way to update the look and feel of your cabinets. Consider:
- Sleek modern pulls for a contemporary vibe. Stainless steel or matte black are stylish options.
- Whimsical knobs for a fun, eclectic look. Crystal, colored glass, or stone knobs would be perfect.
- Bar pulls along the top edge of lower cabinets for an industrial flair.
- Ring or cup pulls for a retro, vintage-inspired feel.
- Matching hardware throughout for a cohesive, polished look. Or mix metals and styles for visual interest.
Accent Trim
For extra charm, add accent trim to your cabinet doors and drawers. Wood or metal trim can be attached around the outer edges of cabinet fronts to create a framed effect. Wider trim, like board and batten, works well for a rustic farmhouse style. Thinner trim in a contrasting color or metallic creates a sleek, custom look.
Decorations
Once hardware and accents are installed, have fun decorating your new white cabinets! Some ideas include:
- Display colorful dishware, glasses, or decorative items inside glass-front cabinets.
- Add removable wallpaper, contact paper, or wrapping paper inside cabinet doors for a pop of pattern.
- Attach a bar across upper cabinets to hang plants, pots pans, or utensils.
- Place decorative boxes, trays, baskets, and bowls on top of cabinets for additional storage and style.
- Install open shelving for a casual space to display collections.
- Add task lighting under cabinets to illuminate counters and show off your decorations.
With the right accents and decor, your white washed cabinets will become the stylish focal point of your kitchen. Have fun with it and make the space your own!
Caring for and Maintaining White Washed Cabinets
Now that your kitchen cabinets have a fresh coat of white wash, it’s important to properly care for them to keep them looking their best. White wash tends to show dirt and grime more easily, so frequent cleaning and touch-ups may be needed.
Dust Regularly
Dust your white washed cabinets at least once a week with a microfiber duster or soft cloth to remove surface dust and debris. Pay extra attention to handles and hardware where dust collects. For stuck-on messes, use a damp cloth or multi-surface cleaner. Avoid using too much water which can damage the white wash finish.
Deep Clean Spills and Splatter
Wipe up spills and splatters immediately to prevent staining. For dried-on spills, use a degreaser or commercial kitchen cleaner and scrub with an abrasive sponge. Rinse well with water and dry completely. For tough stains, you may need to scrub a bit to lift the stain from the grooves and pits in the wood.
Protect From Heat and Moisture
Shield your cabinets from excess heat and moisture which can cause white wash to yellow or peel. Use cabinet protectors, trivets, and liners when placing hot items on counters. Run an exhaust fan while cooking and consider installing a vented range hood. Avoid leaving standing water on cabinet surfaces.
Touch Up As Needed
Inspect your cabinets regularly for any chips, scratches, or stains in the white wash and touch up as needed. Lightly sand the area, then apply another coat of your white wash mixture with a small artist’s brush. Blend in with the surrounding area. For larger damage, you may need to re-white wash the entire cabinet front or door.
Re-White Wash
Over time, your white wash finish can show signs of aging through yellowing or darkening. Plan to re-white wash your entire set of kitchen cabinets every 2-5 years to revive the bright, rustic look. Clean cabinets thoroughly, then reapply 2-3 coats of your white wash mixture, waiting for each coat to dry completely. Your kitchen will look brand new again!
With regular cleaning, maintenance, and re-application of white wash as needed, your charming cabinets will continue providing beauty and function for many years to come. The time and effort will be well worth enjoying your gorgeous white washed kitchen.
White Wash Cabinets FAQ: Answering Common Questions and Concerns
White washing your kitchen cabinets is a stylish way to give your space a rustic, farmhouse feel without a major renovation. However, you probably have some questions before diving in. Here are the answers to the most common concerns about white washing cabinets.
Will whitewash work on any cabinet material?
Do I need to prime the cabinets first?
How long does the process take?
Do I need to seal the whitewash finish?
Can I distress the whitewash for an antique look?
Conclusion
At the end of the day, whitewashing your kitchen cabinets is a rewarding DIY project that will leave you with a bright, airy space you love spending time in. You now have the skills and confidence to take on more ambitious renovations around your home. And the best part? Your newly whitewashed cabinets will make you smile every time you walk into the kitchen. So grab your paintbrush, crank up some tunes, and get to work transforming your space. Before you know it, you’ll be enjoying coffee and conversations in your fresh, modern kitchen. The perfect combination of rustic charm and crisp cleanliness.
More Best Kitchen Cabinets recommendations
- Transform Your Space: Painting Kitchen Cabinets Black for a Sleek Makeover
- Amish Kitchen Cabinets: The Epitome of Quality and Craftsmanship
- 21 Popular Kitchen Colors with White Cabinets: 9 Stunning Ideas for 2023
- Modern Kitchen Paint Colors With Cherry Cabinets Pictures
- Adding Toppers to Kitchen Cabinets: A Step-by-Step Guide