We may earn money or products from the companies mentioned in this post.
A leaking kitchen faucet handle often indicates worn-out O-rings or a faulty cartridge. Regularly addressing these parts can prevent persistent drips.
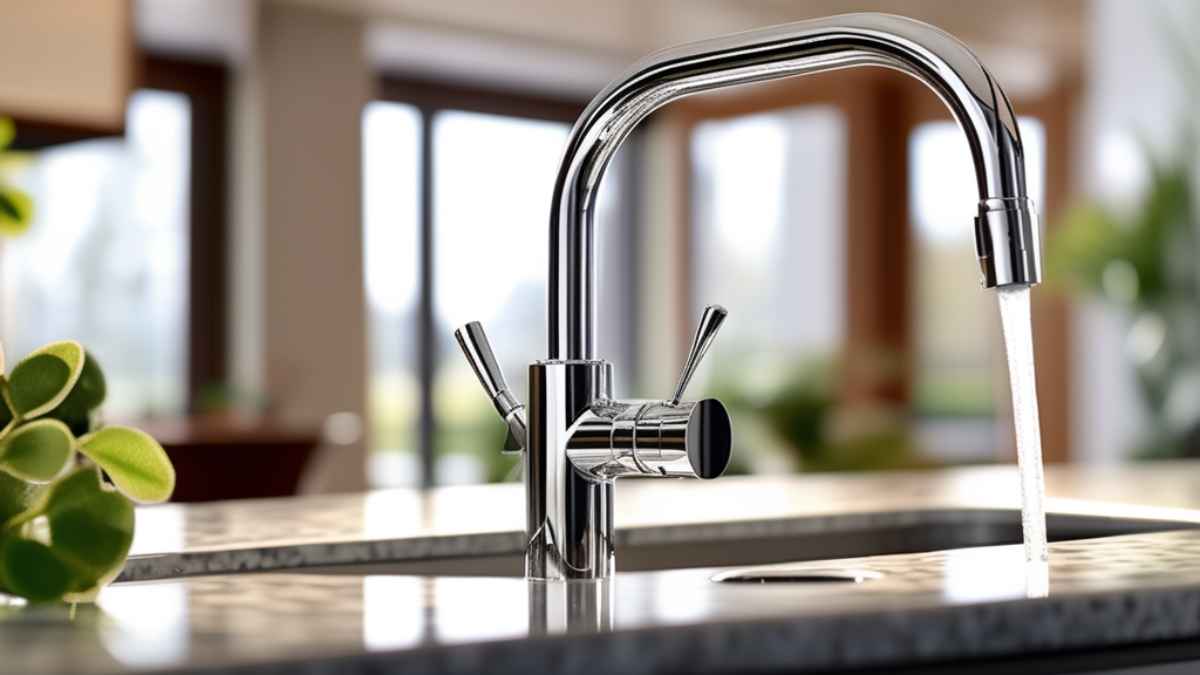
Leaky kitchen faucets are a common household nuisance that can lead to higher water bills and potential sink damage. Immediate action is essential to avoid prolonged issues and unnecessary water waste. A faucet leak typically stems from internal components losing their integrity, such as the O-ring, which seals the handle, or the cartridge that controls water flow.
Recognizing the signs early, like water pooling at the base of the handle or dripping when the faucet is off, can save homeowners time and resources. Routine maintenance and timely replacement of these parts can keep faucets in optimal condition, ensuring your kitchen remains functional and efficient. It’s crucial to address these repairs promptly to maintain both the faucet’s performance and your peace of mind.
Identifying The Leakage Source
When a kitchen faucet leaks at the handle, it can be an annoying problem that disrupts your daily kitchen tasks and potentially leads to higher water bills or water damage. Identifying the leakage source is the first step toward fixing the issue. By carefully inspecting the faucet handle and checking for signs of corrosion or wear, homeowners can diagnose the problem and prepare for a successful repair. Let’s dive into the process of uncovering the root of the leakage.
Inspecting The Faucet Handle
Begin by carefully examining the faucet handle. Look for any visible signs of leakage, such as water dripping or moisture accumulation around the handle base. To get a clearer view, it’s often helpful to:
- Turn off the water supply to the faucet to prevent further leakage while inspecting.
- Carefully remove the handle using the appropriate tools, usually a screwdriver or an Allen wrench.
- Once removed, check the O-ring and washer situated beneath the handle for any signs of damage or deterioration.
Don’t forget to observe the condition of the valve seat, which can often be the culprit behind a leaky faucet handle.
Checking For Corrosion Or Wear
After disassembling the faucet handle, assess the various components for any signs of wear or corrosion:
- Inspect metal parts for rust or mineral deposits, which can indicate a reaction with water or cleaning agents.
- Evaluate rubber seals and washers for any noticeable wear or brittleness, common after years of use.
- Assess the integrity of the cartridge or valve within the faucet handle; these may need replacement if faulty or worn out.
Components that show significant corrosion or wear are often the source of leakage and will require replacement to ensure the faucet functions properly.Example of a table, if needed, showing common issues and solutions (Not required in this scenario, but an example for reference):
| Common Issue | Signs | Potential Solution |
|---|---|---|
| Damaged O-ring | Visible wear, cracks | Replace O-ring |
| Corroded Valve Seat | Rust, mineral deposits | Clean or replace valve seat |
In identifying the source of a leaky kitchen faucet handle, attention to detail is key. Should regular inspection not reveal the issue, consider consulting with a professional plumber. With the leakage source properly identified, the necessary repairs become clearer, leading to a swiftly resolved faucet leak.
Gathering Necessary Supplies
Gathering Necessary Supplies for a kitchen faucet repair is like prepping for a culinary masterpiece. You need the right ingredients before you start. Similarly, fixing a leaky faucet handle requires a well-prepared DIY toolkit. With essential tools and replacement parts at the ready, you can turn the annoying drip into a victory against home maintenance woes. Let’s dive into what you’ll need.
List Of Required Tools
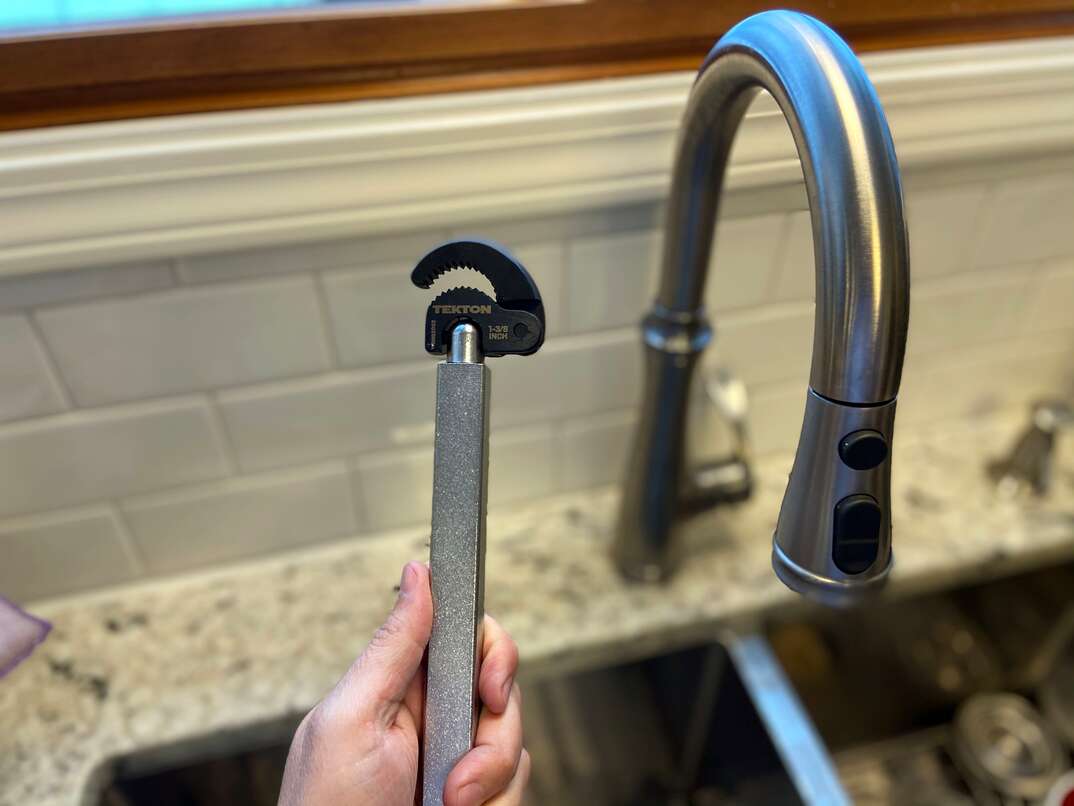
Before tackling the leak, ensure your toolbox contains these must-have items:
- Adjustable wrench: For loosening and tightening nuts and bolts.
- Allen wrenches: Needed for set screws on the faucet handle.
- Screwdrivers: Flat-head and Phillips-head, to fit various screws.
- Slip-joint pliers: Provides grip and leverage.
- Plumber’s tape: Helps achieving a watertight seal.
- Rags or towels: To clean up any spills or drips.
- Bucket or container: Catches any water remaining in the lines.
With these tools, you’re prepared for the mechanical aspects of the repair.
Understanding Replacement Parts
Knowledge about the replacement parts is critical. Here’s what you should know:
| Part | Function | Signs it May Need Replacing |
|---|---|---|
| O-Rings | Seals the joint between parts | Visible wear, tear, or deformity. Leak continues after tightening handle. |
| Cartridge or Valve Stem | Regulates water flow and temperature | Consistent dripping, difficulty in handling, or unusual resistance. |
| Washers/Gaskets | Creates a seal preventing leaks | Deterioration or if the faucet is very old. |
Ensure you have identified the correct replacement parts before proceeding. Wrong parts can lead to further leaks or damage.
Step-by-step Repair Guide
A dripping faucet is more than a minor annoyance. It’s a plumbing puzzle waiting for a solution. With the right approach and a touch of DIY spirit, you can find that solution in your own kitchen. This step-by-step repair guide will help you fix a kitchen faucet leaking at the handle. By following these instructions, you can save money, conserve water, and restore peace to your sink.
Turning Off Water Supply
Before rolling up your sleeves, stop the water flow to prevent any accidental floods. Here’s how:
- Locate the valves under the sink. You’ll find them connected to the water supply lines that feed your faucet.
- Turn each valve clockwise until it won’t turn anymore. This action shuts off the water supply.
- Open the faucet to release any remaining water and pressure in the lines.
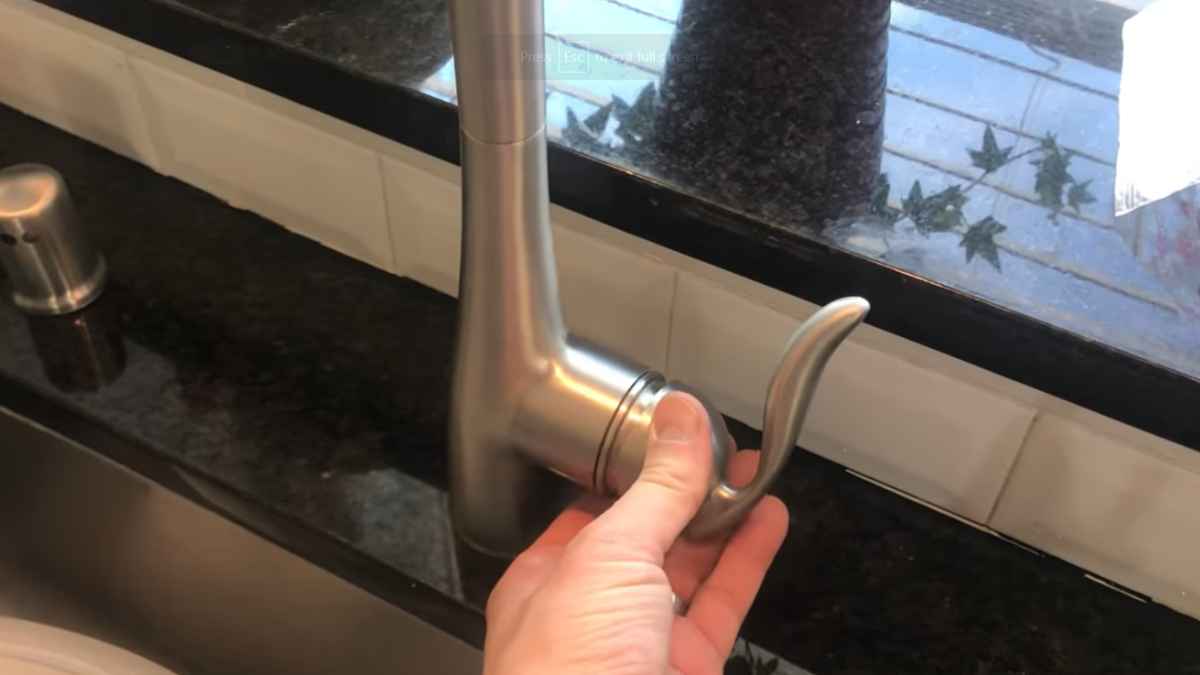
Disassembling The Faucet Handle
To reach the source of the leak, you must disassemble the faucet handle. Ensure you have a flathead screwdriver and an adjustable wrench ready.
- Look for a decorative cap or screw cover on the faucet handle. Carefully pry it off with the flathead screwdriver to reveal the underlying screw.
- Using the screwdriver or an Allen wrench, remove the screw. Securely hold the handle so it doesn’t twist the entire faucet.
- Lift the handle off the stem to expose the inner parts.
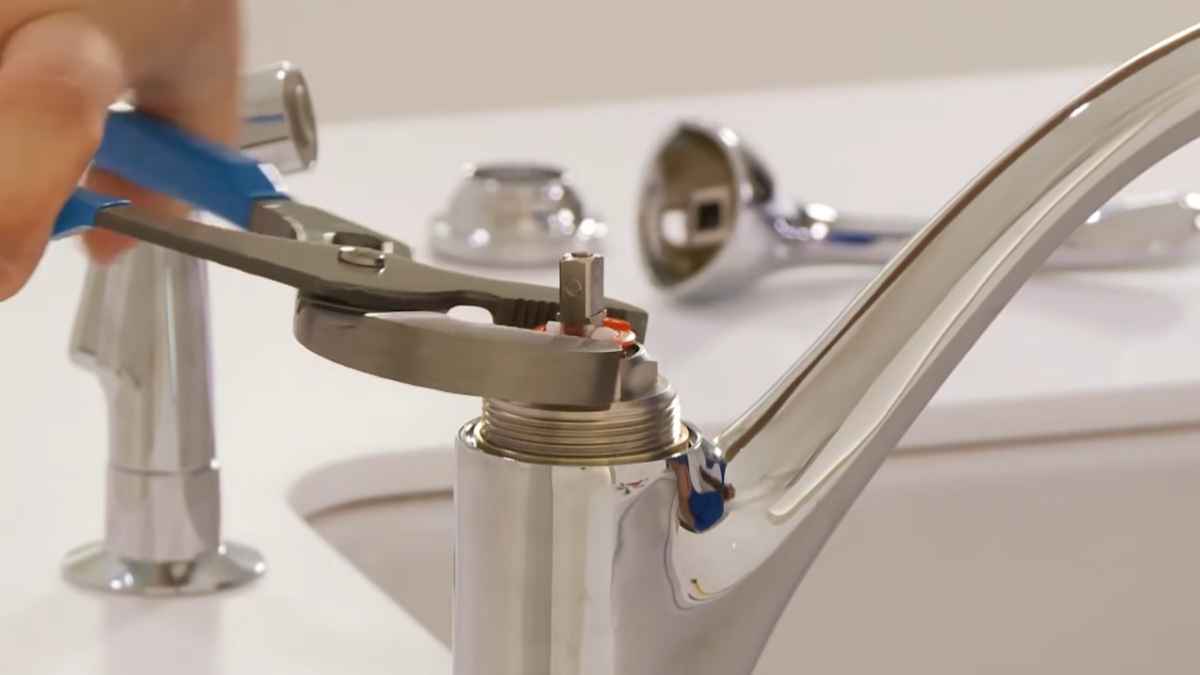
Replacing O-rings And Washers
At the heart of the handle, you’ll find O-rings and washers, which are often the culprits behind leaks. Replace these components to seal the deal on your leaky faucet.
- With the handle off, use an adjustable wrench to unscrew the packing nut, revealing the stem.
- Remove the old O-ring. You might need a utility knife or a specialized tool if it’s stuck.
- Apply plumber’s grease to the new O-ring, and slide it into place.
- If your faucet design includes washers, replace them similarly. Ensure they fit snugly and are the correct size.
- Reassemble the faucet by reversing the disassembly steps, being careful not to over-tighten screws.
By following this guide, your kitchen faucet should no longer leak from the handle. Regular maintenance and timely repairs can keep your faucet in top condition, preventing future leaks and issues. Remember, working with plumbing can sometimes lead to unexpected complexities. If the leak persists or you’re unsure about any step, consider contacting a professional plumber.
Exploring Modern Faucet Options
With the common issue of kitchen faucet leaking at the handle, it’s time to explore modern faucet options that not only address this pesky problem but also enhance the functionality and aesthetics of your kitchen. The sleek designs, innovative features, and advanced technology of modern faucets can transform your kitchen space significantly. Let’s delve into the benefits these faucets offer and the factors you should consider when upgrading.
Benefits Of Modern Faucets
Modern faucets are a game-changer for both utilities and style in the kitchen. Here are some benefits they bring to the table:
- Enhanced Durability: Manufactured with high-quality materials, modern faucets are built to last, reducing the likelihood of leaks and the need for frequent repairs.
- Improved Functionality: Features like touchless operation, adjustable spray patterns, and retractable heads make kitchen tasks more efficient and less messy.
- Eco-Friendly: Many contemporary designs are focused on water conservation, helping you save on your utility bills and minimize your environmental footprint.
- Style Quotient: A vast range of designs, from sleek minimalist to classic elegance, modern faucets can be the centerpiece of your kitchen, reflecting your personal style.
Factors To Consider In Upgrading
When it’s time to upgrade to a modern faucet, weigh these factors to make an informed choice:
| Factor | Description |
|---|---|
| Compatibility | Ensure the new faucet fits your sink’s existing setup. Consider the number of holes and mounting system. |
| Features | Decide which features, like touchless operation or water filtration, align with your needs. |
| Finish | Choose a finish that matches your kitchen decor and is resistant to tarnish, fingerprints, and water spots. |
| Brand & Warranty | Select a reputable brand that offers a solid warranty, ensuring that your investment is protected. |
Selecting the perfect modern faucet involves a balance between function, style, and practicality. With the right faucet, a leaky handle can become a thing of the past, and your kitchen can reach new heights of efficiency and elegance. Evaluate these key factors carefully and prepare for a transformative kitchen update.
When To Seek Professional Help
Experiencing a leaky kitchen faucet can be more than just a nuisance; it may be a sign of a deeper problem requiring a professional’s touch. As homeowners, it’s crucial to recognize when a DIY fix won’t cut it and to call in an expert. The longevity of plumbing fixtures hinges on timely interventions. This section delves into the indicators that it’s time to seek professional help and offers guidance on ensuring your faucet remains in top condition.
Knowing The Signs
Several red flags should prompt you to consider professional faucet repair services:
- Complex Internal Issues: If the problem seems to stem from within the faucet’s internal mechanisms, it’s a clear sign professional assistance is needed.
- Persistent Dripping: A constant drip despite replacing washers or o-rings suggests a deeper issue that a plumber should address.
- Water Damage: Signs of water damage such as mold or mildew around the faucet base demand immediate professional attention to prevent costly damages.
- Reduced Water Pressure: This often indicates mineral buildup or a compromised pipe that experts can efficiently resolve.
Maintaining A Leak-free Faucet
To prevent leaks and the subsequent need for repairs, adhere to these maintenance tips:
| Regular Maintenance | Benefits |
|---|---|
| Regular Cleaning: Utilize mild cleaners to avoid damaging finishes and remove mineral deposits. | Preserves aesthetic and functional integrity. |
| Periodic Inspections: Check for wear and tear, especially in seals and valves. | Early detection of potential problems. |
| Professional Check-ups: Have a plumber inspect the faucet every few years. | Keeps the faucet in optimal working condition, preventing unexpected failures. |
Credit: www.homeserve.com
Frequently Asked Questions On Kitchen Faucet Leaking At Handle
Why Is My Kitchen Faucet Leaking At The Handle?
Leaks in kitchen faucets can often be traced to worn out O-rings or gaskets. Regular use can cause these parts to deteriorate over time, leading to leakage around the handle. It’s usually a sign that these components need replacement.
How To Fix A Leaky Kitchen Faucet Handle?
Fixing a leaky kitchen faucet handle typically involves disassembling the handle to expose the valve. Once accessed, replace the faulty O-ring or washer, then reassemble. Make sure to turn off the water supply before beginning any repairs.
Can A Leaking Faucet Increase Water Bills?
Yes, a leaking faucet can significantly increase water bills. Even a small drip can waste gallons of water over time, leading to unnecessary extra charges on your monthly utility bill.
What Tools Are Needed To Repair A Faucet Leak?
To repair a faucet leak, you’ll generally need an adjustable wrench, a Phillips or flathead screwdriver, and replacement parts such as O-rings or washers specific to your faucet model.
Conclusion
Tackling a leaky kitchen faucet handle can be a quick DIY fix. By identifying common issues and applying the solutions we’ve discussed, you can restore your faucet’s function and prevent water waste. Remember, proper maintenance ensures your kitchen’s cornerstone operates smoothly.
Don’t hesitate to seek professional help when needed. Keep your faucet drip-free and efficient with these easy steps.
More kitchen Faucets recommendations
- Top 10 The Best Luxury Kitchen Faucets for Every Budget
- What Is the Highest GPM Kitchen Faucet? Meet the Moen Arbor
- Best Gold Kitchen Faucets of 2023: Top 5 Picks for a Luxurious Look
- Waypoint Cabinets vs KraftMaid: Which is the Better Choice?
- American Woodmark Cabinets: Real Customer Reviews
- Midea Appliances Reviews: What Customers Are Saying
- The Best High-End Kitchen Faucets for Every Budget
- Allen and Roth Kitchen Faucet With LED Light:
- How to install a Moen Kitchen Faucet With Sprayer
- How to Install a Kohler Kitchen Faucet: A DIY Tutorial