We may earn money or products from the companies mentioned in this post.
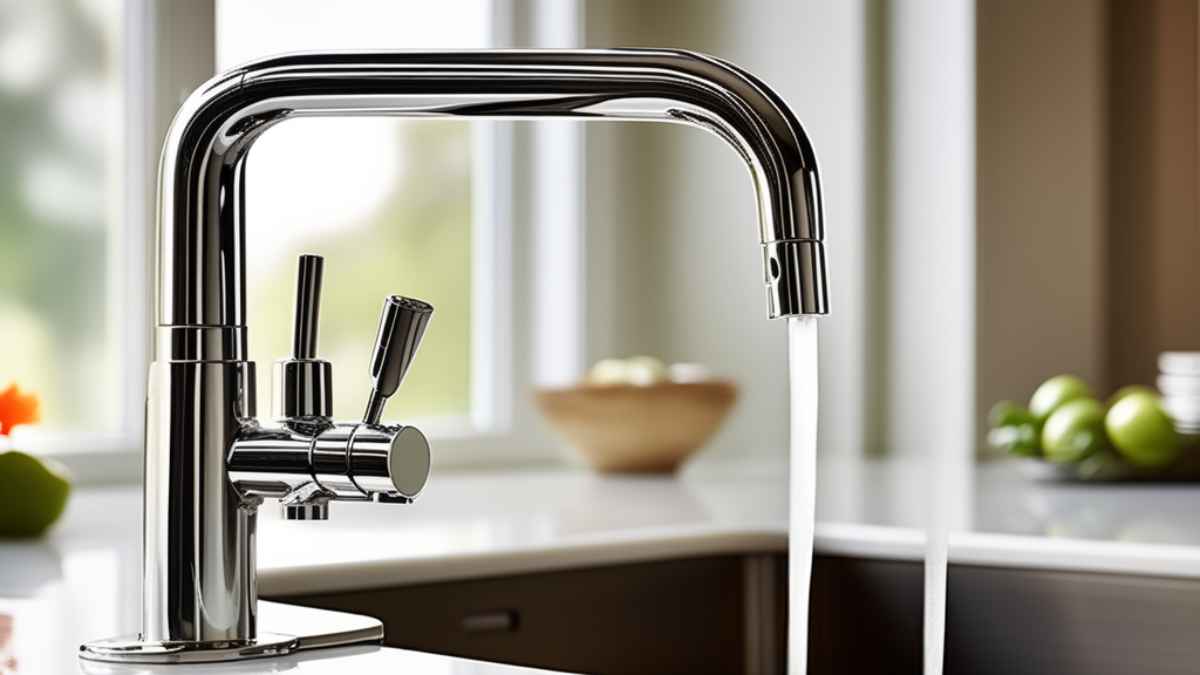
A Kitchen Faucet Leaking from Handle typically indicates worn O-rings or seals. Immediate attention can prevent further damage and save water.
Addressing a kitchen faucet leak as soon as it’s noticed is crucial both for water conservation and to avoid potential damage to your sink area. A dripping faucet can lead to higher water bills and undue stress on your plumbing system.
It’s a common household problem that homeowners face, and while it might seem minor, it can be symptomatic of needed maintenance. Tending to this issue promptly ensures that your faucet continues to function efficiently and remains durable over time. DIY enthusiasts might be able to handle the repair with the right tools and a bit of know-how, whereas others might prefer to call in a professional. Either way, fixing a leaking kitchen faucet handle is an important task that should not be delayed to maintain the integrity of your kitchen’s plumbing.
Credit: www.homeserve.com
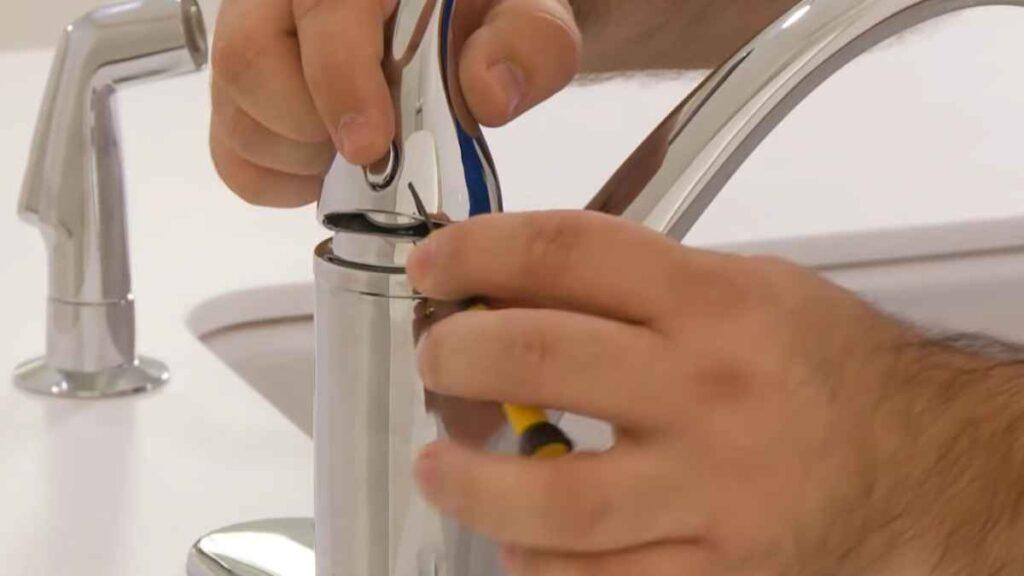
Identifying The Leak Source
One of the most common issues homeowners face in the kitchen is a pesky leak from the faucet handle. Not only can this seem like a minor inconvenience, but it can also lead to higher water bills and potential damage to your kitchen’s cabinetry and surfaces. To tackle this problem effectively, pinpointing the exact source of the leakage is crucial. Follow the steps below to diagnose the issue and prepare for the appropriate fix.
Inspecting The Faucet Handle
Start with a visual inspection of the faucet handle. Activate the handle by turning the water on and off, observing any water that may seep out from its base or any of the connecting points.
- Check for dripping water when the handle is in the ‘on’ and ‘off’ positions.
- Notice if the leak worsens at specific handle positions which could indicate an internal problem.
Checking For Loose Parts
Tightening any loose screws or nuts is a key step. A loose handle can cause poor regulation of water flow, leading to leakage.
| Action | Potential Result |
|---|---|
Turn the handle screw clockwise | Secures the handle, possibly stopping the leak |
Check the packing nut | If loose, tighten gently to prevent further leakage |
Examining The O-ring And Cartridge
Inspect the O-ring, found beneath the handle. This small, circular piece can degrade over time, losing its capacity to hold back water.
- Remove the faucet handle to access the O-ring.
- Look for signs of wear, tear, or distortion on the O-ring.
- If damaged, consider replacing the O-ring to see if it resolves the leakage.
Review the cartridge, often situated within the faucet handle housing. The cartridge controls water flow and temperature and thus, if faulty, can lead to leaks.
- After removing the faucet handle, locate and assess the condition of the cartridge.
- Check for mineral deposits or nicks that could impact its function.
- A compromised cartridge can typically be replaced to restore proper faucet operation.
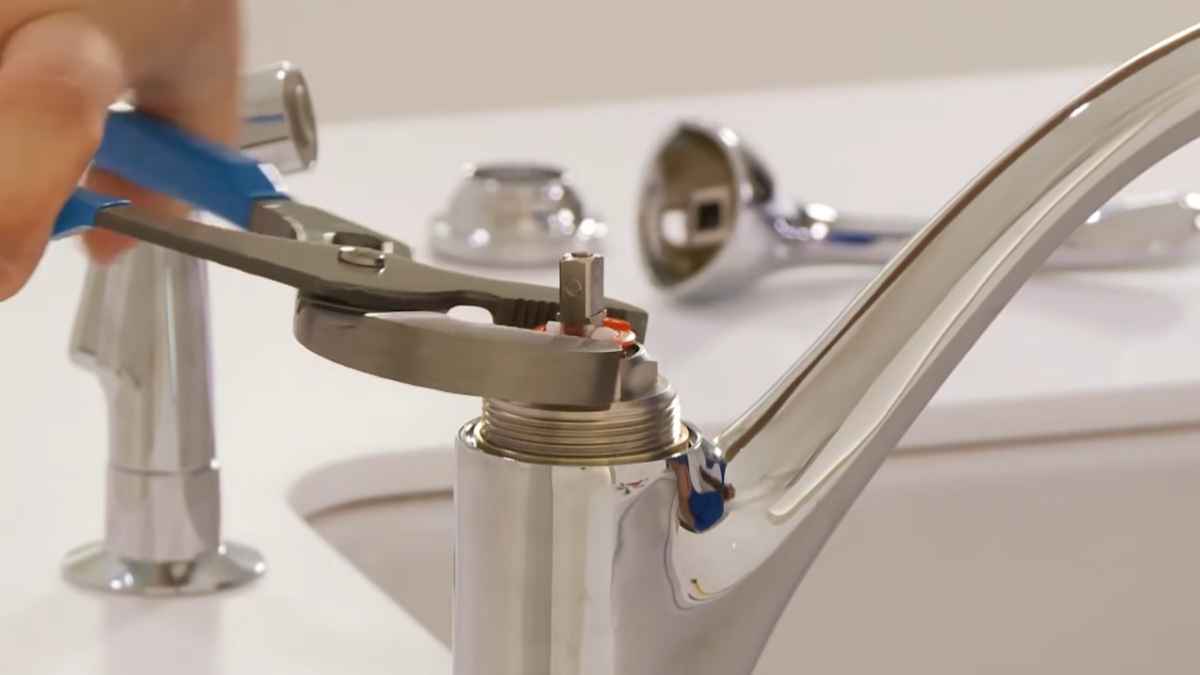
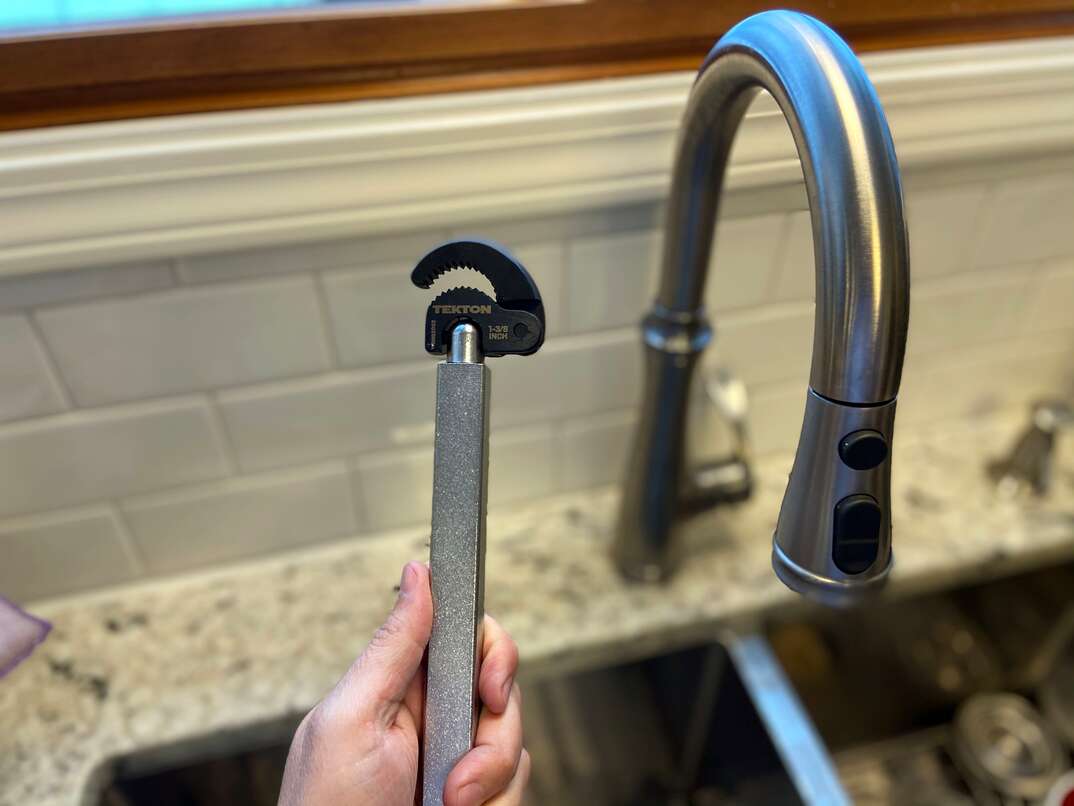
Fixing A Leaky Faucet Handle
The drip, drip, drip of a leaky faucet is more than just an annoyance; it symbolizes money going down the drain and can lead to larger plumbing issues over time. So, tackling that leaky faucet handle in your kitchen is essential. With the right tools and a bit of know-how, you can fix that faucet and restore peace and efficiency to your kitchen sink. Let’s go step by step to tighten, secure, and replace components as needed. Tightening Loose Components
Tightening Loose Components
Loose screws and fittings are often the culprits behind a leaky faucet handle. Over time, they can become loose due to regular use. With an adjustable wrench and a screwdriver, start by carefully tightening each component. Be mindful not to over-tighten, as this may damage the parts or the handle itself. Securing the Handle and Base
Securing The Handle And Base
Solid connections keep the faucet handle and its base stable, preventing leaks. Ensure all nuts and screws are securely fastened. If the handle continues to wobble or leak, disassemble it to check for worn-out parts that may need replacing. A stable handle is key to a well-functioning faucet. Replacing Worn-Out Washers
Replacing Worn-out Washers
Washers withstand a significant amount of friction and can deteriorate over time, leading to leaks. Turn off the water supply before starting, then disassemble the handle to access the washer. Match the size and shape with a new washer from your local hardware store. Replace the old washer and reassemble the faucet to test for leaks. Repairing the O-ring and Cartridge
Repairing The O-ring And Cartridge
O-rings seal the spot where the faucet handle meets the rest of the plumbing, and a faulty one can cause leaks. Similarly, a damaged cartridge can compromise the faucet’s ability to regulate water flow and temperature. Inspect both for signs of wear or damage and prepare to replace them if necessary. Removing and Replacing the O-ring
Removing And Replacing The O-ring
To replace the O-ring, first remove the faucet handle and take out the existing O-ring. Coat a new O-ring with the plumber’s grease for a better seal and slide it into place. This simple step can greatly enhance the faucet’s integrity and stop the leak. Replacing the Faucet Cartridge
Replacing The Faucet Cartridge
If the faucet continues to leak after replacing the O-ring, the cartridge may need attention. This component controls water flow and temperature. Upon removal, take the old cartridge to the store to find an exact match. Insert the new cartridge, reassemble the handle, and check for leaks to ensure a successful repair.
Armed with this guide, you’re now prepared to conquer that leaky faucet handle and reclaim the harmony of a drip-free kitchen sink.
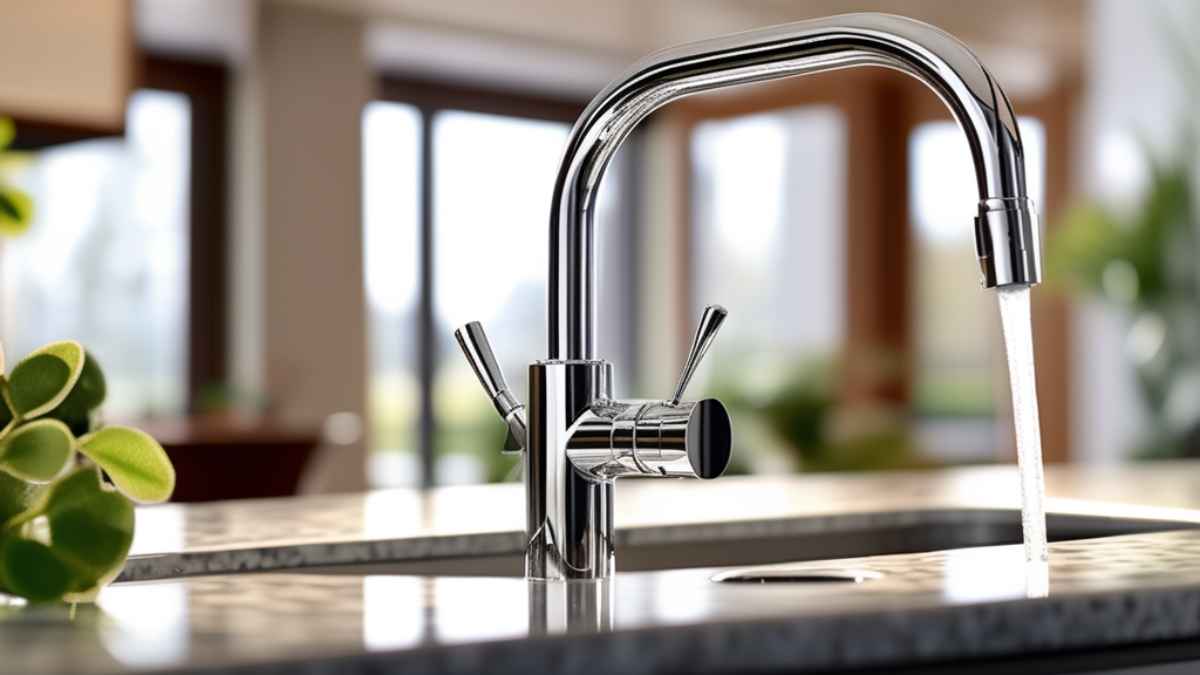
Testing The Repairs
After tightening, replacing, or otherwise addressing the issues that caused your kitchen faucet to leak from the handle, it’s time to put your handiwork to the test. This crucial step ensures that the repairs hold up to daily use and the faucet operates as intended. We will guide you through a systematic approach for testing the repairs, broken down into simple, actionable steps.
Turning On The Water
Once you’ve completed the repair process, gradually turn on the water supply to your kitchen faucet. Begin slowly to avoid any sudden pressure that can cause damage or reveal weaknesses in your repair. This cautious approach prevents potential surges that might compromise your recent fixes.
Checking For Leaks
With the water back on, it’s time to scrutinize the faucet for any signs of leakage. Keep a keen eye on the handle and any connection points. Here’s what to look for:
- Immediate dripping or seepage around the handle
- Moisture accumulation or water trails on the underside of the sink
- Droplets forming at the base of the faucet or where it connects to the sink
It’s prudent to have a dry cloth handy to wipe away any droplets or spillage, making it easier to spot new leaks.
Ensuring Proper Functionality
Finally, check that your faucet operates smoothly. Turn the handle through its full range of motion to confirm it feels right and that the flow of water adjusts correctly without any hiccups or resistance. Take note of:
- Whether the handle moves freely without grinding or stiffness
- The water flow consistency as you change from cold to hot
- Sudden changes in water pressure that were not present before the repair
It’s essential to confirm that the leak is fixed and the faucet’s performance meets expectations. Success in this area guarantees long-term usage and reliability.
Preventive Maintenance Tips
Understanding the importance of preventive maintenance for your kitchen faucet can save you from the inconvenience of unexpected leaks and costly repairs. Regular upkeep not only prolongs the life of your faucet but also ensures it operates efficiently. In this segment, we delve into key tips to maintain your faucet and prevent leaks from occurring at the handle.
Regular Cleaning And Lubrication
Keeping your kitchen faucet clean isn’t just about aesthetics; it’s also crucial for its functionality. Dirt and grime can lead to stiffness and wear. Use a gentle detergent and a soft cloth to wipe down the faucet regularly, preventing build-up. For areas with hard water, consider using a cleaning solution designed to counteract mineral deposits.
Removing Mineral Deposits
Mineral build-up can cause blockages and wear on your faucet components. To tackle this, soaking a cloth in vinegar and wrapping it around the faucet for an hour can dissolve the deposits. Afterward, use a non-abrasive brush to gently scrub away any remaining build-up.
Lubricating Moving Parts
Over time, moving parts can become stiff, leading to leaks. Apply a silicone-based lubricant to any moving parts, such as the handle joint, to ensure smooth operation. Avoid petroleum-based lubricants as they can break down rubber seals.
Prompt Addressing Of Minor Leaks
Even the smallest leak can hint at underlying issues. Don’t ignore them. Address minor leaks by first identifying the source. Oftentimes, tightening the faucet’s packing nut or replacing a worn O-ring can resolve the issue.
Routine Inspection
Periodically check underneath the sink, around the base of the faucet, and look for any signs of moisture or drips. Check hoses for kinks or wear and make sure connections remain tight. If you aren’t confident undertaking these checks alone, consider enlisting a professional.
Quick Repairs
When you spot a problem, take immediate action. Whether that’s replacing a washer or a cartridge, quick repairs can prevent more significant damage. Always shut off the water supply before attempting any repair, and follow the manufacturer’s instructions closely.
Professional Assistance
Dealing with a kitchen faucet that’s leaking from the handle can be frustrating and might lead to bigger issues if not handled properly. While some might be tempted to fix it themselves, certain situations call for the expertise of a professional plumber. This section will explore the signs that indicate when it’s time to call in the pros, understand the intricacies of complex leaks, and consider the age of your kitchen faucet.
Knowing When To Seek Help
It’s essential to recognize the symptoms indicating that a professional plumber’s intervention is necessary. Here’s what to look out for:
- Are water bills skyrocketing? – A leak can waste gallons of water and significantly increase your costs.
- Are DIY fixes not holding up? – If previous attempts to repair the leak are unsuccessful, it’s time for professional help.
- Signs of water damage? – Discoloration or warping on cabinets and floors near the sink signals a severe problem.
Complex Leaks
Leaks that seem minor might be symptoms of a more severe issue. Plumbers can offer solutions for:
- Leaks behind walls or under the sink that may not be visible.
- Mysterious water pressure issues that contribute to the leakage.
- Replacing corroded valves or worn-out seals that DIYers might miss.
Don’t underestimate the complexity of a leak—what appears simple could be a part of a bigger plumbing puzzle.
Age Of The Faucet
Faucets don’t last forever. Awareness of your faucet’s lifespan plays a vital role in troubleshooting leaks. Consider this:
| Faucet Age | Action |
|---|---|
| 0-5 years | Warranty check, possible manufacturer defect. |
| 5-10 years | Parts might need replacing; wear and tear is common. |
| 10+ years | Highly prone to issues; consider a full replacement. |
Remember, an older faucet might require a complete overhaul rather than a simple repair.
Frequently Asked Questions Of Kitchen Faucet Leaking From Handle
Why Is My Kitchen Faucet Leaking At The Handle?
How Do I Fix A Leaking Kitchen Faucet Handle?
Can A Leaky Faucet Increase My Water Bill?
What Tools Are Needed To Repair A Leaky Faucet?
Conclusion
Dealing with a leaky faucet can be daunting, but swift action is crucial. With the right tools and guidance, you can fix the issue and prevent future drips. Remember to check your fixtures periodically and address any leaks promptly. Keep your kitchen efficient and dry – tackle that leaky faucet handle without delay!
More kitchen Faucets recommendations
- Top 10 The Best Luxury Kitchen Faucets for Every Budget
- What Is the Highest GPM Kitchen Faucet? Meet the Moen Arbor
- Best Gold Kitchen Faucets of 2023: Top 5 Picks for a Luxurious Look
- Waypoint Cabinets vs KraftMaid: Which is the Better Choice?
- American Woodmark Cabinets: Real Customer Reviews
- Midea Appliances Reviews: What Customers Are Saying
- The Best High-End Kitchen Faucets for Every Budget
- Allen and Roth Kitchen Faucet With LED Light:
- How to install a Moen Kitchen Faucet With Sprayer
- How to Install a Kohler Kitchen Faucet: A DIY Tutorial