We may earn money or products from the companies mentioned in this post.
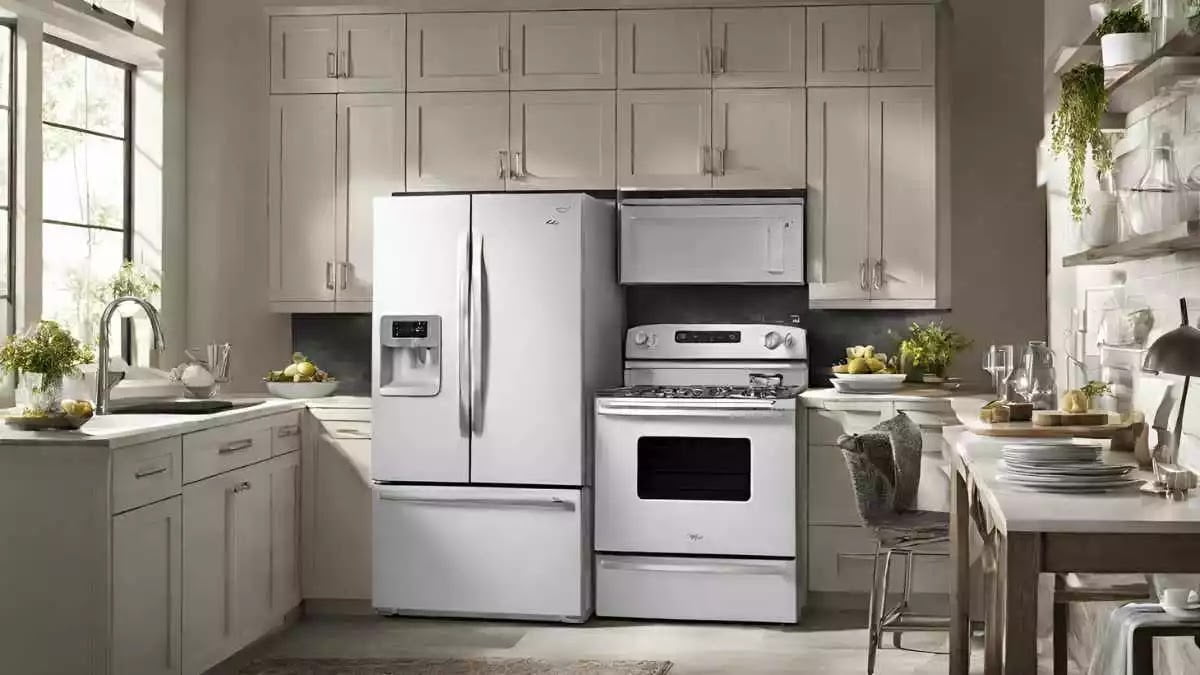
Replacing the spray head on your Kohler kitchen faucet is a quick and easy DIY project. Follow our step-by-step guide to get the job done right.
Have you noticed that the spray head on your Kohler kitchen faucet isn’t working as well as it once did? When you attempt to go from stream to spray, the button can stick or the spray pattern may have become uneven. It’s not necessary to contact the plumber just yet if it has to be replaced. You may simply do a do-it-yourself job and replace the spray head on your Kohler kitchen faucet. You’ll have your faucet operating like new again in a matter of minutes.
Assessing Your Existing Kohler Faucet Spray Head

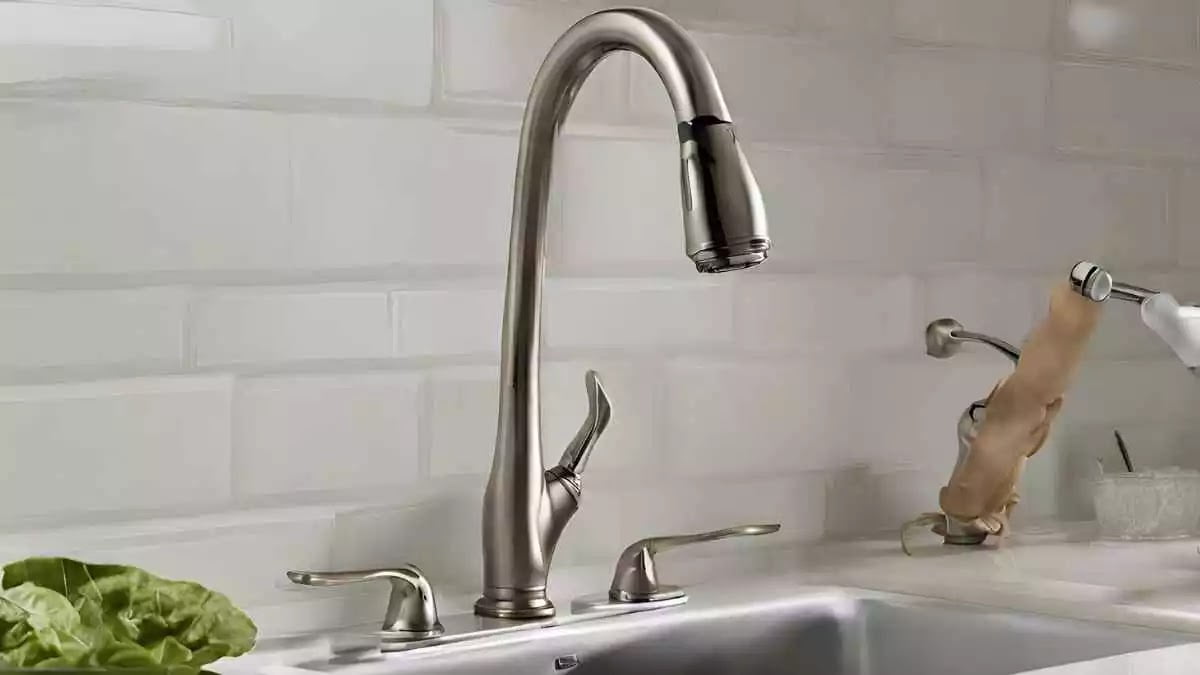
You can adjust the water’s flow and spray using the spray head on your Kohler kitchen faucet. Its effectiveness may be impacted over time by regular wear and tear as well as mineral accumulation. Replace your spray head immediately if it’s leaking, not correctly switching between spray modes, or has low water pressure.
Ascertain the model of your current faucet before making a new spray head purchase. The model number is usually found in your original papers or on the faucet itself. To assist you in locating the appropriate replacement components, Kohler offers an intuitive faucet identification tool on their website. Make that your faucet spray head connects to the faucet base via a spline adapter, cartridge, or quick-connect system. While cartridge and spline adapter spray heads need to be installed with the proper socket wrench, quick-connect spray heads just need to be twisted on.
A genuine Kohler replacement spray head is available on the Kohler website or at the majority of home improvement retailers after you’ve determined the brand and type of your faucet. To install a quick-connect spray head, just twist on the new one after removing the old one. If there are different kinds of connections, you may have to disconnect the water, take out any bolts or holding clips, take out the old spray head, and then replace it with the new one.
Your kitchen faucet will soon be functioning like new again if you have the correct Kohler replacement spray head and a few simple tools. Your Kohler kitchen faucet’s lifetime may be increased by doing routine maintenance such as checking for leaks, lubricating o-rings, and descaling spray heads.
Selecting the Right Replacement Faucet Head
Once you’ve turned off the water supply and removed your old faucet head, it’s time to pick out a replacement. Kohler offers a variety of spray head styles for their kitchen faucets, so you’ll want to choose one that suits your needs and decor.
Pull-Down Spray Heads
For maximum convenience, consider a pull-down spray head. These multifunction heads feature a retractable spray wand that pulls down into the sink for up-close tasks like rinsing produce or filling pots. When not in use, the wand docks neatly back into the faucet spout. Popular options like the Kohler K-72218-VS Simplice pull-down spray head offer multiple spray functions like a stream, sweep spray, and pause.
Single-Function Spray Heads
A single-function model such as the Kohler K-72215-VS Simplice single-function spray head is an excellent option if you’re looking for something basic and easy to use. It offers a strong stream of water for all of your typical culinary chores. This simple but sturdy choice is also quite reasonably priced.
Ultimately, choose a replacement spray head that is compatible with the type of Kohler kitchen faucet you own and has the features and functionalities that you want. To complement your faucet and kitchen décor, take into account finish possibilities including brilliant stainless, polished chrome, or matte black. Your Kohler faucet may be restored to working condition and prepared to tackle any kitchen task with the correct spray head.
Gathering the Necessary Tools and Materials
.jpg "Gathering the Necessary Tools and Materials")
To replace the spray head on your Kohler kitchen faucet, you’ll need to gather a few basic tools and parts. For this DIY project, you should have:
Adjustable wrench or pliers
To loosen the retaining clip or retaining nut that secures the spray head to the faucet spout. An adjustable wrench or pliers can grip and turn these parts.
Replacement spray head
You’ll want to purchase a new spray head that is specifically designed to fit your Kohler faucet model. Check your faucet specifications or product number to find the right replacement part.
Pipe tape or plumber’s putty (optional)
If your new spray head does not come with a washer or gasket to create a watertight seal, you may need some pipe tape, also known as Teflon tape or a plumber’s putty. These can be found at any hardware store.
Towels (optional)
In case there is any remaining water in the faucet lines, have some towels handy. Even though the water supply will be turned off, there can still be some water that leaks or spouts while the replacement is being done.
Eye protection (optional)
Wearing safety goggles or other eye protection might be a good idea to safeguard your eyes in case any components suddenly spring or spray water throughout the process.
Now that you have the required components and equipment, you can begin changing the spray head on your Kohler kitchen faucet. Before starting, make sure the hot and cold water supply pipes beneath the sink are turned off. Please don’t hesitate to get in touch with Kohler’s customer care if you need any further assistance or support. You can guarantee many more years of dependable usage and make your faucet operate correctly again by replacing this little element.
Shutting Off the Water Supply Lines

To replace the spray head on your Kohler kitchen faucet, you’ll first need to shut off the water supply lines under the sink. This will prevent water from spraying out while you work.
Locating the Shutoff Valves
Look under your kitchen sink for two pipes running from the wall to your faucet. These are the hot and cold water supply lines. On each pipe, you should see a shutoff valve where the pipe connects to the faucet. The valves will either be small lever valves or round wheel valves.
Closing the Valves
Turn the hot water shutoff valve clockwise until it’s fully closed. Then turn the cold water shutoff valve clockwise to close it as well. Double-check that both valves are fully closed by turning on your faucet to make sure no water is flowing. If any water continues to trickle out, turn the valves a bit more until the water stops completely.
Testing the Valves
Once the valves are closed, turn the faucet back on to release any built-up pressure. Leave the faucet on for a full minute to ensure water does not continue to seep out. If everything looks dry under the sink after a minute, you can proceed to remove the spray head. However, if water does start leaking from the valves or connections, turn the faucet off immediately and call a plumber to have the issue repaired before continuing. It’s best not to take chances with plumbing leaks!
Draining the Faucet Lines
After turning off the water and releasing the pressure, put a pan or cloth below the spray head to collect any leftover water that could leak. To remove the spray head from the faucet, loosen the mounting nut using pliers or an adjustable wrench. To let water run from the hose and into your towel or pan, you may need to tilt the spray head once it has become loose. After draining the lines, put the new Kohler spray head into the faucet that you removed from the old one.
Before using your faucet, turn the water back on at the supply valves and make sure there are no leaks. You now have a fully functional faucet spray head to make household chores a breeze, if all looks okay! Please contact us if you have any further inquiries.
Removing the Old Spray Head

It’s necessary to take off the old spray head before replacing the one on your Kohler kitchen faucet. With only a few simple instruments, this is a rapid procedure.
You should first shut off your faucet’s water supply. For the purpose of turning off the water, find the cutoff valves beneath or next to the sink and turn them clockwise.
Then, to collect any last drops of water that could spill, put a cloth or bucket below the faucet. Consider keeping your tools and components on a towel that you put on the counter behind the faucet.
It’s time to take off the outdated spray head now. To remove the spray head from the spray hose, most Kohler faucets only need to unscrew it. Using your hands, turn it counterclockwise to loosen. Use pliers or a towel-wrapped wrench if it’s stuck to prevent scratching the finish. It ought to begin to spin if you apply consistent, strong pressure.
:
Unscrew the old spray head and take it off the hose. To get rid of any accumulation, wipe the hose’s end with a moist towel. Before you replace the spray head, be sure you clean the spray hose connection on your faucet to get rid of any dirt.
You may need to take off the spray hose retractor or weight on your Kohler faucet in order to have complete access to the hose end. For correct removal and reinstallation, according to the guidelines provided in the handbook that comes with your faucet model.
It’s now time to install the new replacement spray head after removing the outdated one. Easily attach the replacement spray head by hand-tightening it onto the hose’s end. Next, before using pliers to completely tighten, turn the water back on and look for any drips or leaks.
Make sure the new spray head is functioning properly by turning on your faucet and giving it a test. Restart the water and adjust the spray head once more once everything seems to be in order. Your Kohler kitchen faucet’s spray head has been successfully changed! Congratulations!
Cleaning and Preparing the Faucet

To thoroughly clean your Kohler kitchen faucet and prepare it for a new spray head, follow these steps:
Turn Off the Water
The first thing you’ll want to do is locate the shutoff valves under or near your sink and turn off the water supply lines to your faucet. This will prevent water from spraying out when you remove the existing spray head. Be sure to test your faucet to ensure the water is off before starting the repair.
Remove the Existing Spray Head
Next, gently unscrew the spray head from the gooseneck spout of your Kohler faucet using your hands or a spanner wrench or channel locks. Turn it counterclockwise to loosen and remove it. Have a towel handy to wipe up any excess water left in the line.
Clean and Dry Components
With the old spray head removed, now is a good time to clean your Kohler faucet to remove any built-up minerals or debris. Wipe down the spout and base of the faucet with a damp, soft cloth or sponge and a mixture of warm water and either vinegar, lemon juice or a commercial limescale remover. Rinse well with water to remove any cleaning solution residue. Dry all parts completely with another towel or cloth to prepare the faucet for the new spray head.
Attach New Spray Head
Finally, take your new Kohler spray head out of the packaging and screw it onto the spout by turning it clockwise with your hands. Hand-tighten only, being careful not to overtighten. Test your new spray head to ensure there are no leaks before turning the water supply back on. Turn on the faucet handles and run the water for 30 seconds to flush out any debris.
Your Kohler kitchen faucet should now be clean and working like new with the replacement spray head installed. Be sure to turn the faucet off completely when not in use to conserve water. With proper care and maintenance, your Kohler faucet and new spray head should provide you with years of service.
Installing the New Spray Head

Once you have the new spray head in hand, it’s time to install it. This step-by-step guide will walk you through the process to get your Kohler kitchen faucet working like new again.
Turn off the water supply
Locate the shutoff valves under or near your sink and turn them clockwise to cut off the water. This will prevent any surprises when you start dismantling your faucet.
Detach the spray hose
The spray hose is connected to a quick-connect fitting at the base of the faucet spout. Pull down firmly on the hose to detach it from the spout. You may need pliers to grasp and disconnect it. Have a towel ready to soak up any excess water in the hose or spout.
Attach the new spray head
Your new spray head will also have a quick connect fitting to attach to the spray hose. Hold the end of the hose over the sink, then push the new spray head onto the hose until it clicks into place. Tug on the spray head gently to ensure it’s secure before turning the water back on.
Test and turn the water on
With the new spray head installed, turn the water supply back on and test your work. Run the hot and cold water separately to check for any drips or leaks under the sink. Once everything looks good, you can test the new spray head to ensure proper operation and water pressure.
Troubleshooting
If the new spray head is leaking or not functioning properly, turn off the water and detach the hose. Check that no debris has gotten caught in the quick connect fitting and reattach. Ensure the hose was pushed in completely straight into the fitting. You may need to gently sand down the end of the hose or spray head for a smooth fit. It can also help to moisten the end of the hose slightly with water before reconnecting.
Most of the time, replacing a Kohler spray head is an easy fix. But if you continue to experience issues, it’s best to contact Kohler customer service for further help troubleshooting or to arrange a replacement. With some patience, you’ll be enjoying your new fully functioning Kohler kitchen faucet in no time.
Checking for Leaks and Proper Function
Now that your new Kohler spray head is installed, it’s time to check that everything is working properly and there are no leaks.
Turn the water supply back on
Head to your basement or crawlspace and turn the water supply valves back on. Double-check that the lines are open fully. This will allow water to flow back into your kitchen faucet.
Check for leaks
Look under and around your kitchen sink for any drips or drops of water. Run your hand along the water supply lines, spray hose, and connections to ensure everything is dry. If you do notice a leak, tighten the connections or replace any worn washers or seals. It’s best to address any leaks right away to avoid water damage.
Test the new spray head
Turn your Kohler kitchen faucet on and switch between the spray and stream functions a few times to ensure the diverter mechanism is working properly. The spray head should switch easily between a steady stream and a wide, soft spray pattern. If it seems stuck or is not changing between the two modes, the diverter may need adjustment or replacement.
Check water pressure
With the spray head in the “stream” setting, turn the faucet on fully to check that you have strong, even water pressure and flow. If the water flow seems weak, uneven or cuts out, there may be additional issues with the faucet cartridge or water supply lines that need to be addressed. It’s best to contact a plumber to inspect further.
Final inspection
Do a final check under the sink to ensure there are no leaks and all water connections are tight. Turn the spray head to each function one more time to make sure it’s operating correctly. Congratulations, your Kohler kitchen faucet spray head replacement is now complete! You can now enjoy improved functionality and water pressure in your kitchen once again.
Troubleshooting Common Kohler Faucet Spray Head Problems
If your Kohler kitchen faucet spray head is malfunctioning or not working properly, there are a few common issues that could be the cause. Here are some troubleshooting tips to try before replacing the spray head.
Mineral buildup
Over time, hard water can lead to mineral buildup in the spray head that prevents water from flowing freely. To clean out any buildup, soak the spray head in a vinegar and water solution. The acid in vinegar helps dissolve the minerals. Let it soak for several hours or overnight. Rinse with water and reattach to see if the flow has improved.
Incorrect installation
If the water flow seems weak or uneven, the spray head may not be installed properly. Double-check that the spray head is threaded on tightly and correctly aligned. Tighten by hand and then use pliers to turn it an additional 1/4 turn. Be very careful not to overtighten.
Faulty diverter
If water does not come out of the spray head at all, the issue could be a faulty diverter inside the faucet. The diverter is what redirects water to the spray head when you move the faucet lever or handle. You may need to replace the diverter valve cartridge inside the faucet to restore the spray function. Consult your faucet model number to order the correct replacement part.
Clogged or damaged spray head
If the previous steps do not fix the problem, it’s likely time for a new spray head. Over time, spray heads can become worn or clogged beyond repair. Replacement spray heads are easy to install and inexpensive. Simply unscrew your existing spray head from the spray hose or faucet spout using pliers or an adjustable wrench and screw on the new spray head. Be sure to wipe down the connection points to remove any dirt before installing the new part.
With regular maintenance and occasional troubleshooting or repairs, a Kohler kitchen faucet can provide many years of reliable service. If problems persist, it may be best to contact Kohler’s customer support to prevent any damage. They can also help determine if more extensive repairs or faucet replacement are needed.
Conclusion
That’s right, you can easily replace the spray head on your kitchen faucet if it breaks. You may quickly restore your faucet in less than half an hour by gathering a few simple tools and a new spray head that fits your faucet type. Enjoy a wonderful treat for yourself with the money you saved on a plumber’s visit. Not only will you feel proud of yourself for fixing the leak yourself, but every time you turn on that faucet, and receive a powerful, consistent stream of water just where you need it, too. WINNER: DIY project!
More kitchen Faucets recommendations
- Top 10 The Best Luxury Kitchen Faucets for Every Budget
- What Is the Highest GPM Kitchen Faucet? Meet the Moen Arbor
- Best Gold Kitchen Faucets of 2023: Top 5 Picks for a Luxurious Look
- The Best High-End Kitchen Faucets for Every Budget
- Allen and Roth Kitchen Faucet With LED Light:
- How to install a Moen Kitchen Faucet With Sprayer
- How to Install a Kohler Kitchen Faucet: A DIY Tutorial